


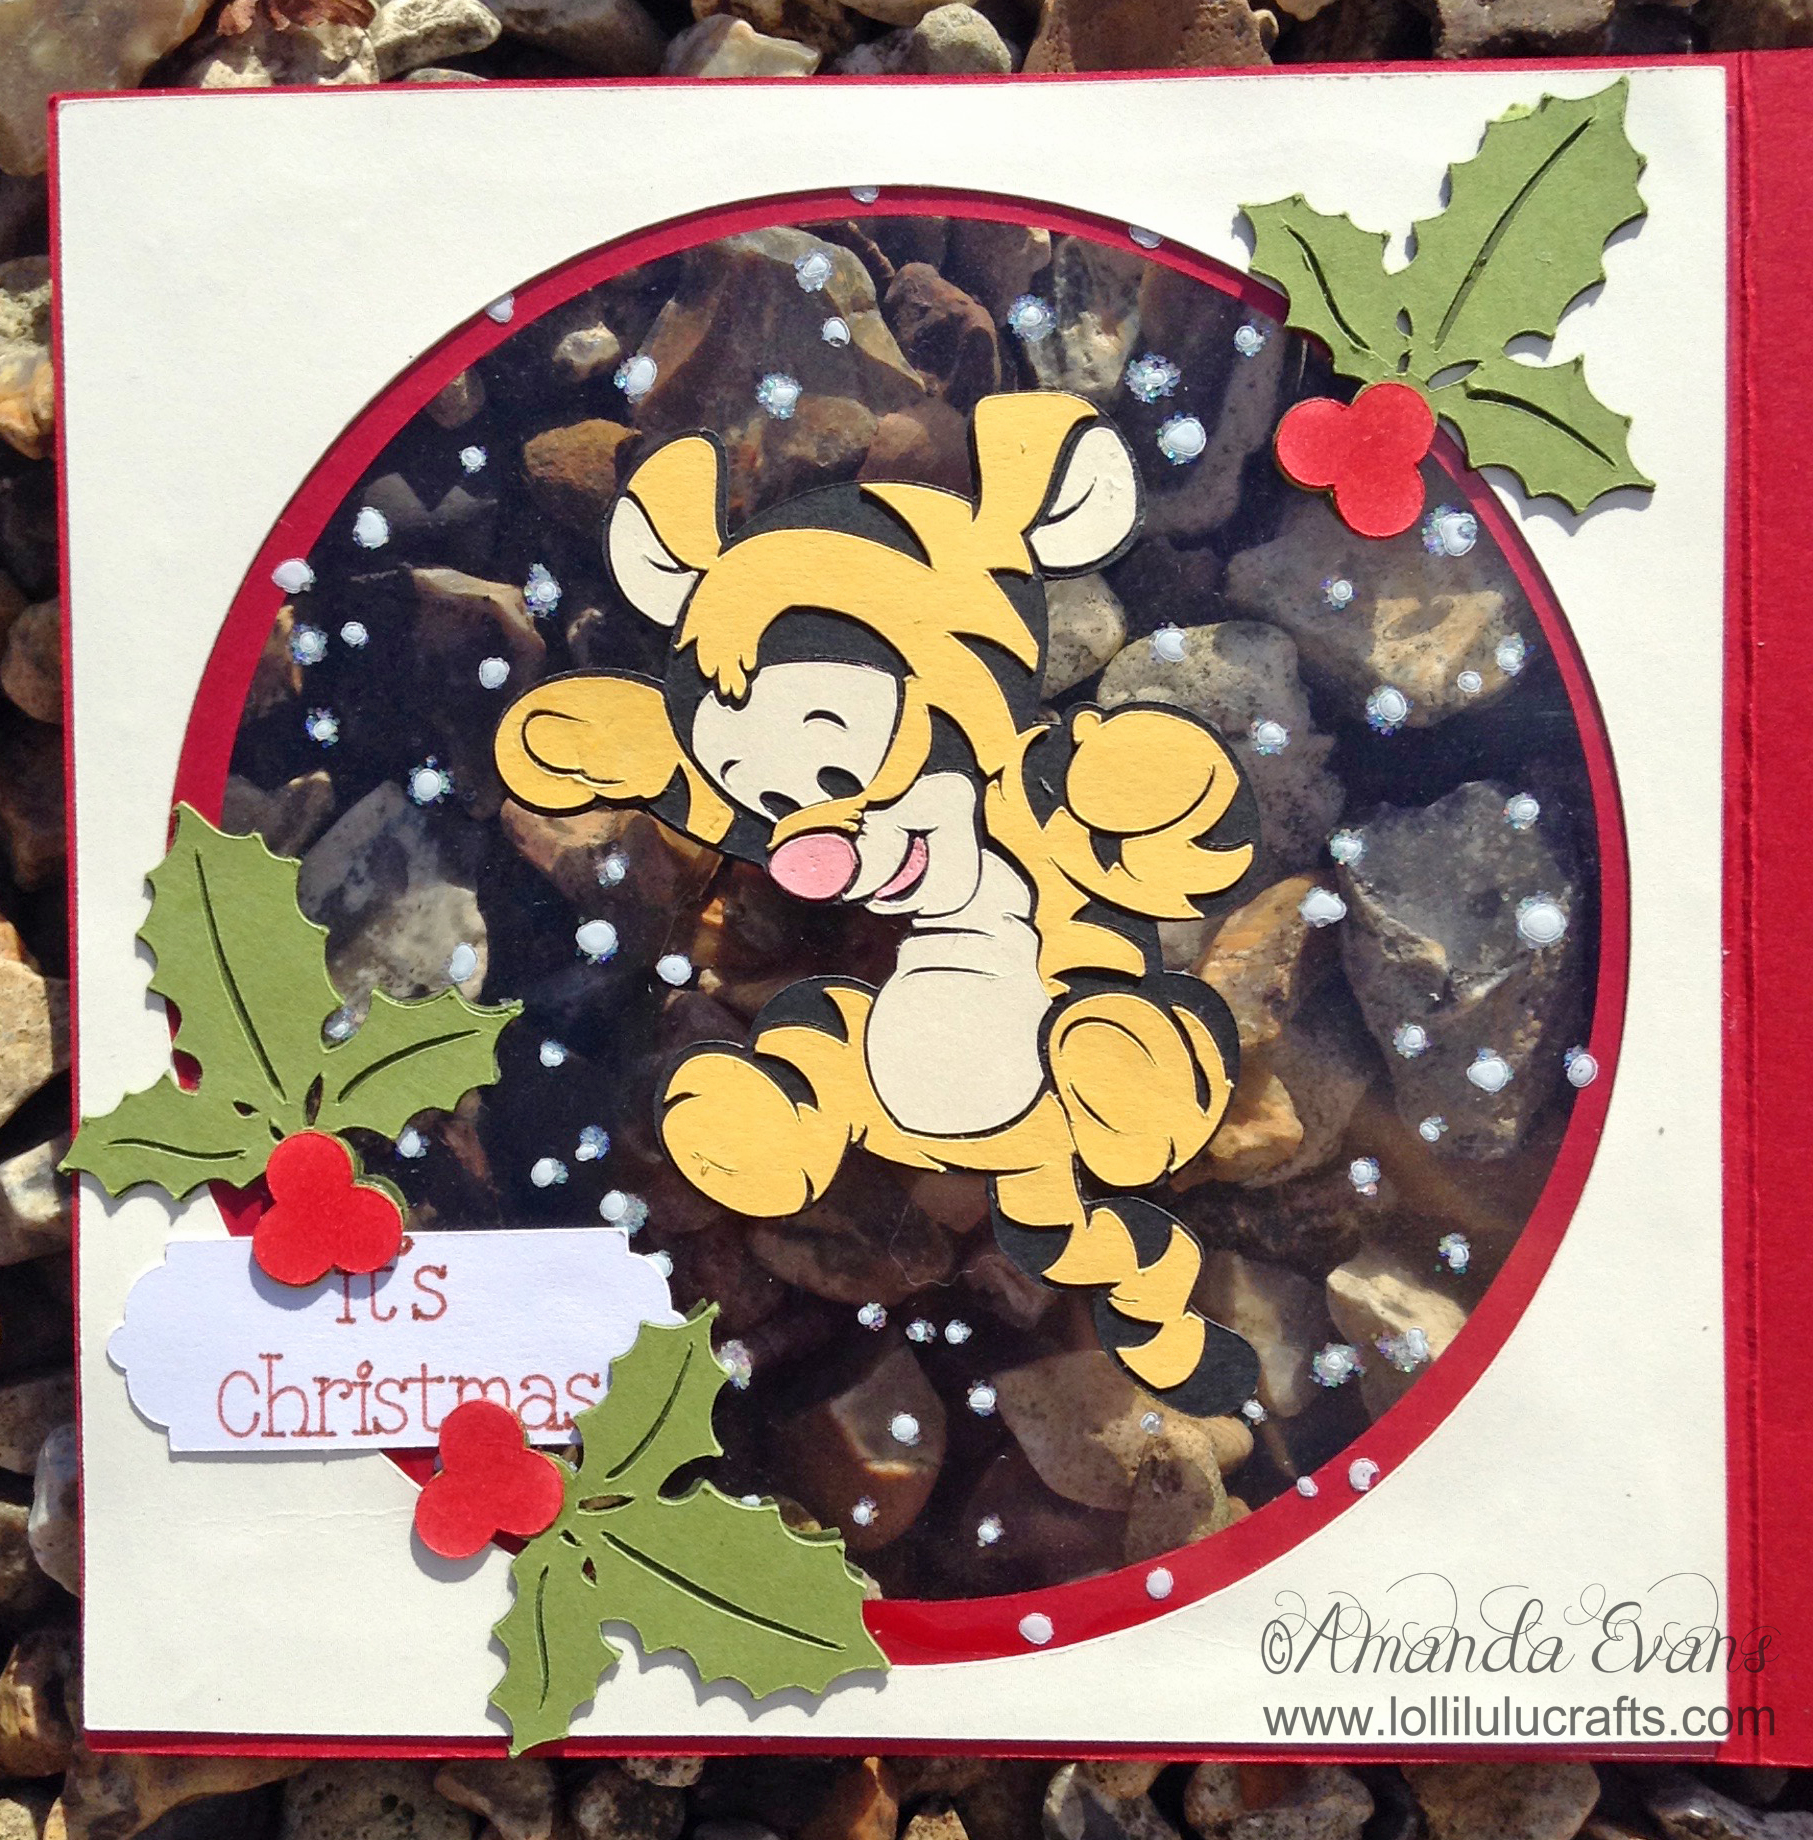
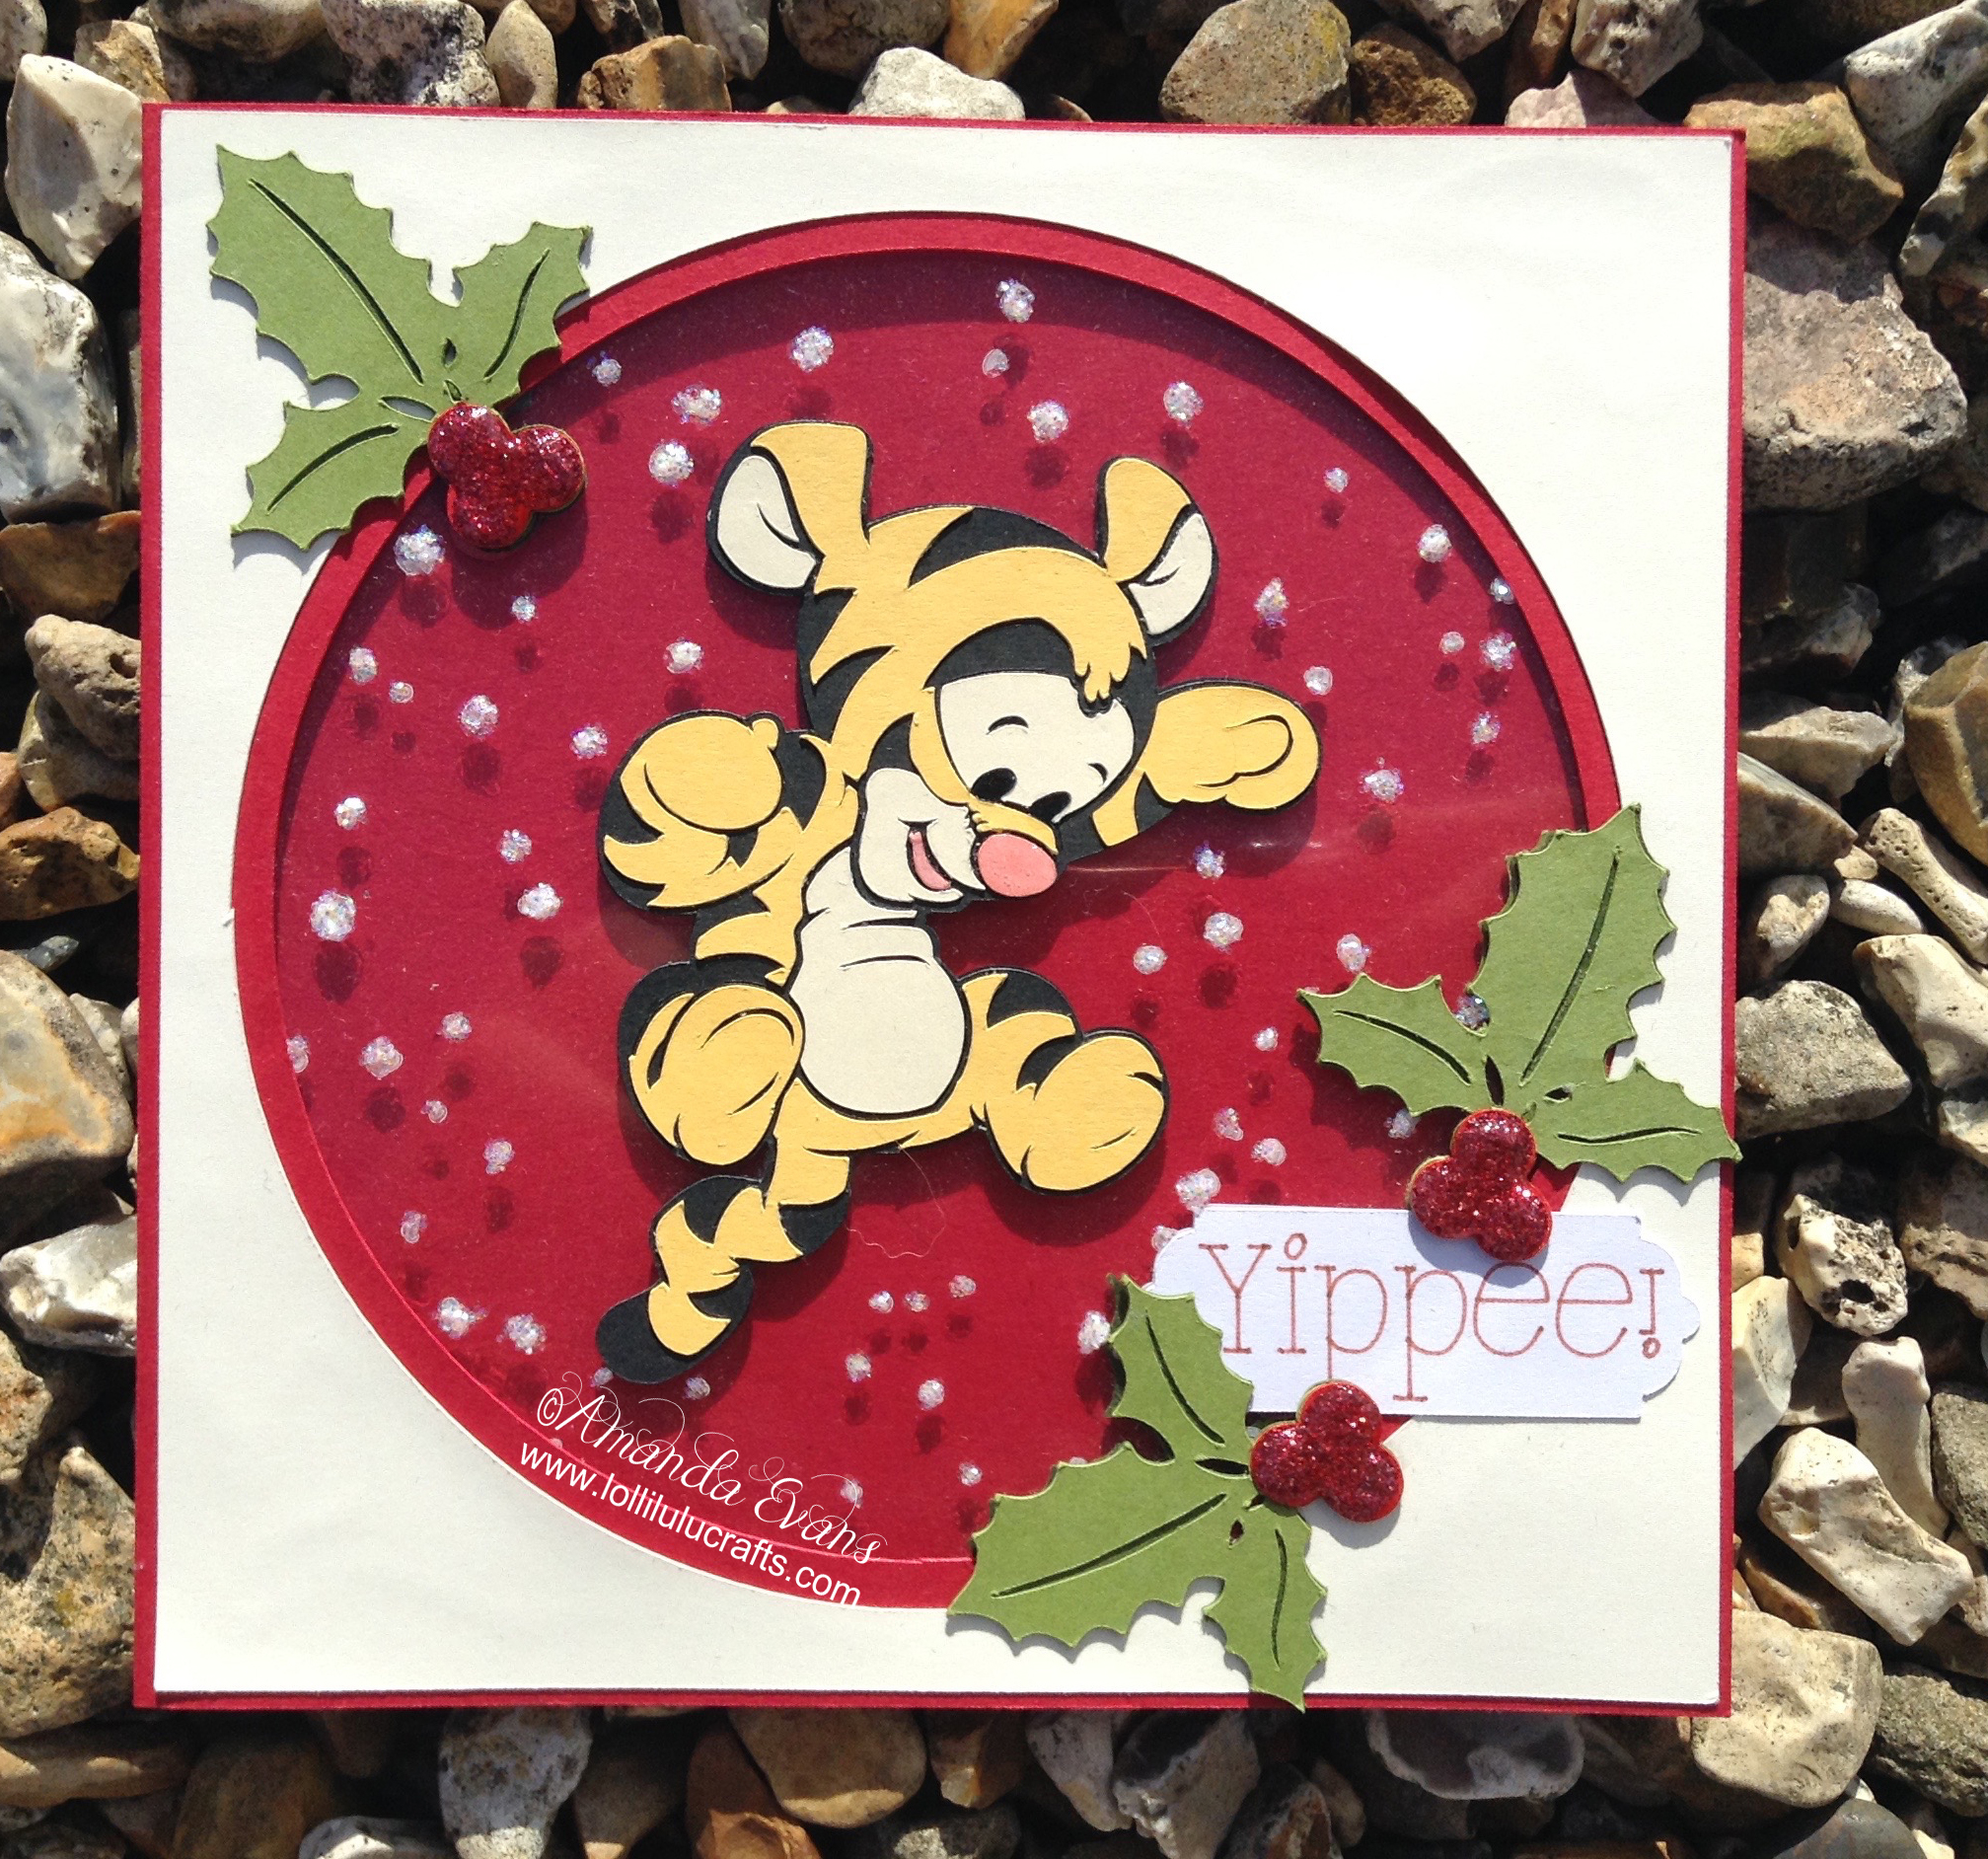
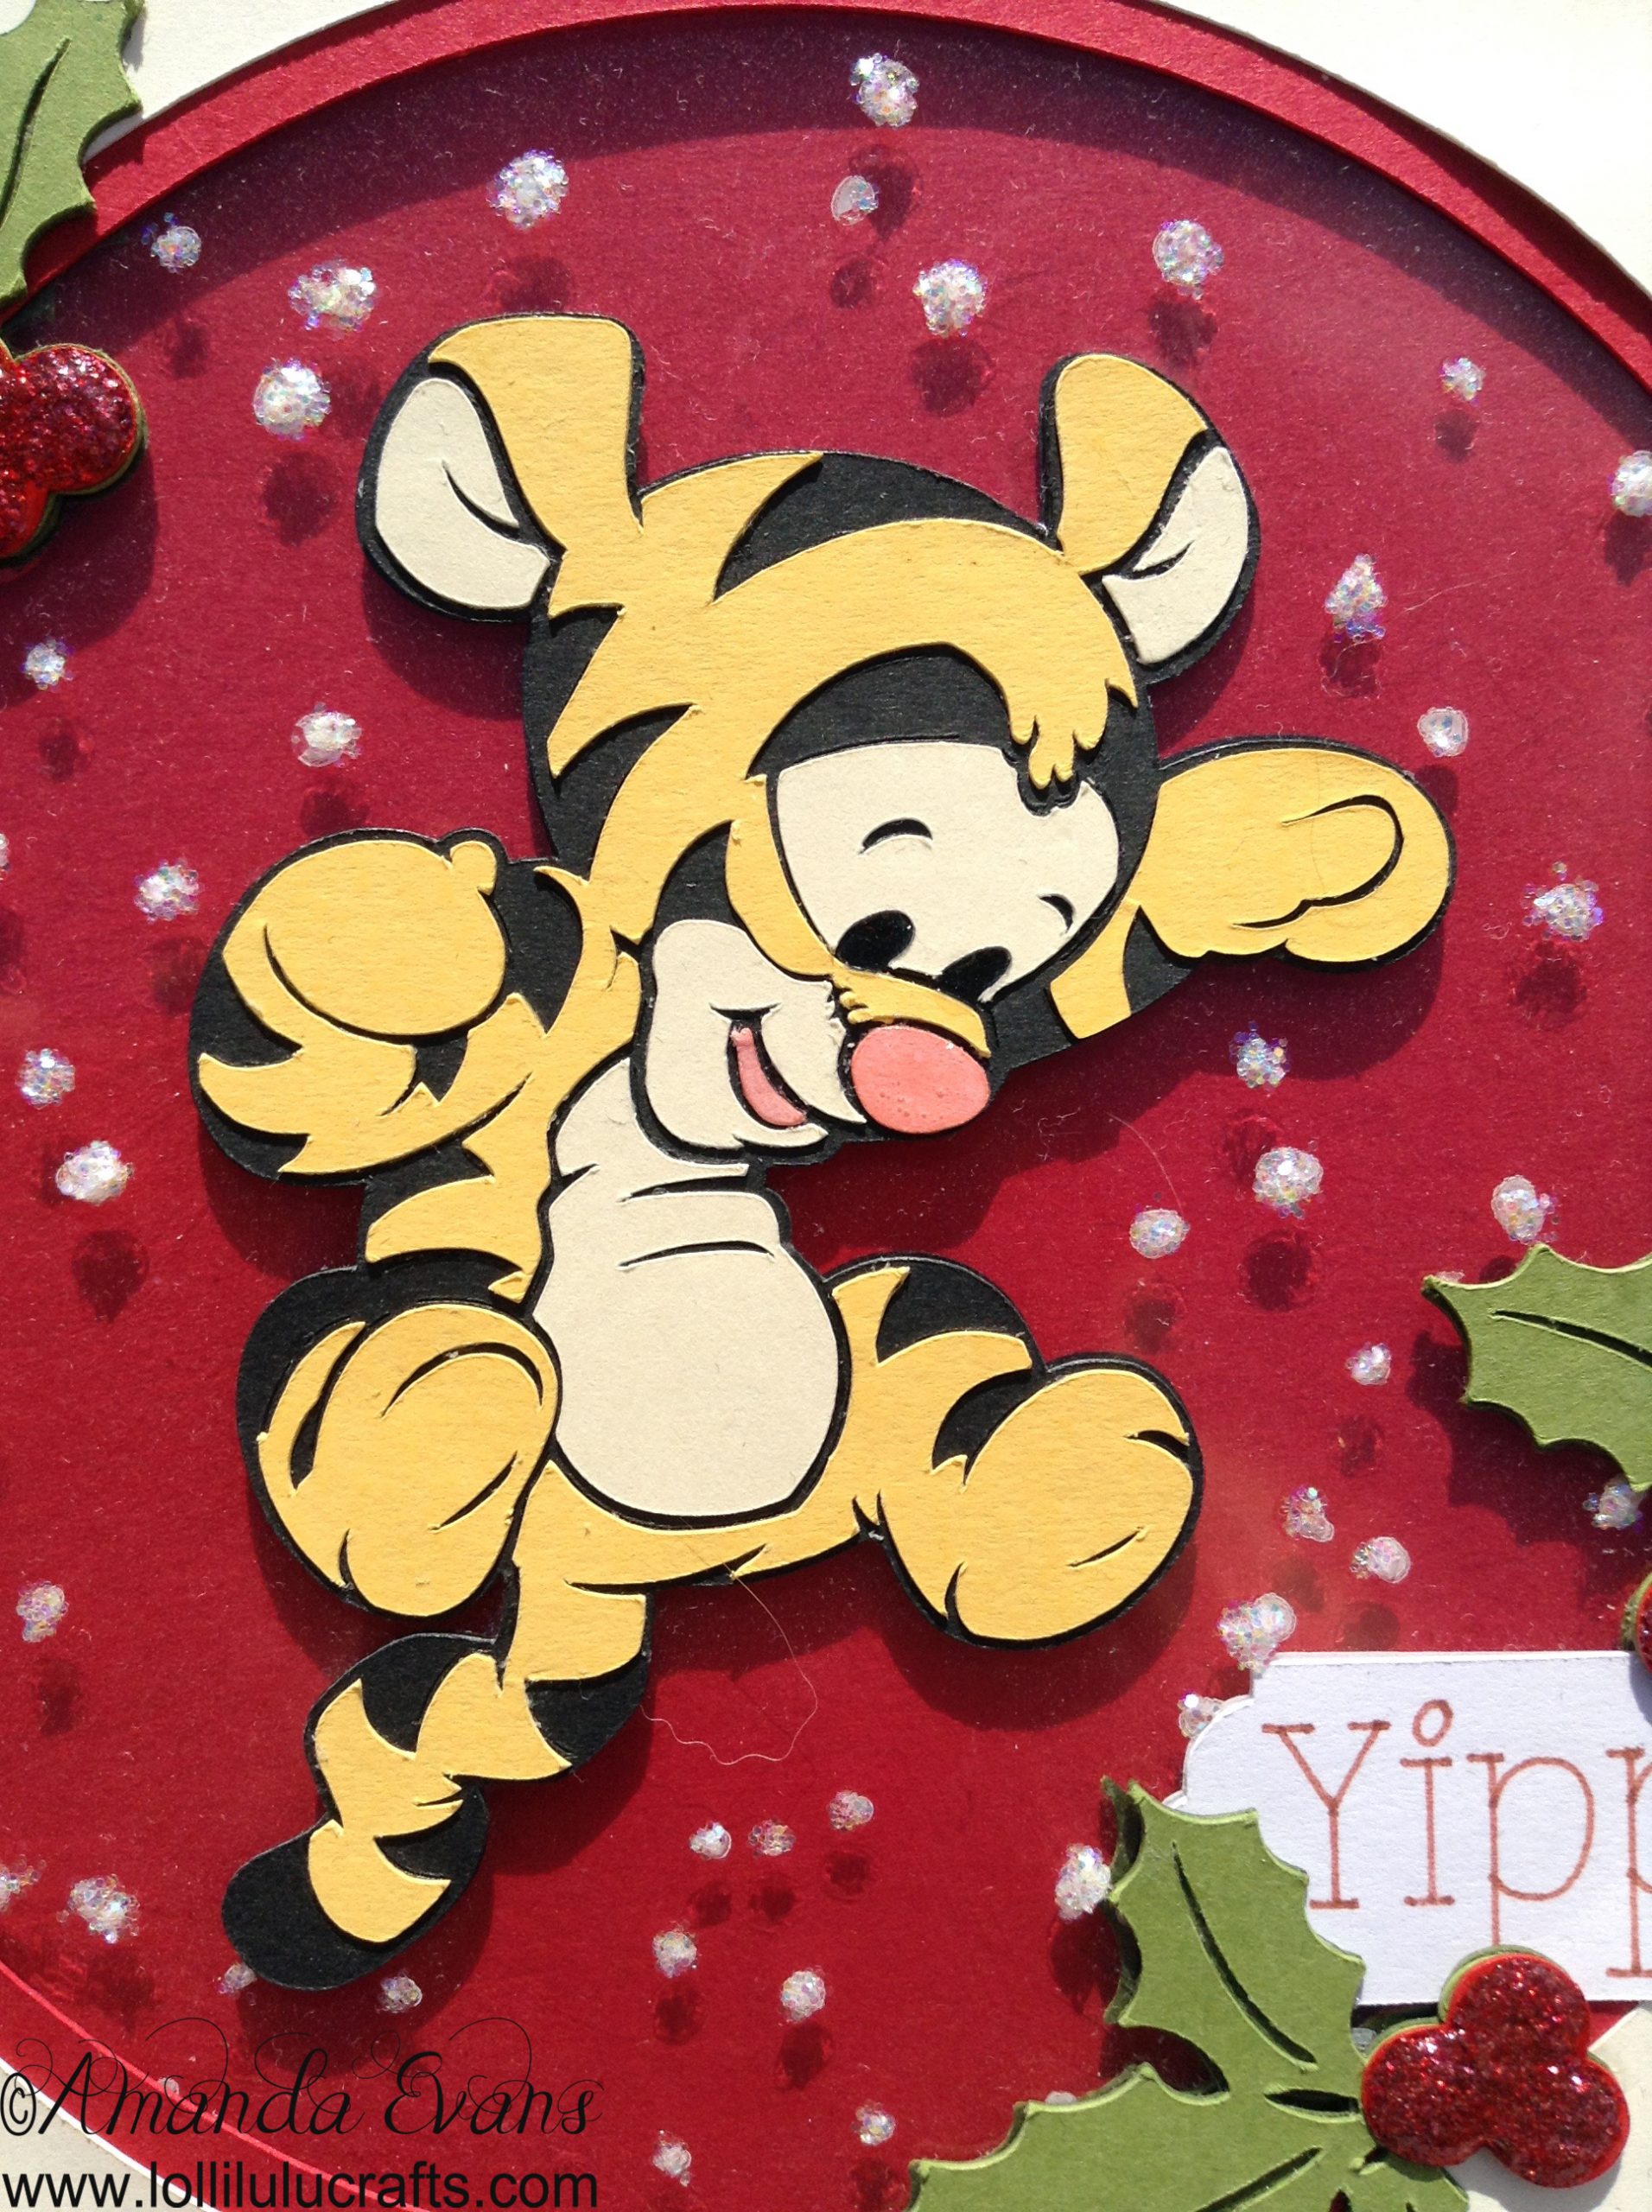
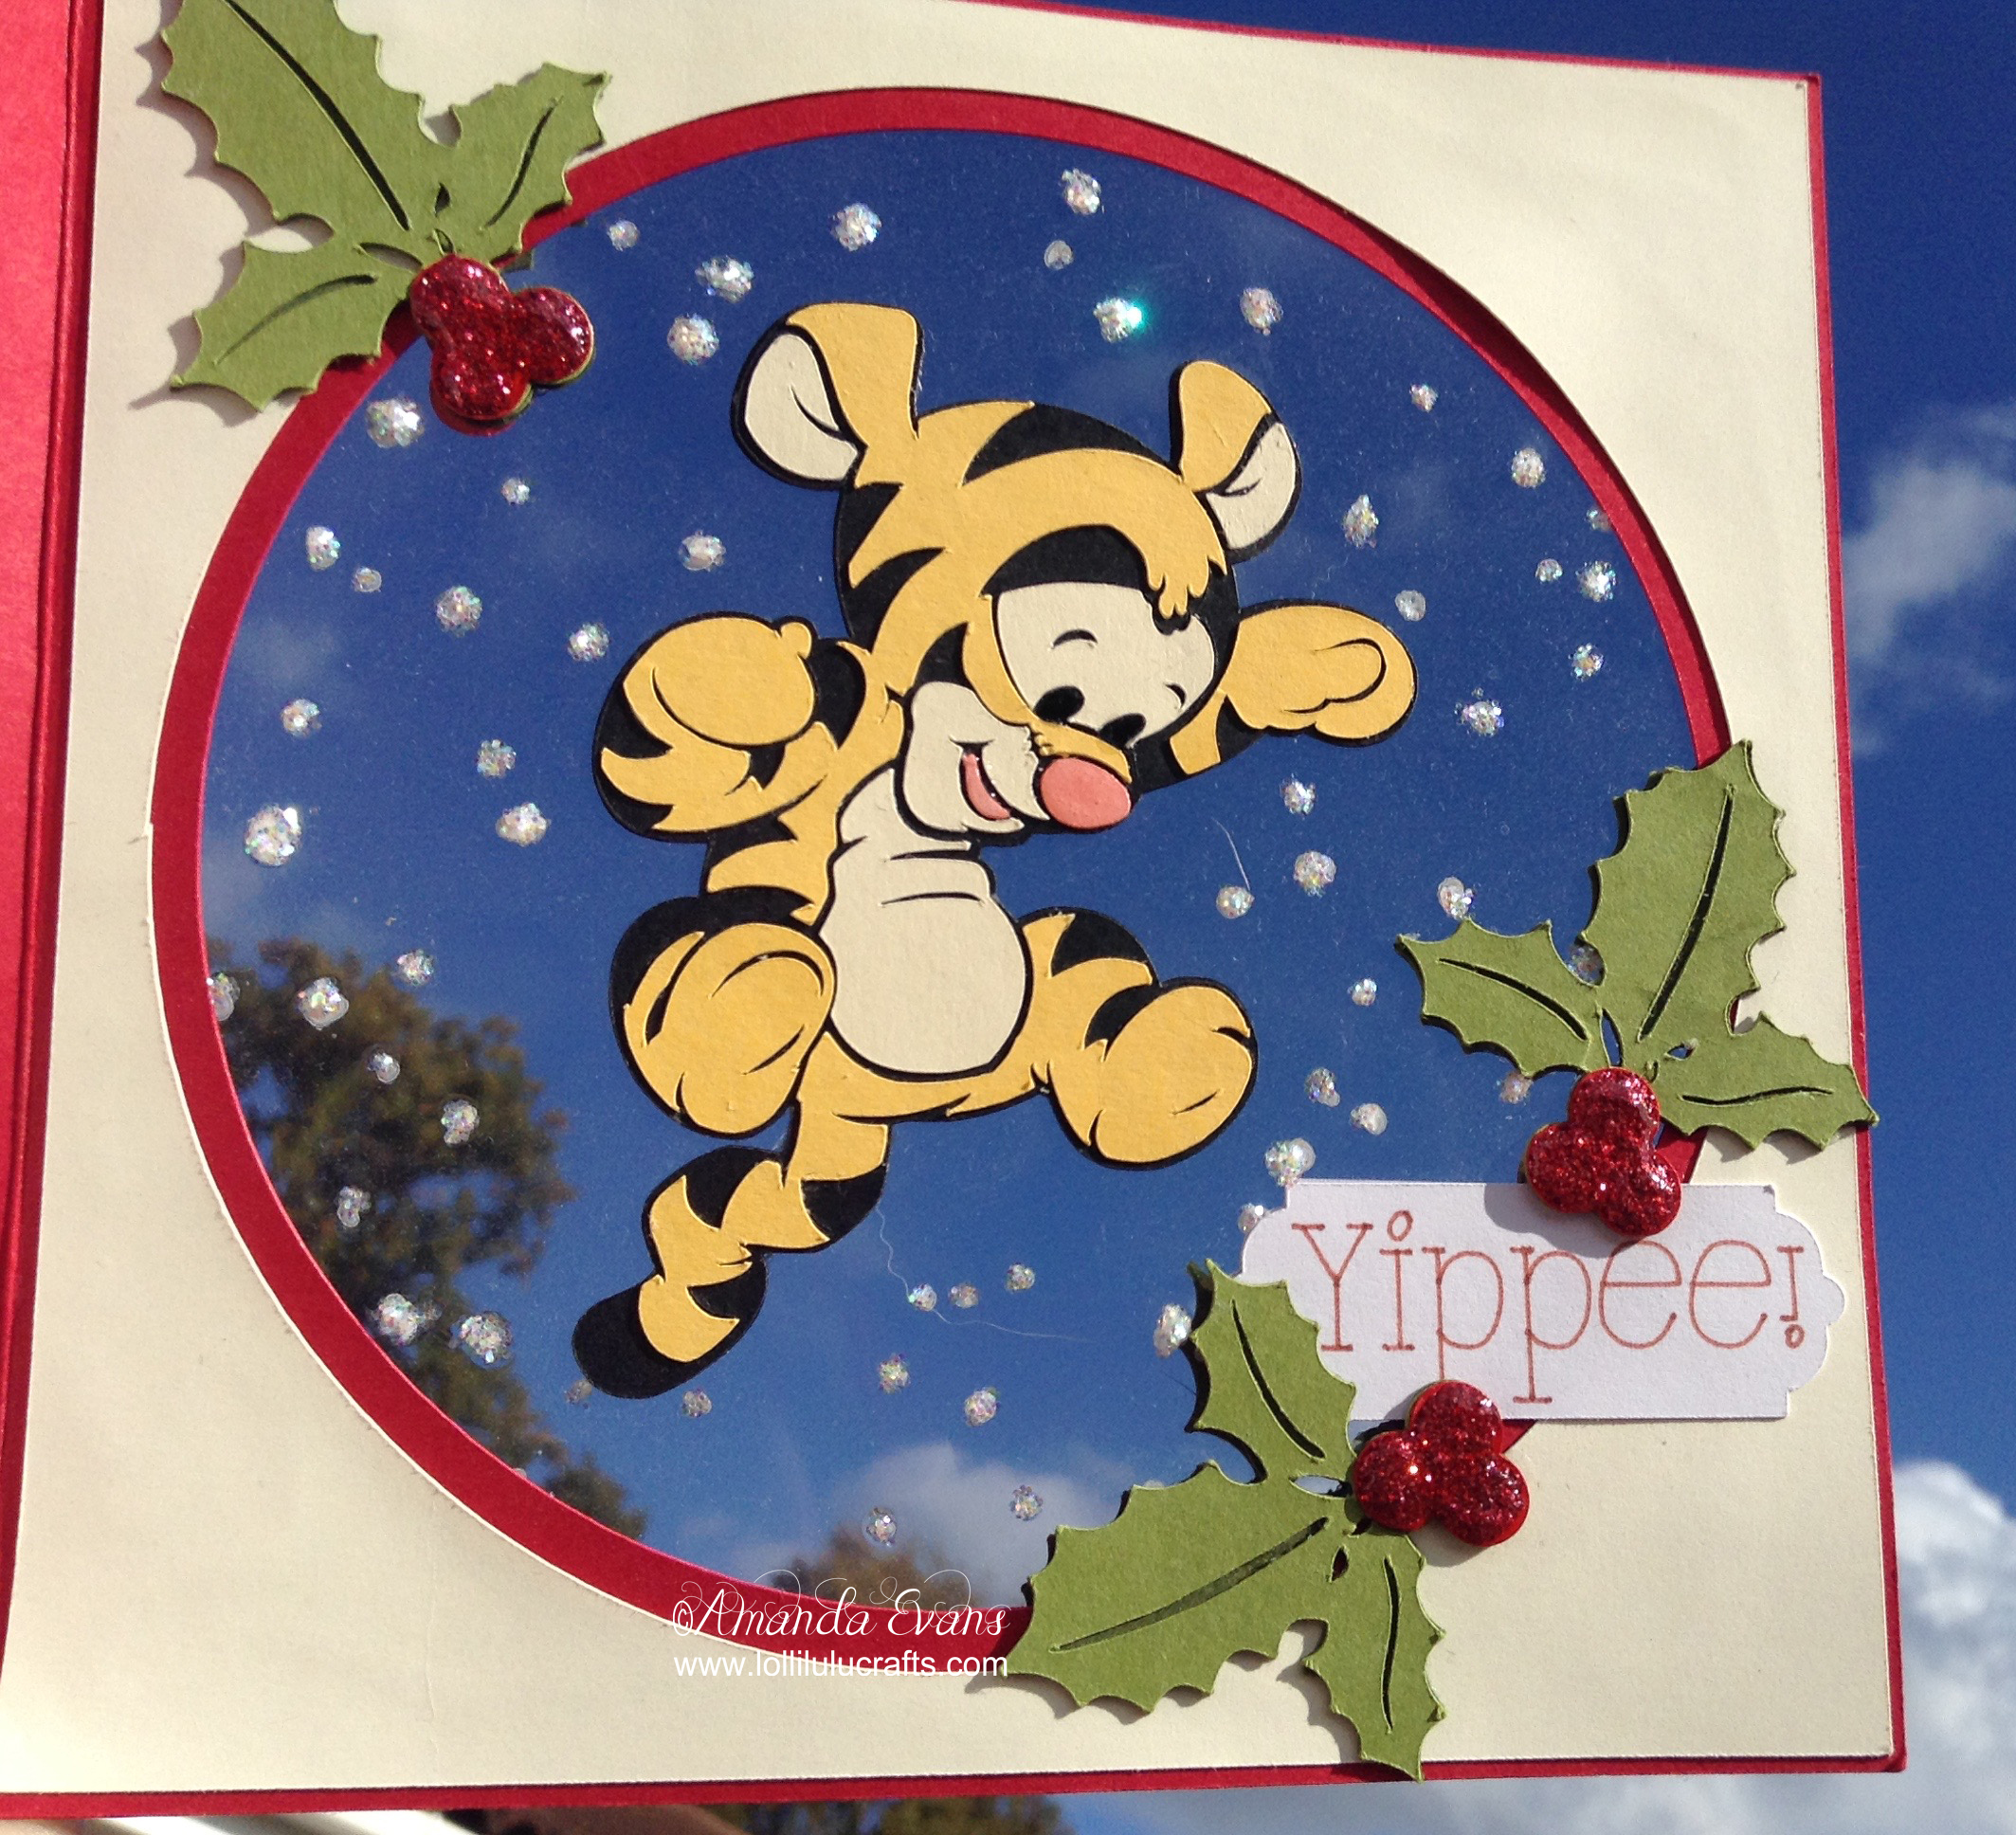
Hiya, today I have another Cricut Explore Card for you, this time an adorable Christmas Disney card made using the adorable Baby Tigger ahhh so cute! 🙂
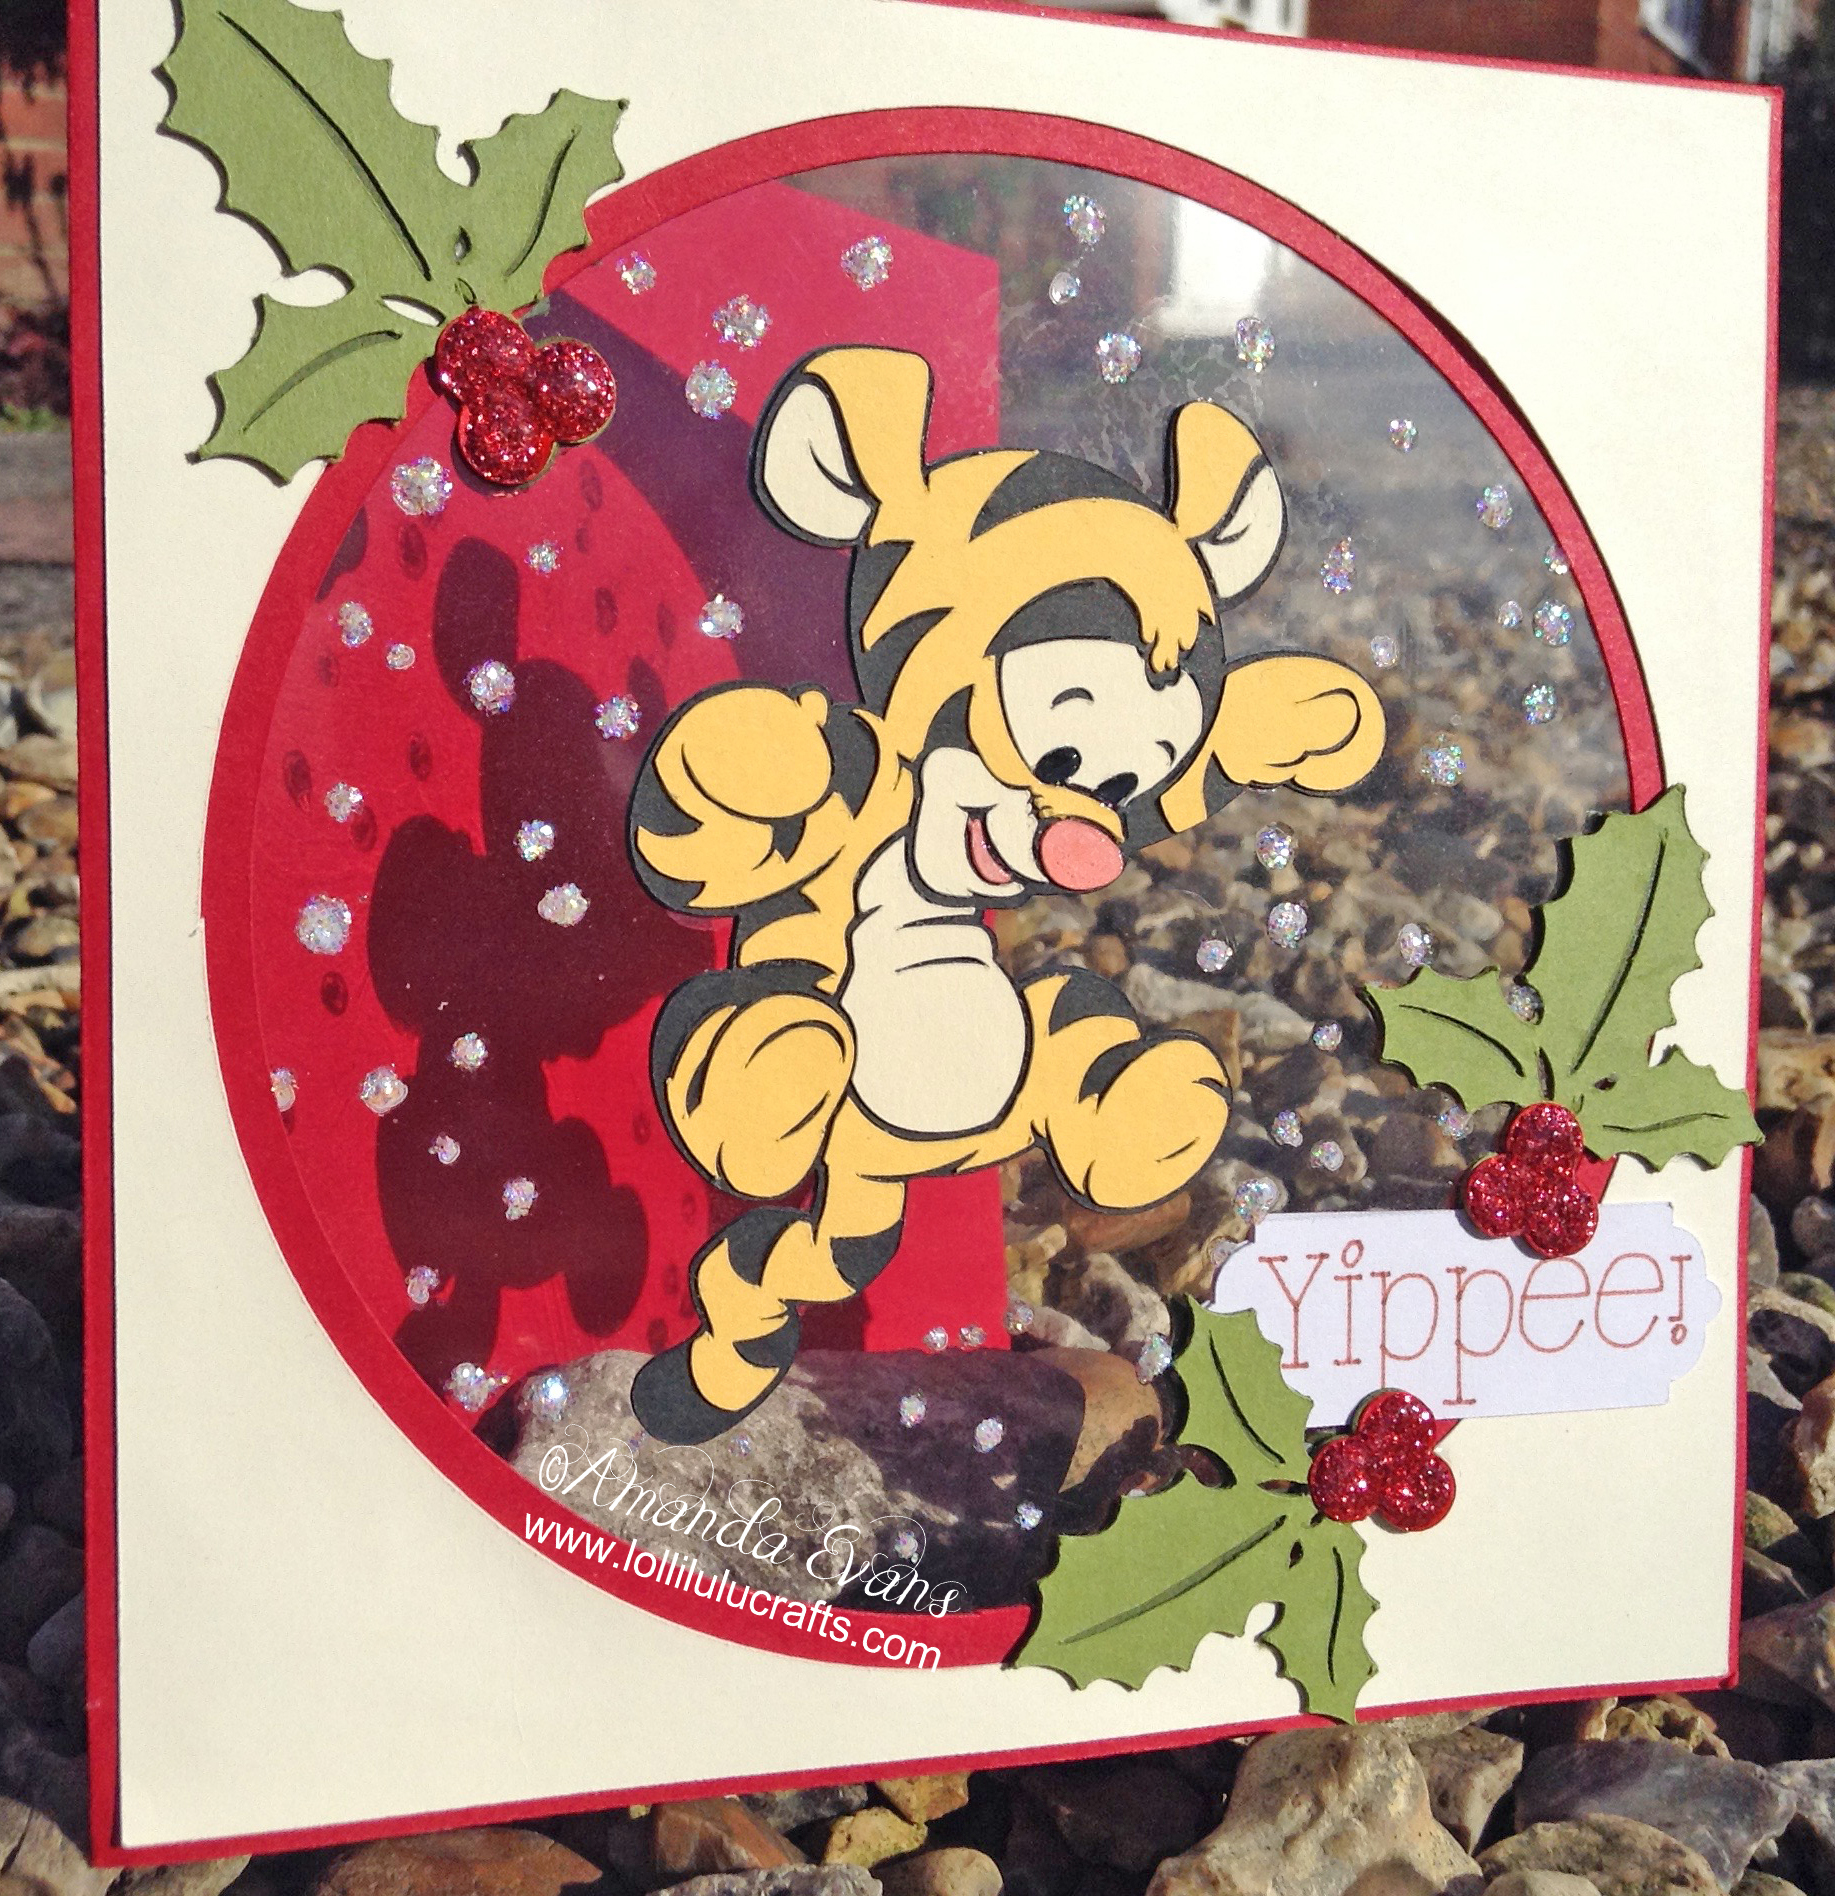
So this card was not originally meant to be a Christmas card, which I think shows that it could be changed very easily to be to say a birthday card. I started out with this idea, that came from seeing the bouncing Baby Tigger cut on Design Space. This idea of the Baby Tigger bouncing up into the sky led to the vision of an aperture card with acetate. From there the whole design developed and I started working on it in Design Space.
I have to say I love working in Design Space it allows me to design in the way that I have always tried to design. If you look back to my old videos using my Gypsy you will see how I set up a template of the shape of the card on one layer and then I would begin to build all the elements of the card onto that template to try and work out position and size. The disadvantage of this was that all these elements were see through so it did end up looking rather mess! Now we’ve got Design Space it does this automatically and it looks just like a card, has no see through elements so that you are building up your actual card on your Cricut Mat. It is only when you can click ‘cut’ that it separates all the elements, fantastic! 🙂
So back to Baby Tigger, as I was making the design in design space I discovered another tool that I have not used before – slice. So when I put my rectangle cardbase down, I added over it circle to look like my Aperture. However at that point it was really just layering and I needed to tell Design Space to cut that circle out of the rectangle. When you have only two elements the slice tool becomes active. If you click on it it will take the upper layer away from the layer below. Fantastic – one aperture created! So I really liked this tool and I can see proving really useful. Now in the video I had already made my design before I started filming so the first part of the video I just quickly talking through what I did in Design Space so this Slice tool I will go into in more detail in the future. I plan to do a series similar to that of my Silhouette Seminars but for the Cricut.
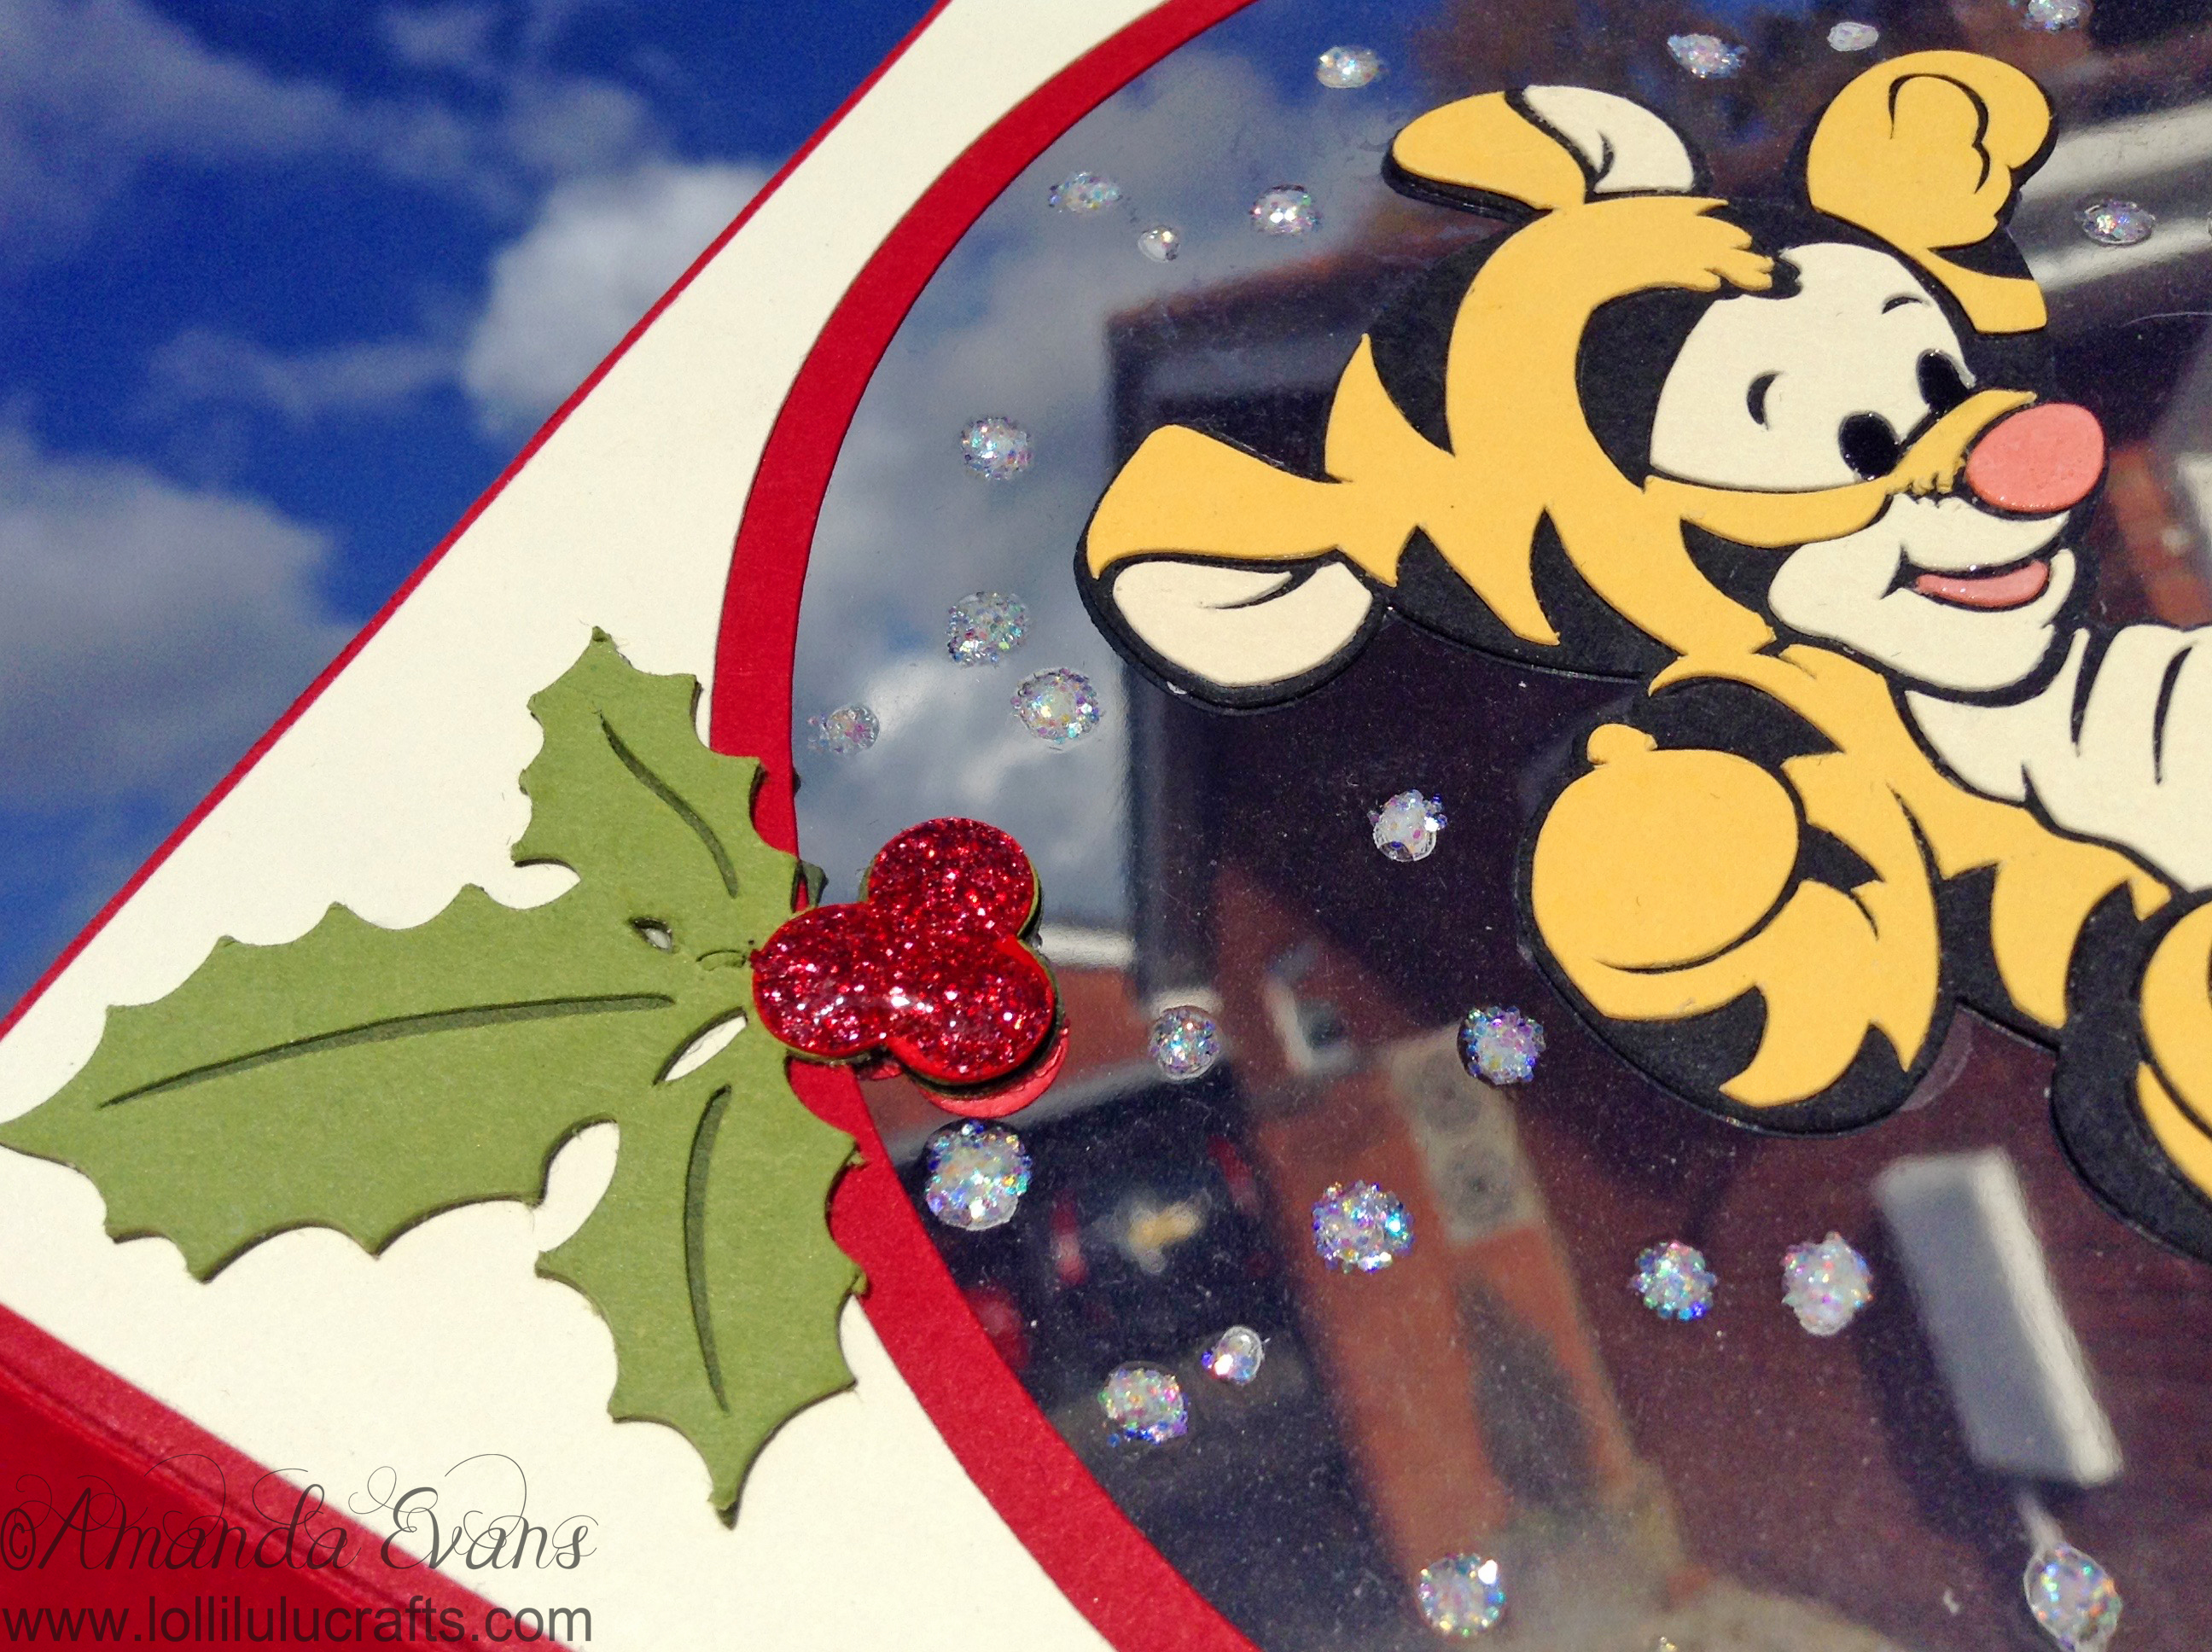
At this point I still hadn’t decided that this was going to be a Christmas card. I put my Tigger into the centre of my aperture and I wanted to add a little sentiment tag that said the ‘yippee’ because Tigger was jumping up in the air for joy but he had to have a reason. Plus I really wanted to add something around the tag on the front for extra decoration. It was at this point that it turned into a Christmas card because I decided to add Holly.
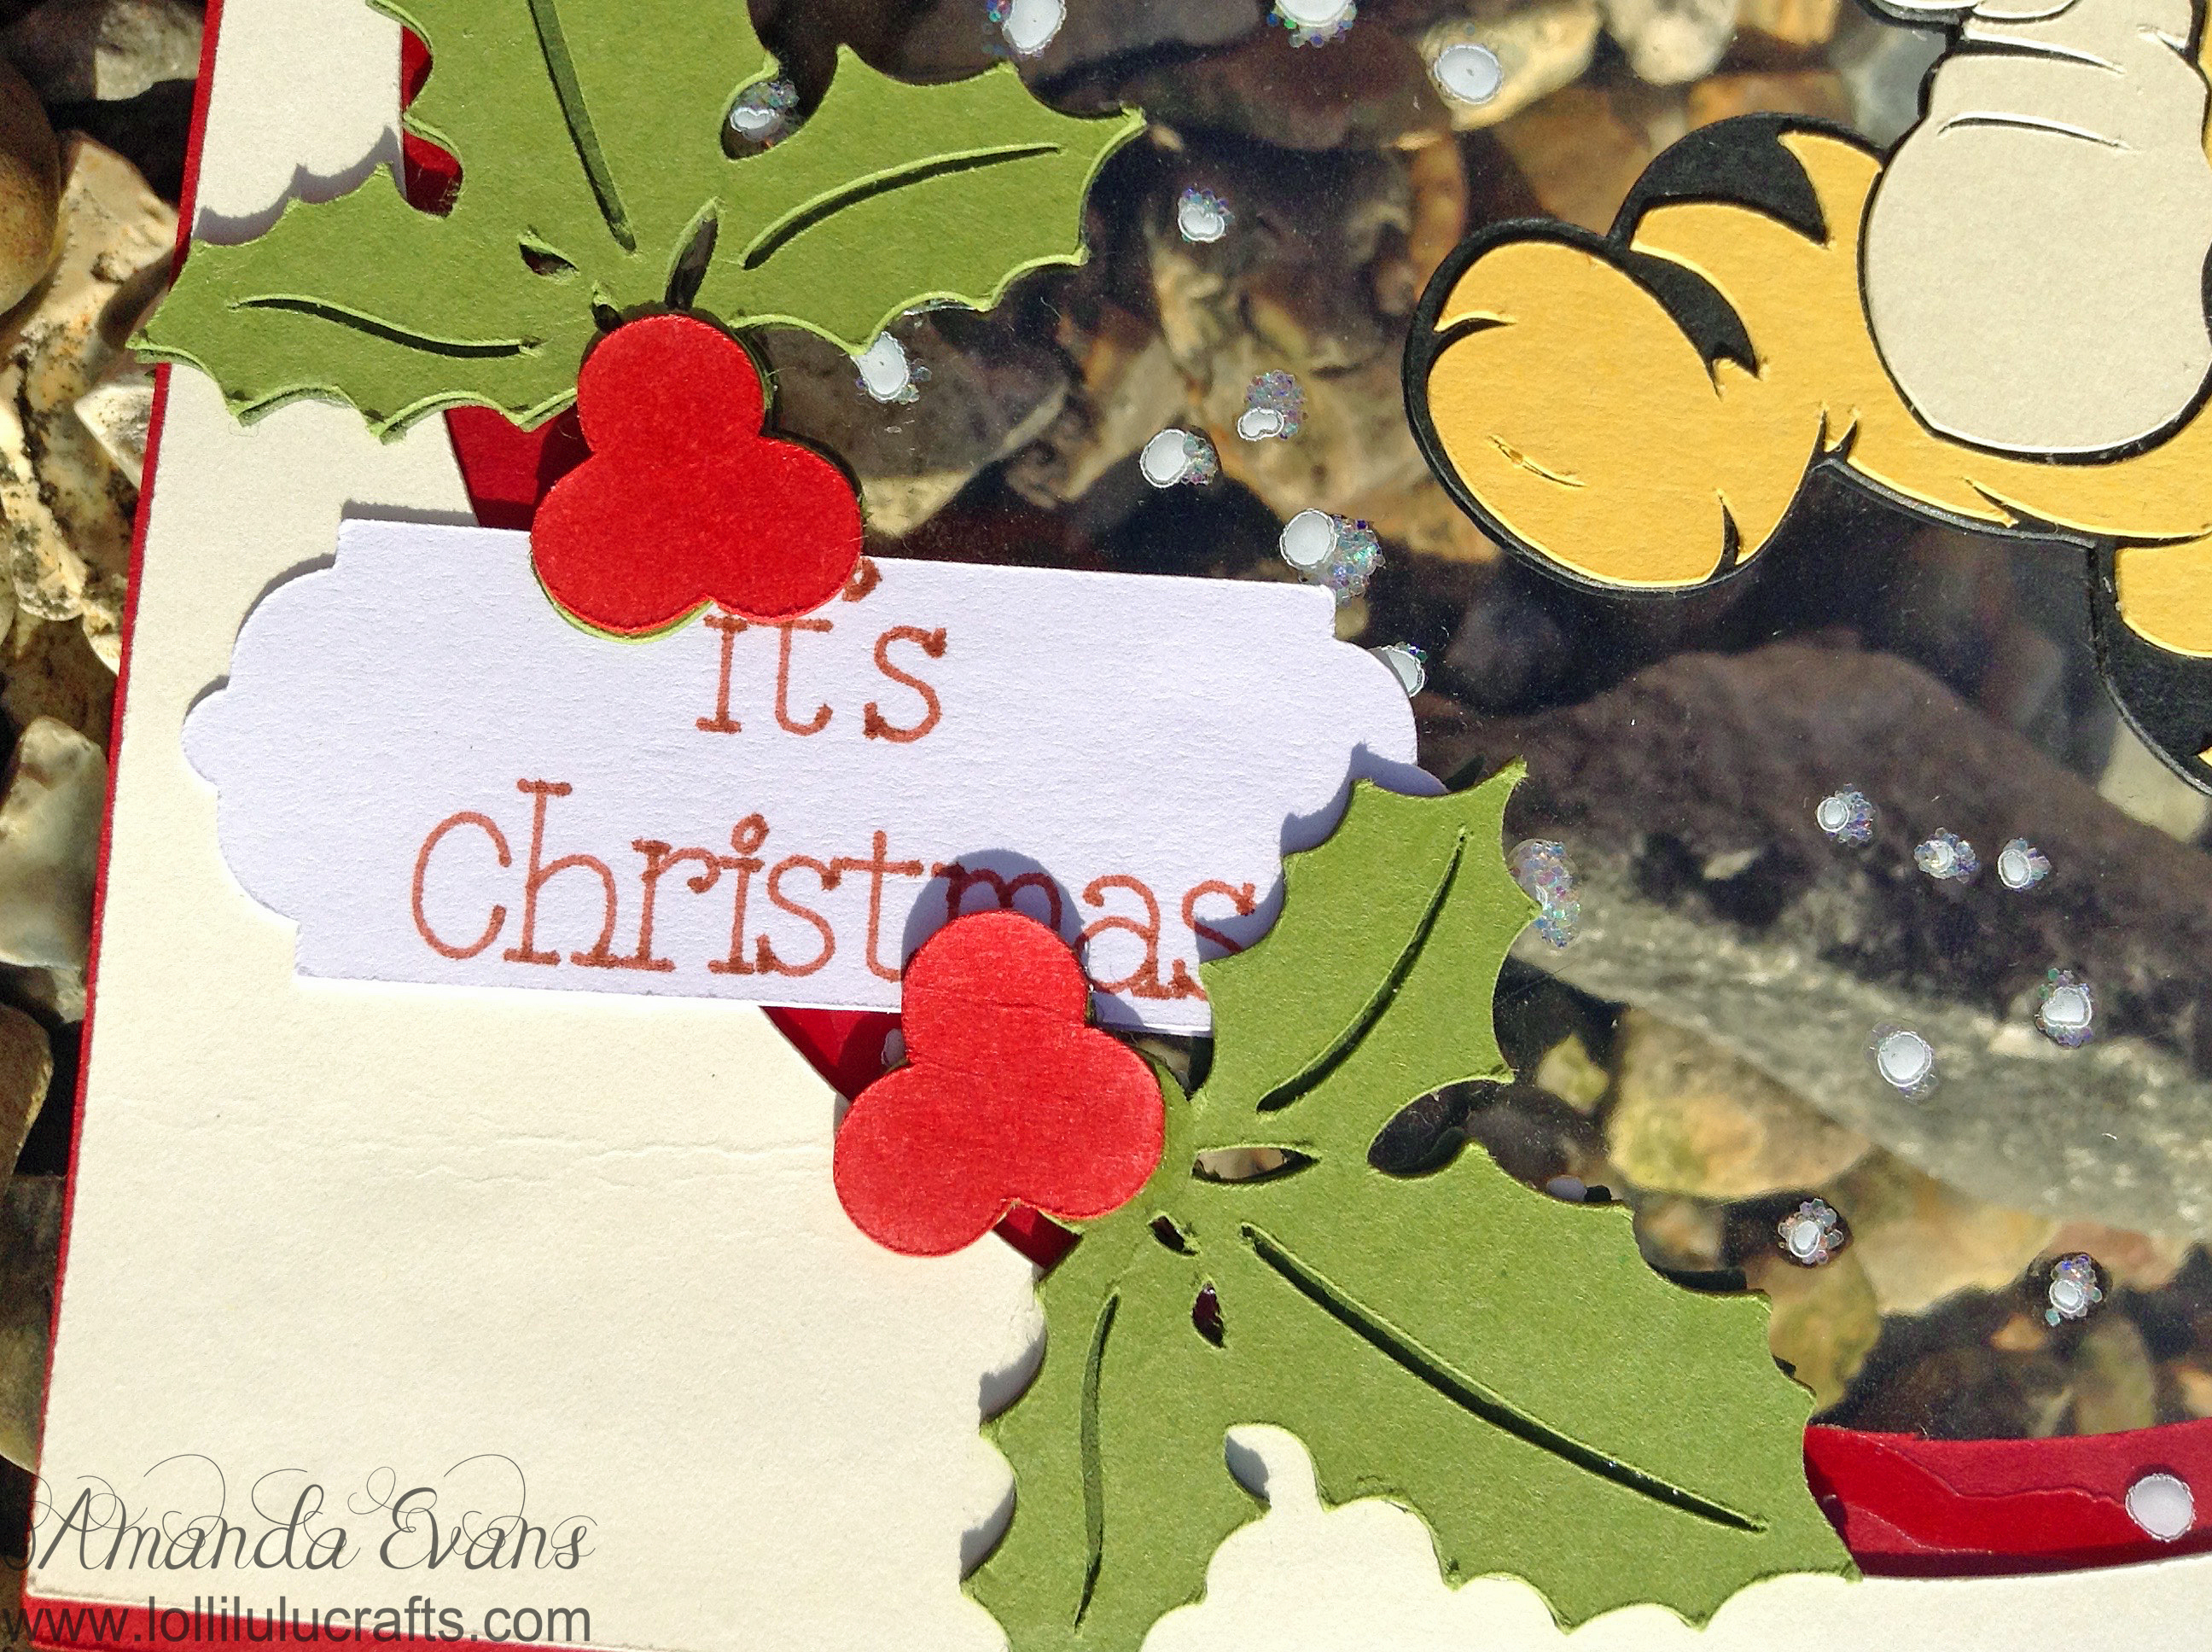
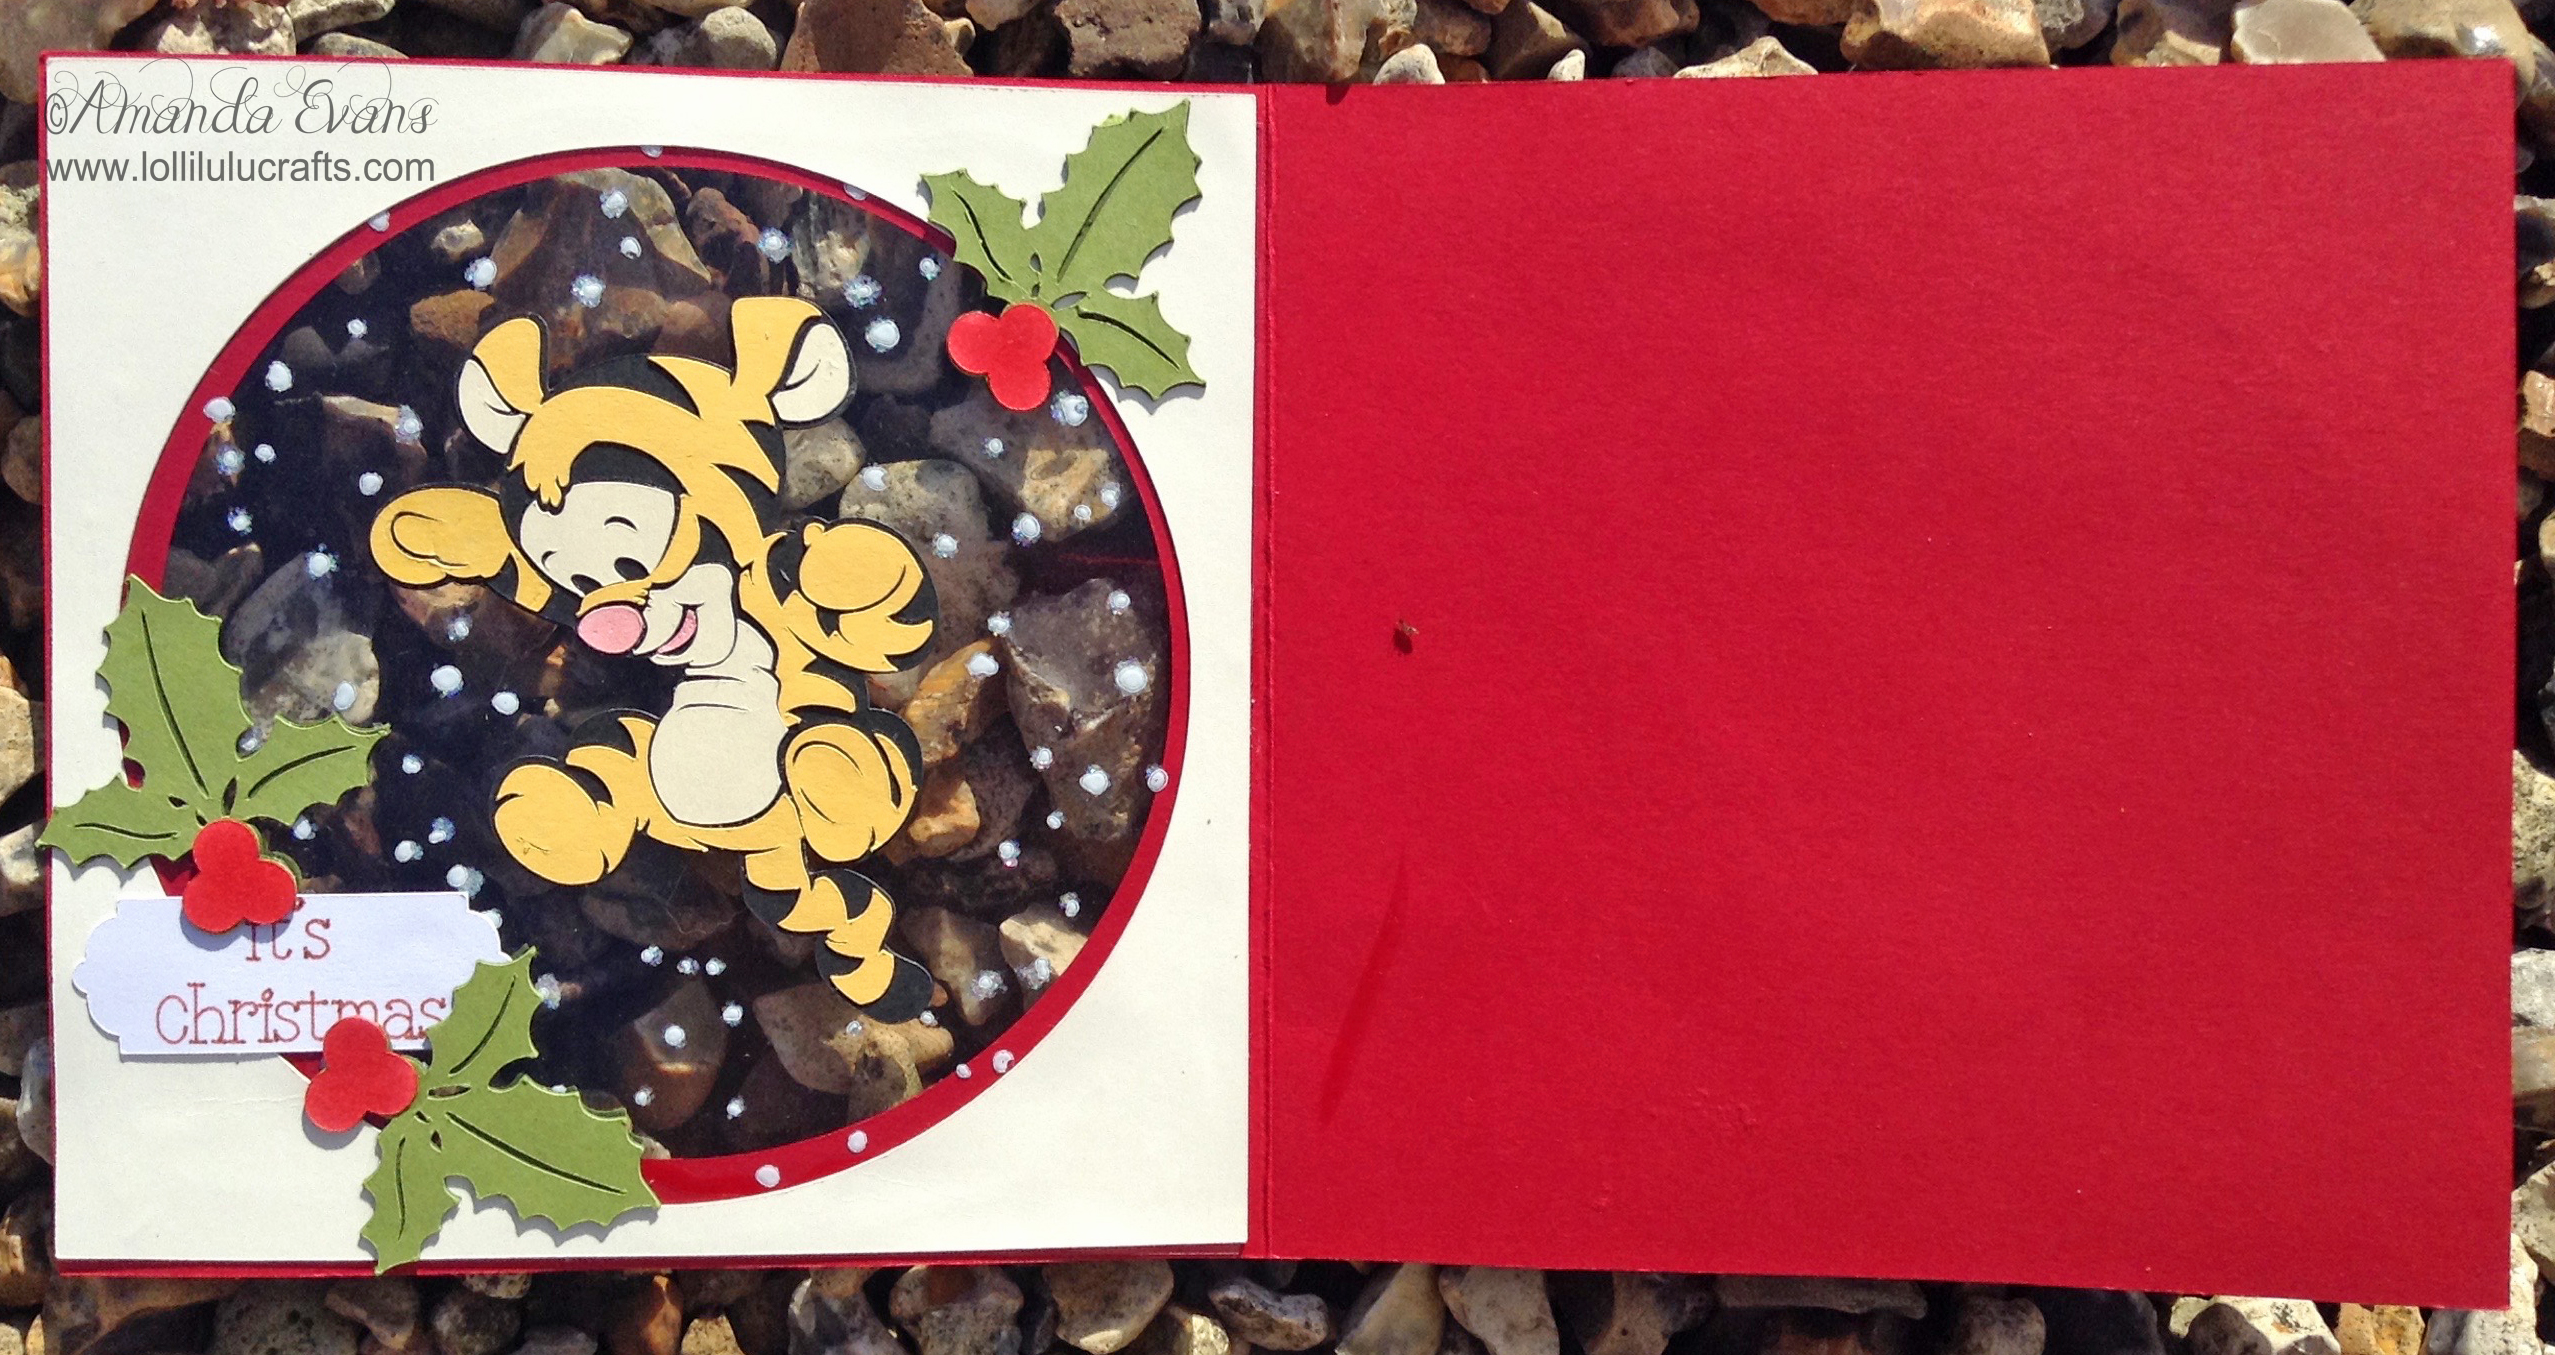
The other beauty of being on the Explore was that I could write my sentiment tag right there in my Design Space, I didn’t have to worry about finding stamps or printing out out and then cutting around it etc etc. It was at that point that I decided to mirror image all my elements and put them on the inside of the card. I just thought it would be fun surprise and then I was able to write a different sentiment on the inside.
I think I would have actually assembled all the elements differently if I made it again just because the sentiment on the inside was a little longer then the one on the outside which meant I really needed the position of the holly on the inside to be in a slightly different position to what it was, however because I did the front first I had to match the inside to the outside. If I had thought about the actual writing and where the holly would need to be in relation to that I could have decided whether it would be better to do the inside or outside first. However lesson learned for future cards.
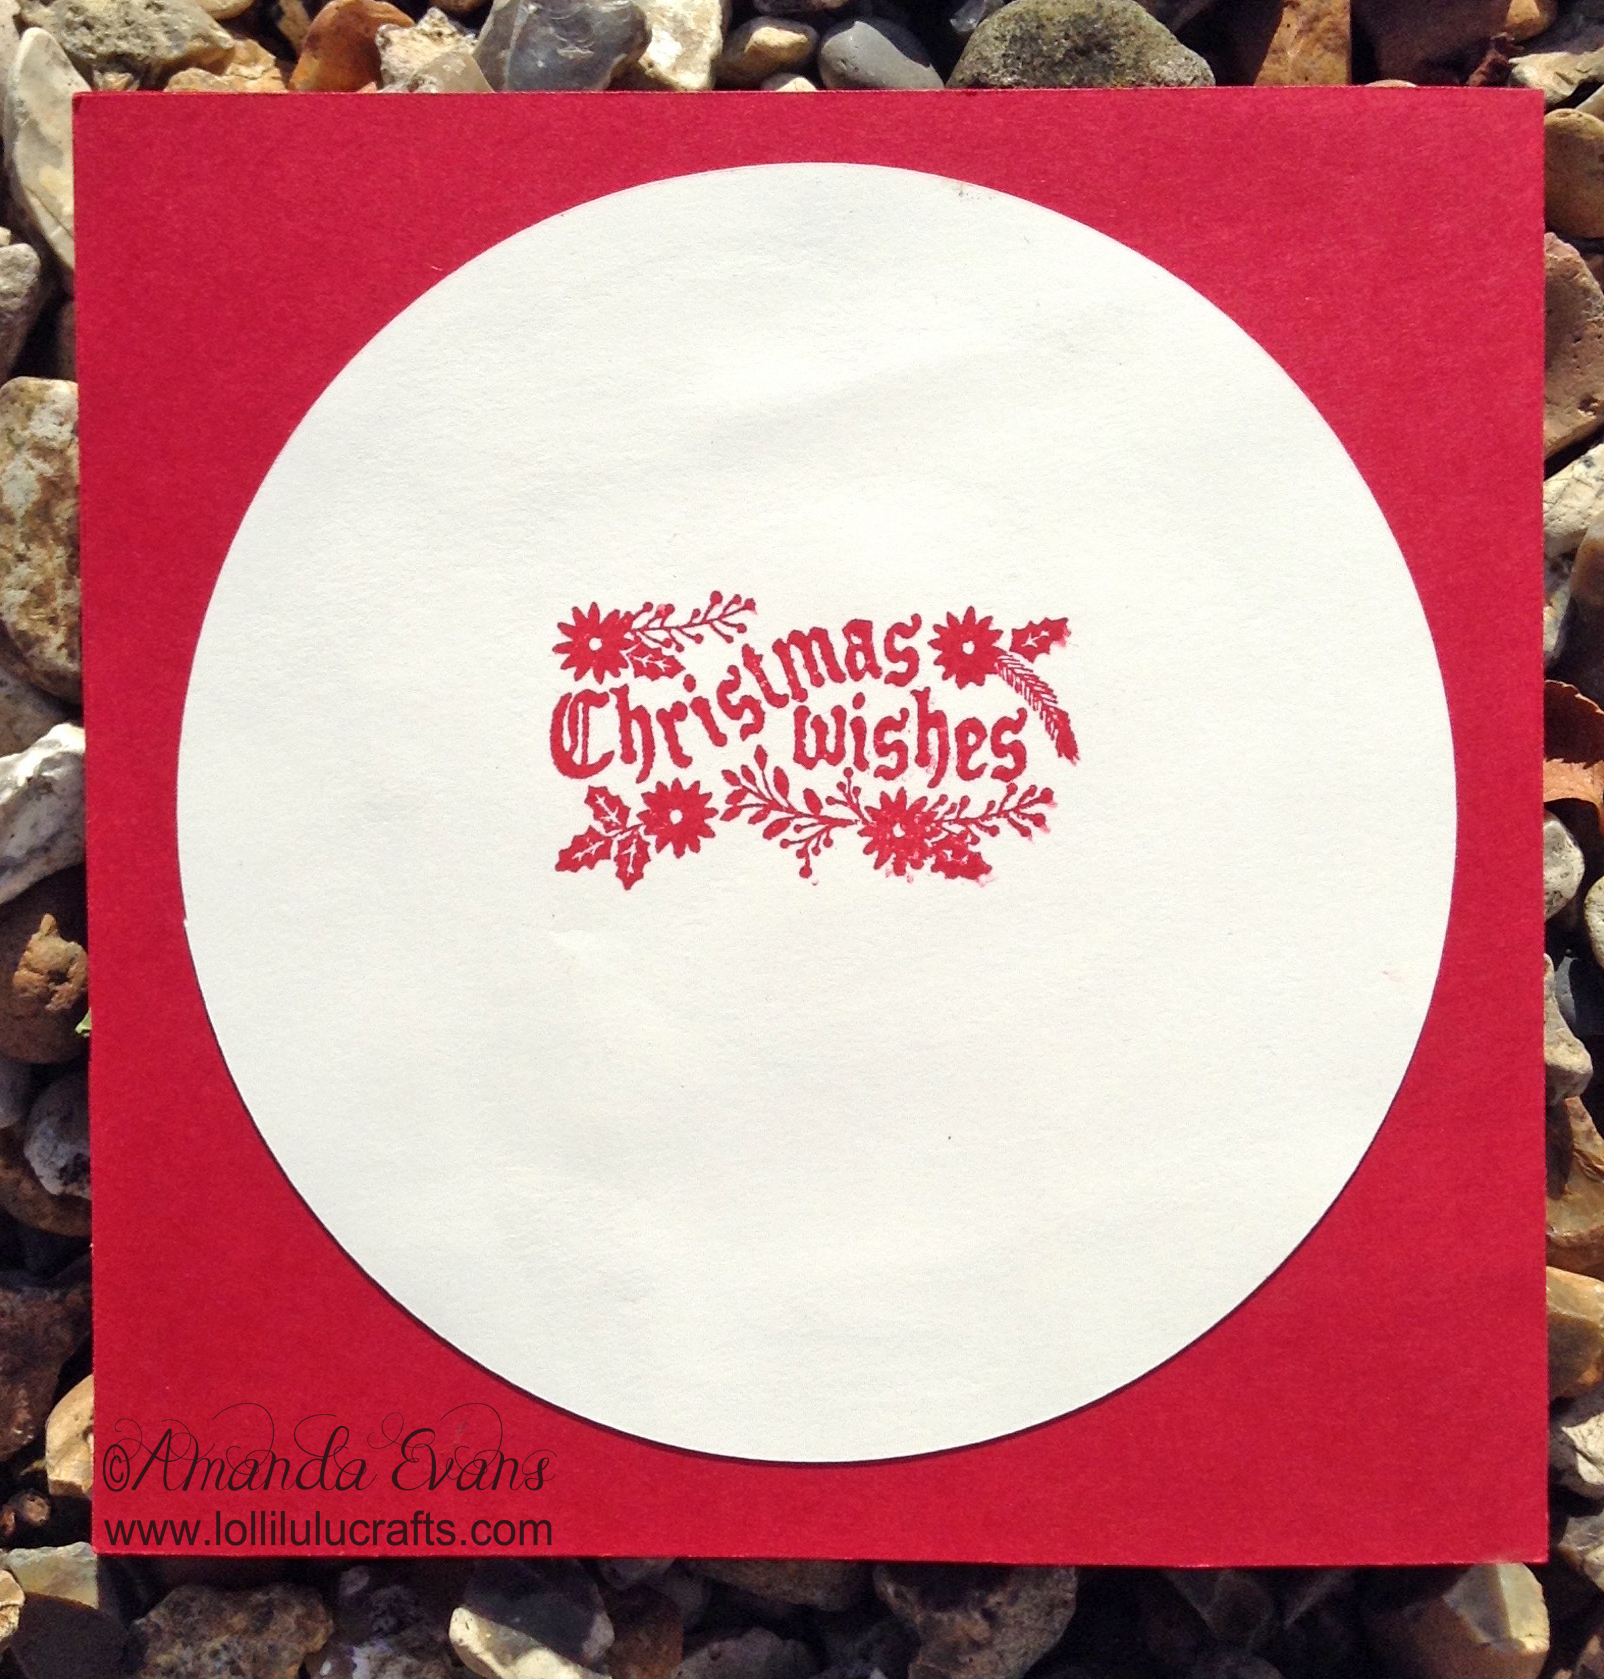
The final thing that I did was take one of the circle aperture that I had cut out and placed it on the back of the card. This was an afterthought because I didn’t want people to have nowhere to write their card message but also I wanted to direct them to the right place to write it so that it didn’t ruin the look of the card. I then added an additional sentiment there to make it super clear that it was where you were supposed to write. So that’s enough chatter about this card let’s take a look at my Cricut Disney Baby Tigger Christmas Card video:
And of course as always here are whole heap of photos of the finished card for you to look at. Don’t forget that the way the photos are put out there is just ‘designer-y’ so some might be smaller than others and when you refresh the page they will being in a different place. So the best way is to click on the the first photo in the top left corner, it will come up nice and big on your page, you can then click the arrow to move forward at your own pace, or you can click the little playback button and it will play through all of those photos for you while you just sit back and watch. This is the same with all my posts and photos:-

So that is it for today I hope you have enjoyed this video and I hope that you liked the finished card. If it isn’t really wrong, LOL!, I have to say I think it’s absolutely adorable and I’m so pleased with how it turned out, I really really hope you do too and I would be so so pleased if you could leave me some comments as I love love love to hear from you my lil’ lolliettes,
And one finall thing, I have a FREE DOWNLOAD of this design in my store so do pop on over to take a look 🙂
or now hugs and have a great craft day, AND

●▬▬▬▬▬ ●SUPPLIES● ▬▬▬▬▬●
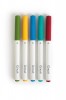
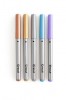
Below are the products featured in today’s Video. Some products can be purchased from multiple stores so I have given each store different letter codes. Click on the letters below the picture to go to a favorite store: Simon Says Stamp (SSS), Dick Blick (DB), Cricut (C), Scrapbook.com (SB) and Amazon (AMZ)


●▬▬▬▬▬ ● DISCLAIMER ● ▬▬▬▬▬●
Affiliate links are used. For affiliate information and policy please see the Policy page.
