


Hiya, today I have for you a card that comes from that lost batch of film but unlike the others you have seen from that batch lately, with this one I was sadly only able to recover the photographs and no video. I am really pleased to have found this as it is a fabulous fun card that I am so pleased to share with you of a young girl and her pony. This card consists of so many different techniques and elements such as the digi stamp colouring, airbrushed background, spellbinders die cutting, 3d embossing, print n cut on my Silhouette and more.

I have to say that of the film lost this is probably the one I am most gutted about as it was a positive crafty feast of different techniques and was so fun to make. I just hope you don’t think this a big tease sharing this with you when there should have been film! So as best as I can remember I will explain what I did and show you lots of photos and hopefully that will make up for it a little bit and that you just enjoy it anyway 🙂
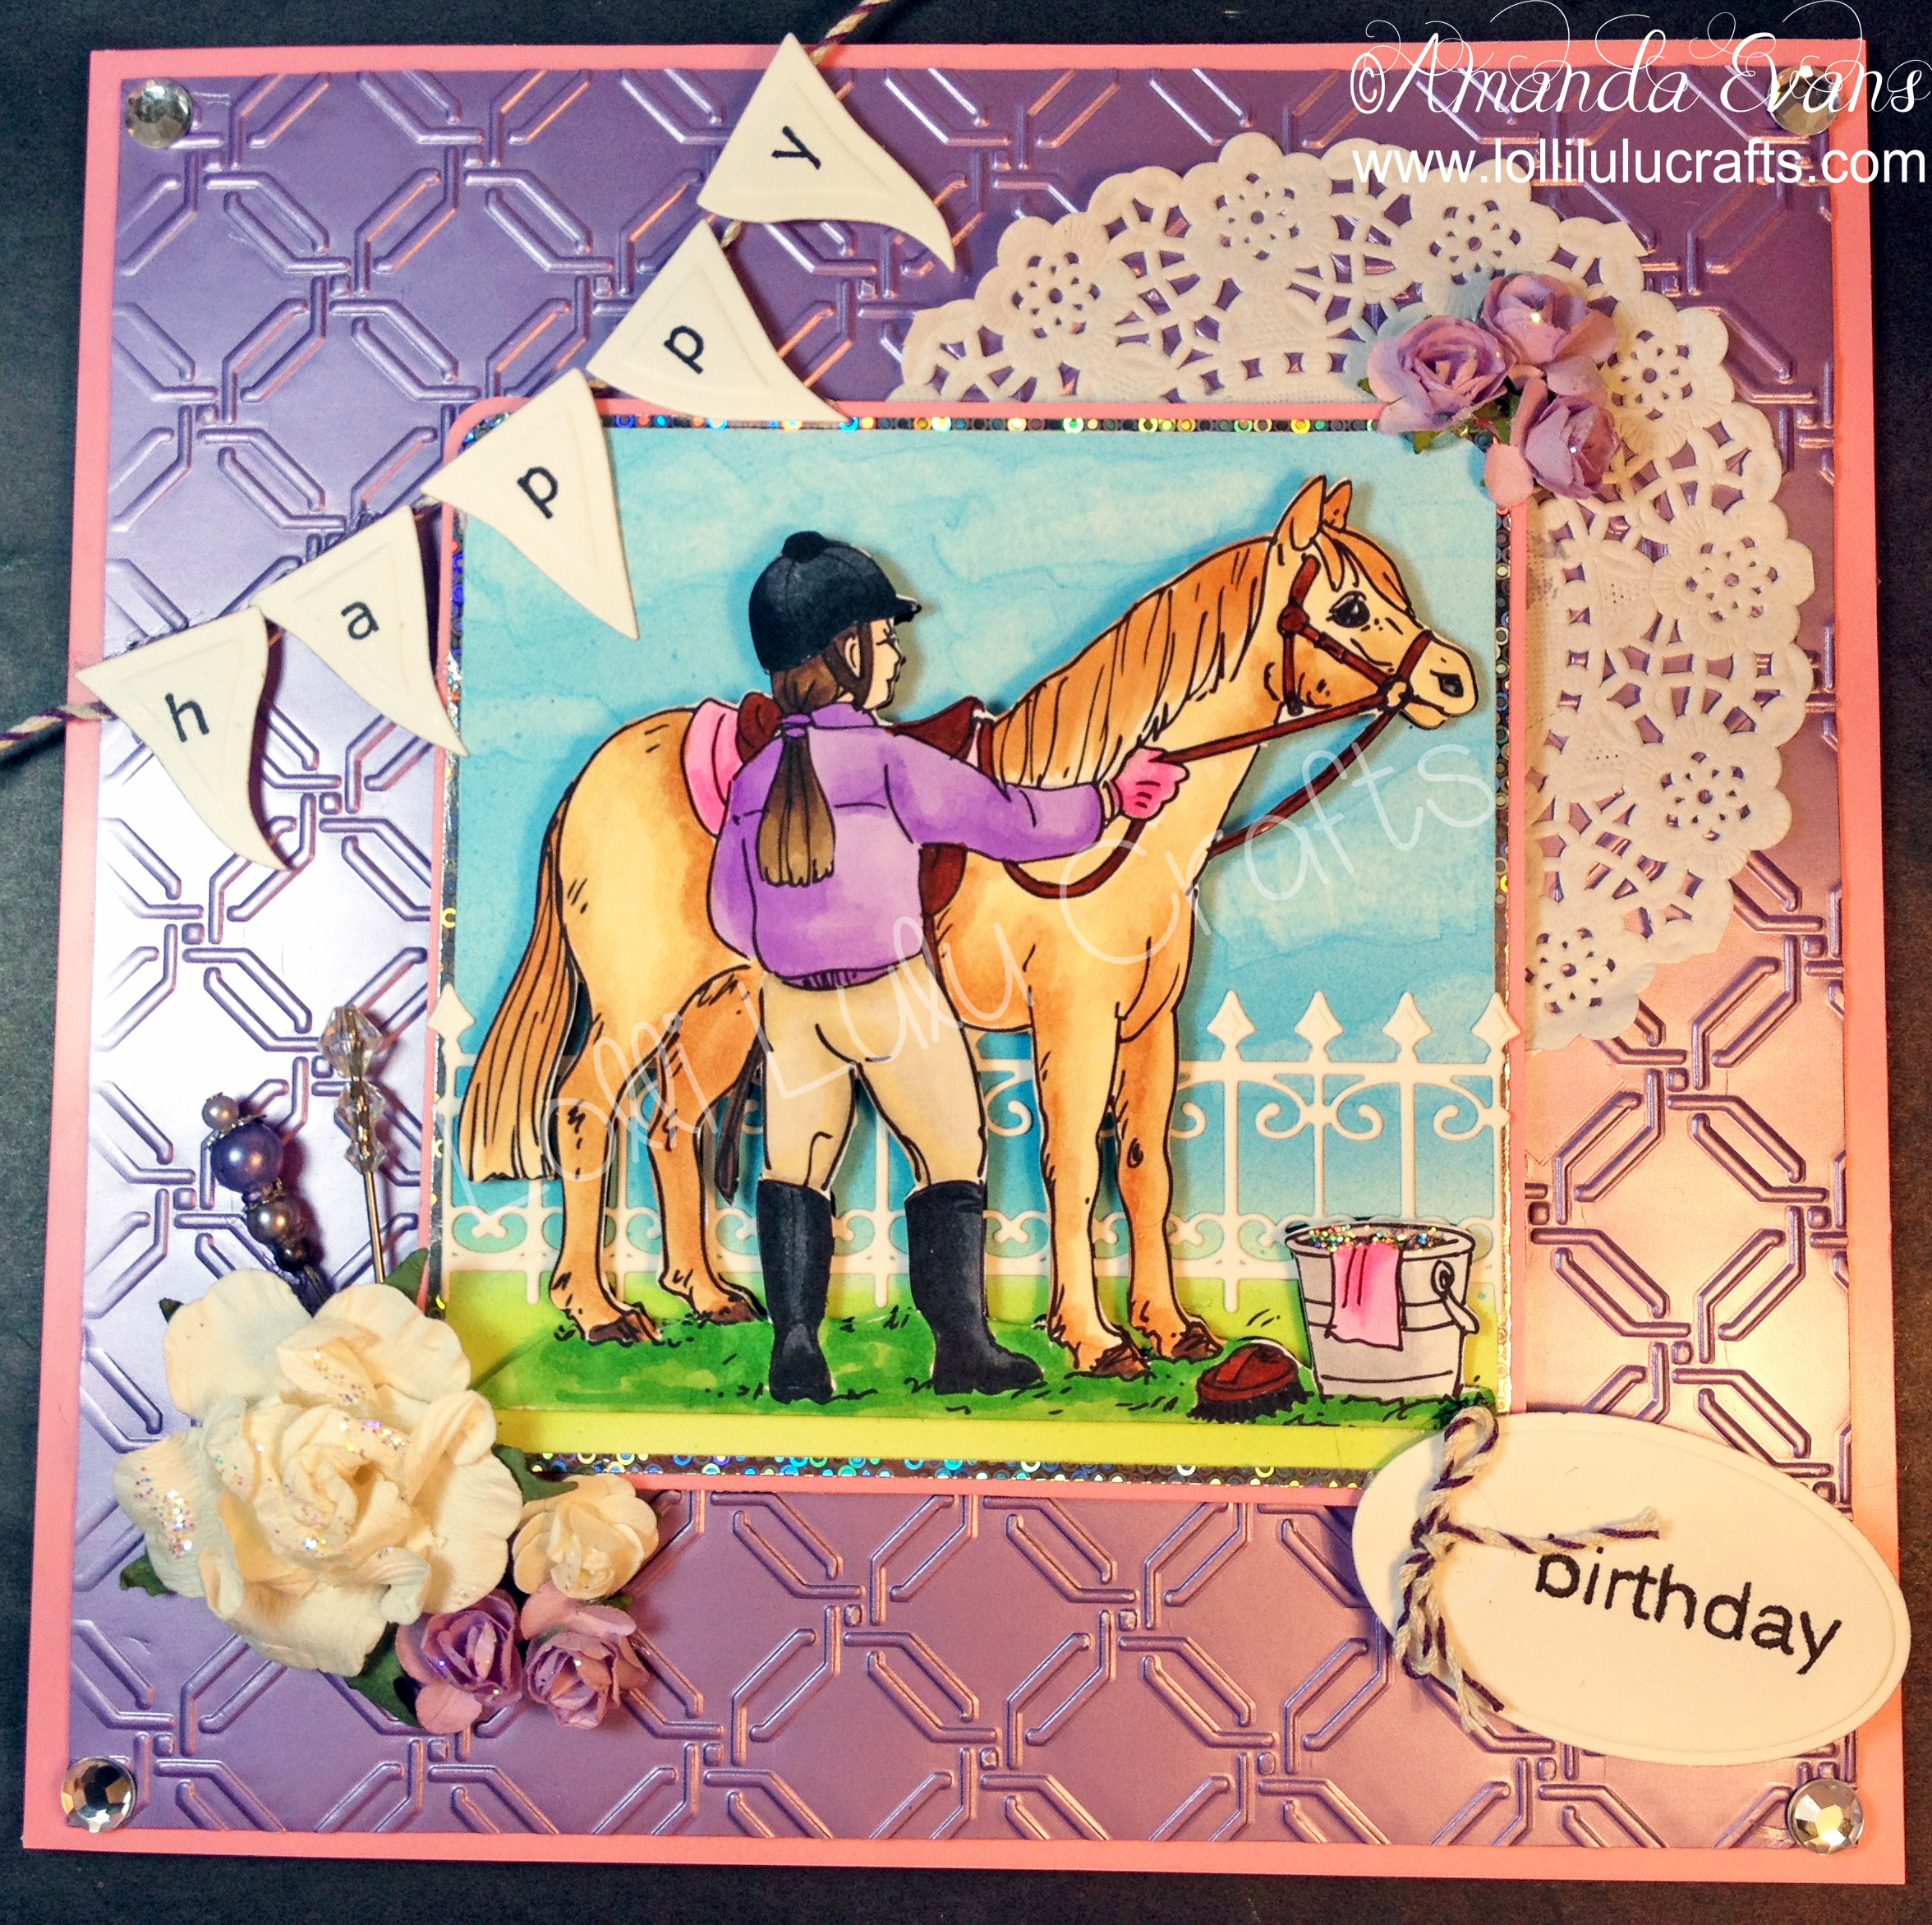
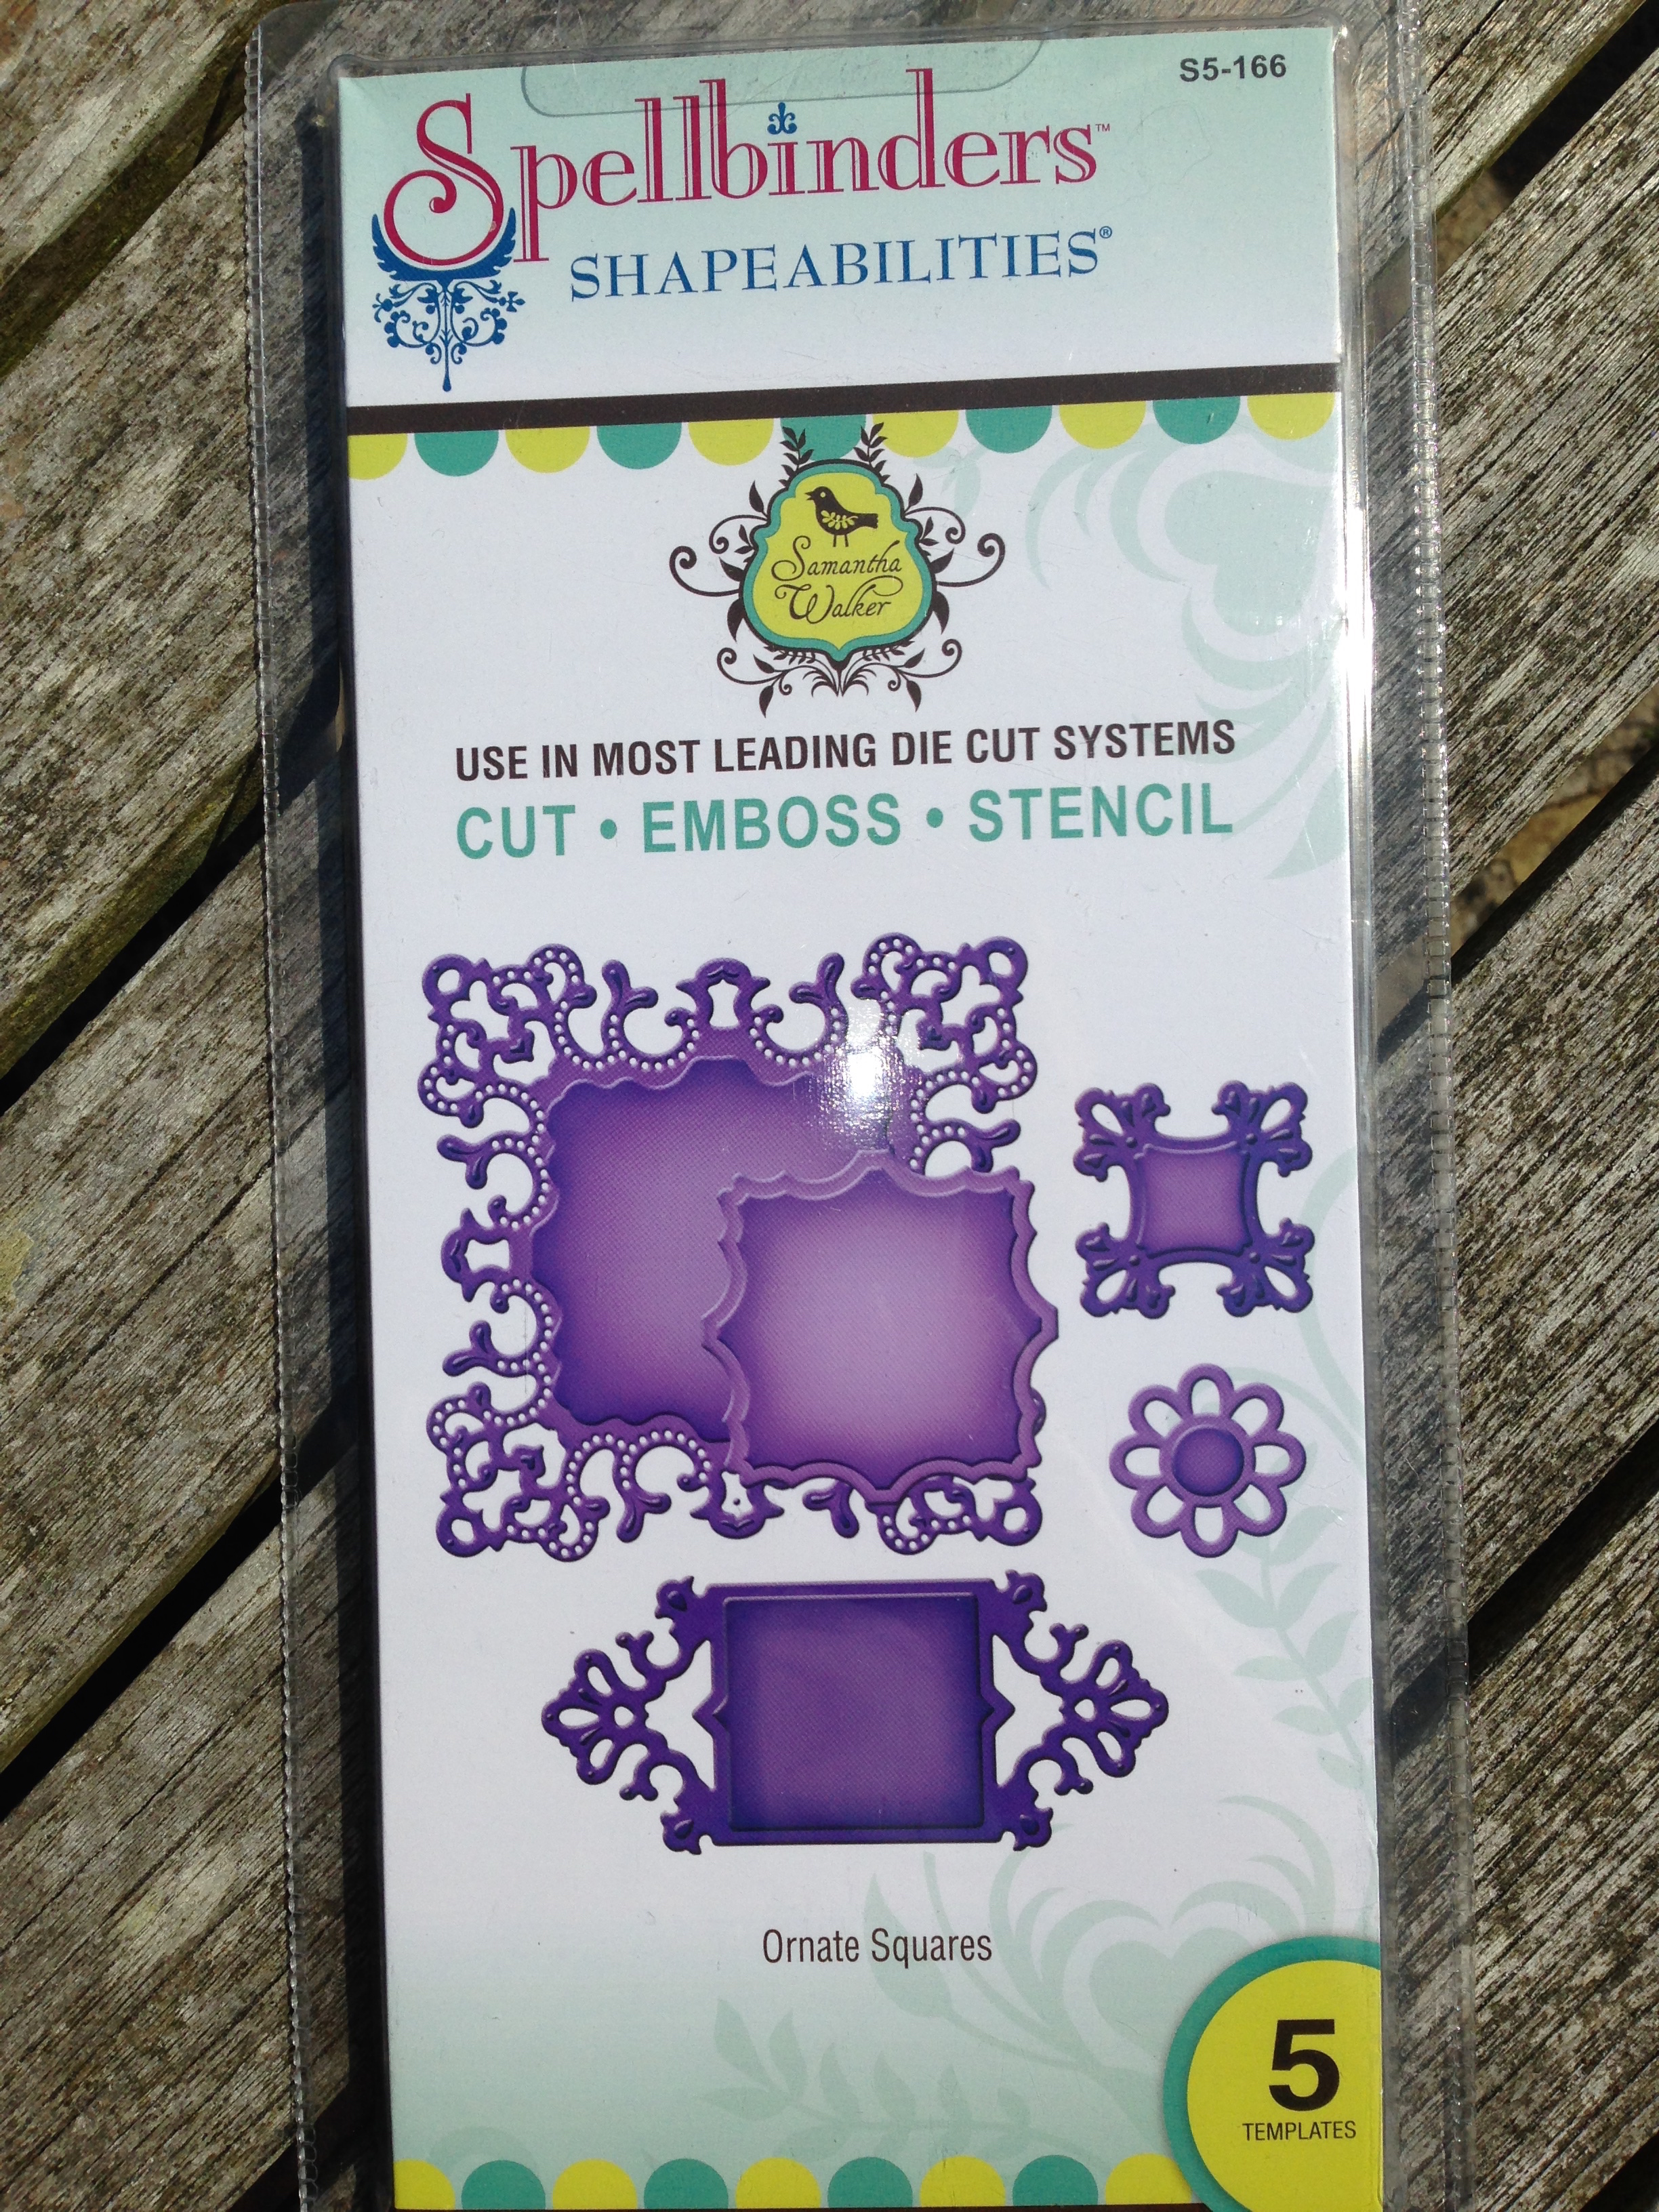
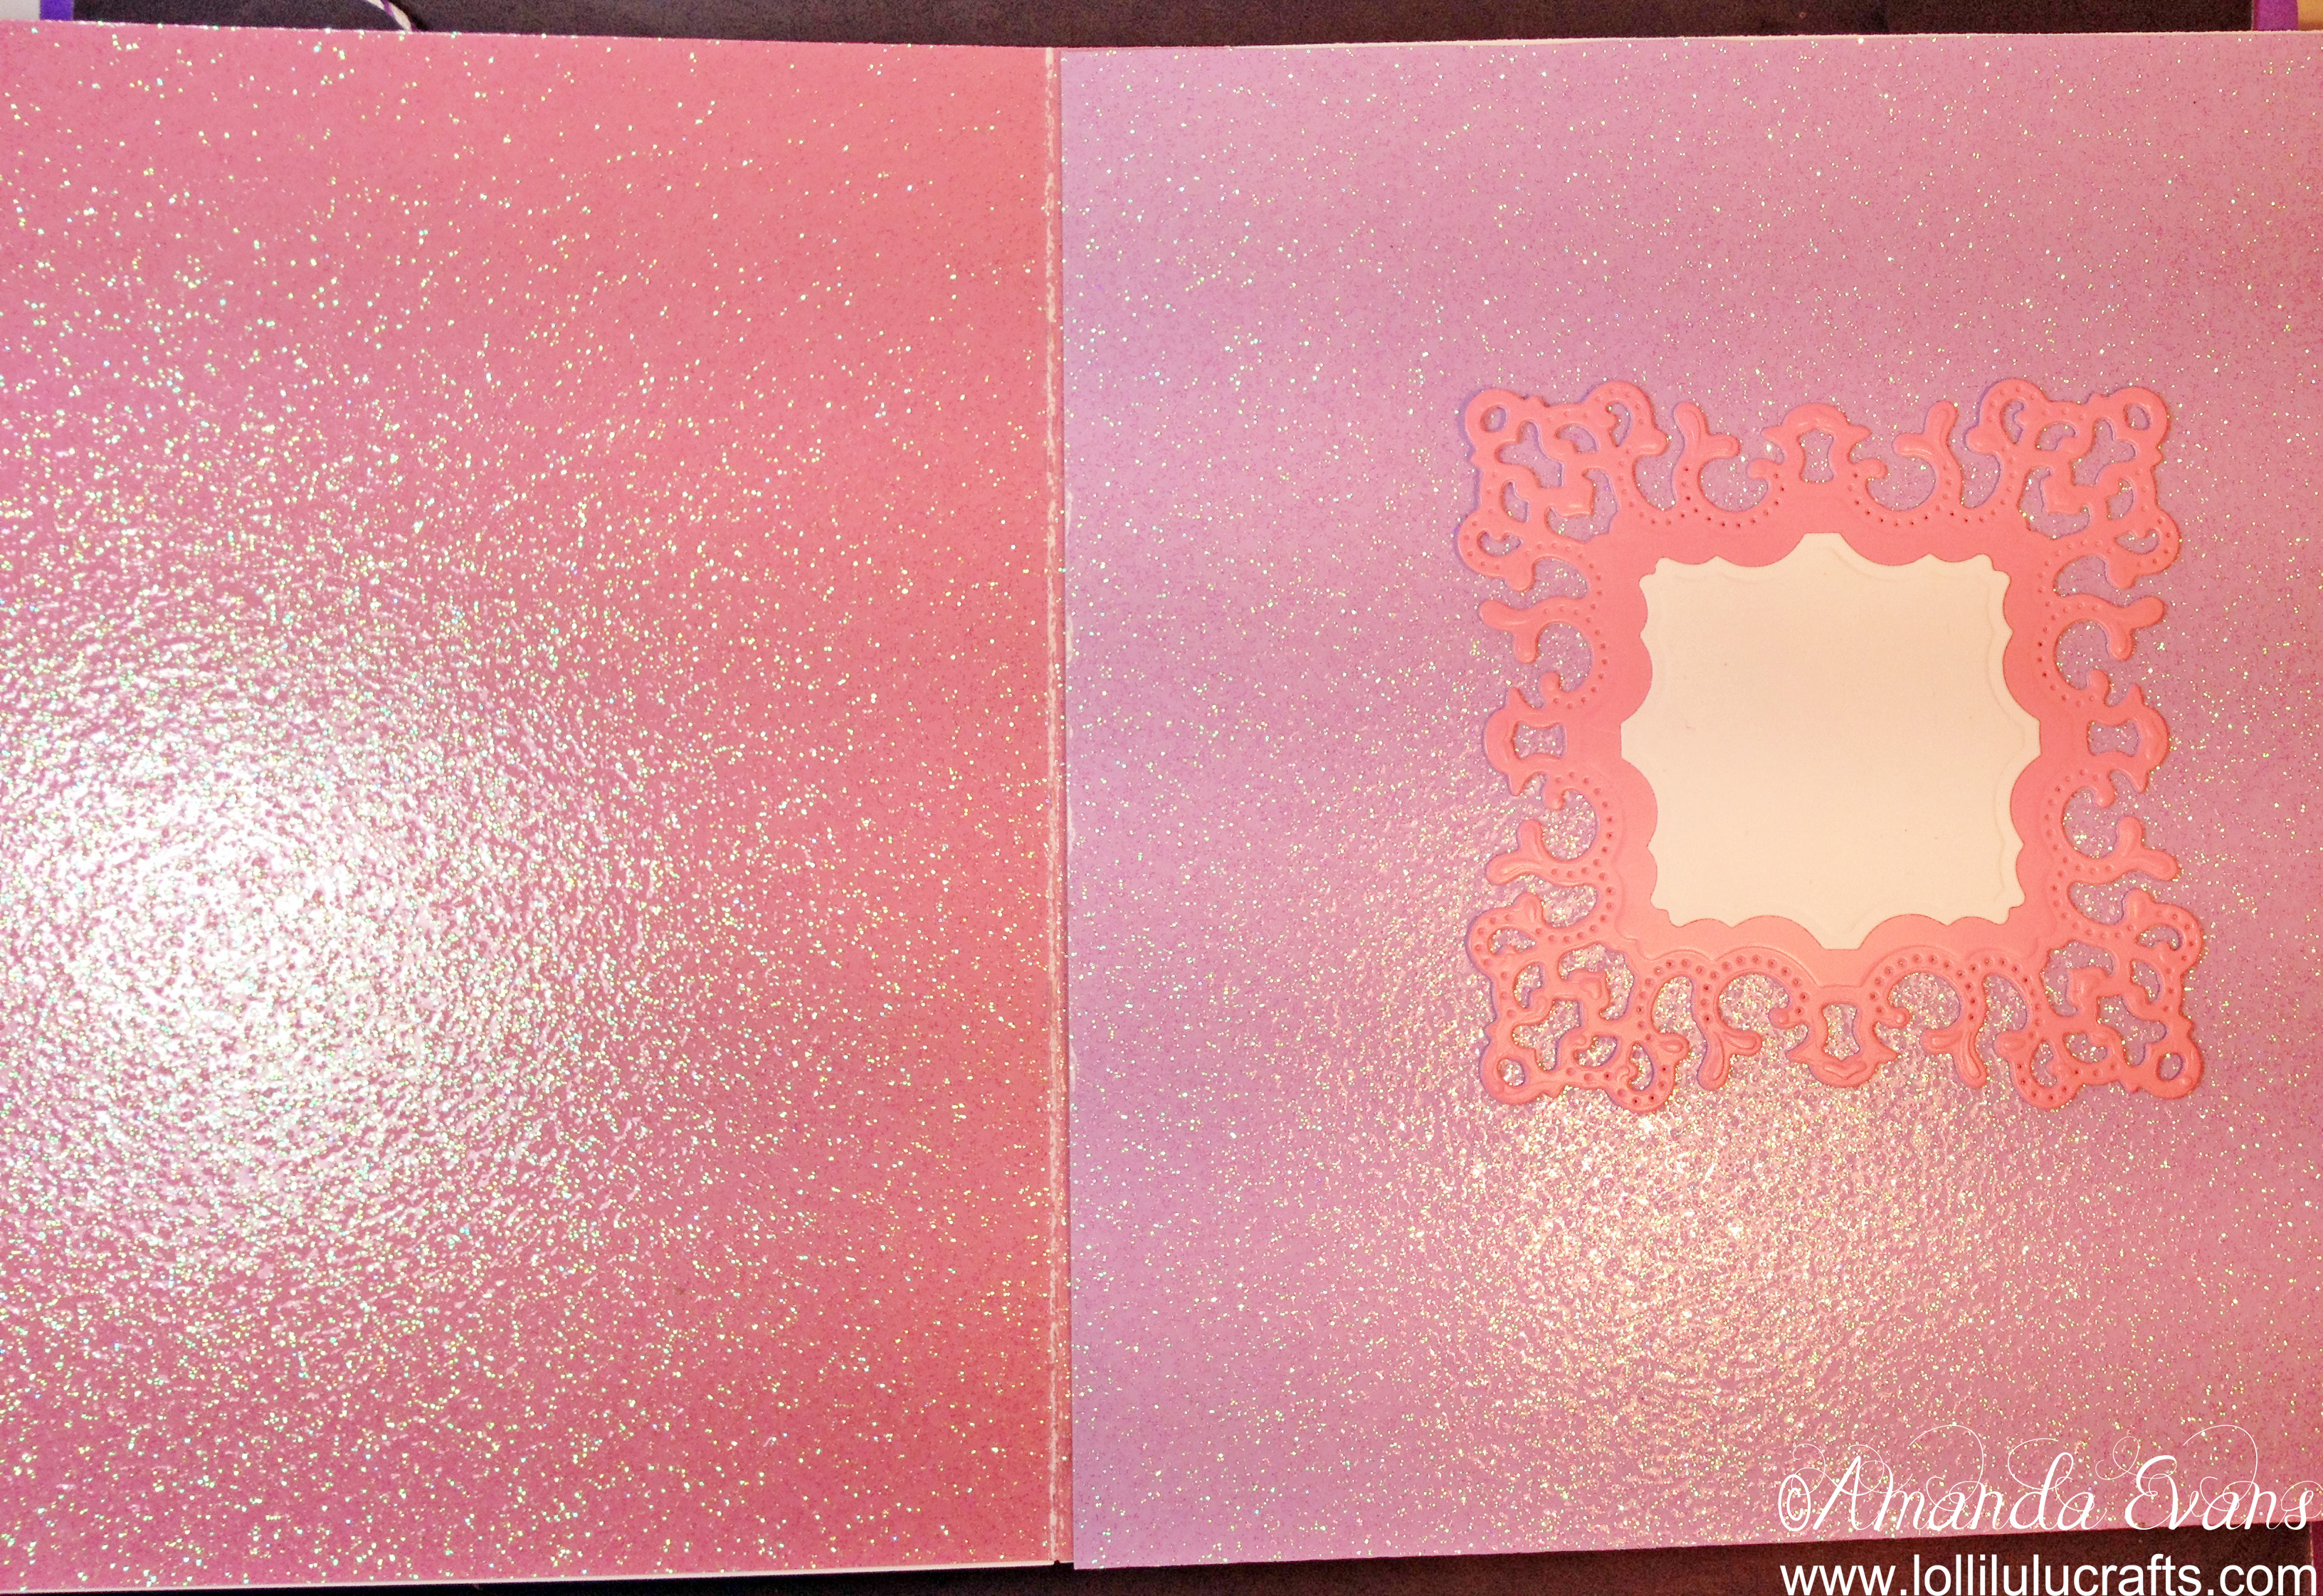
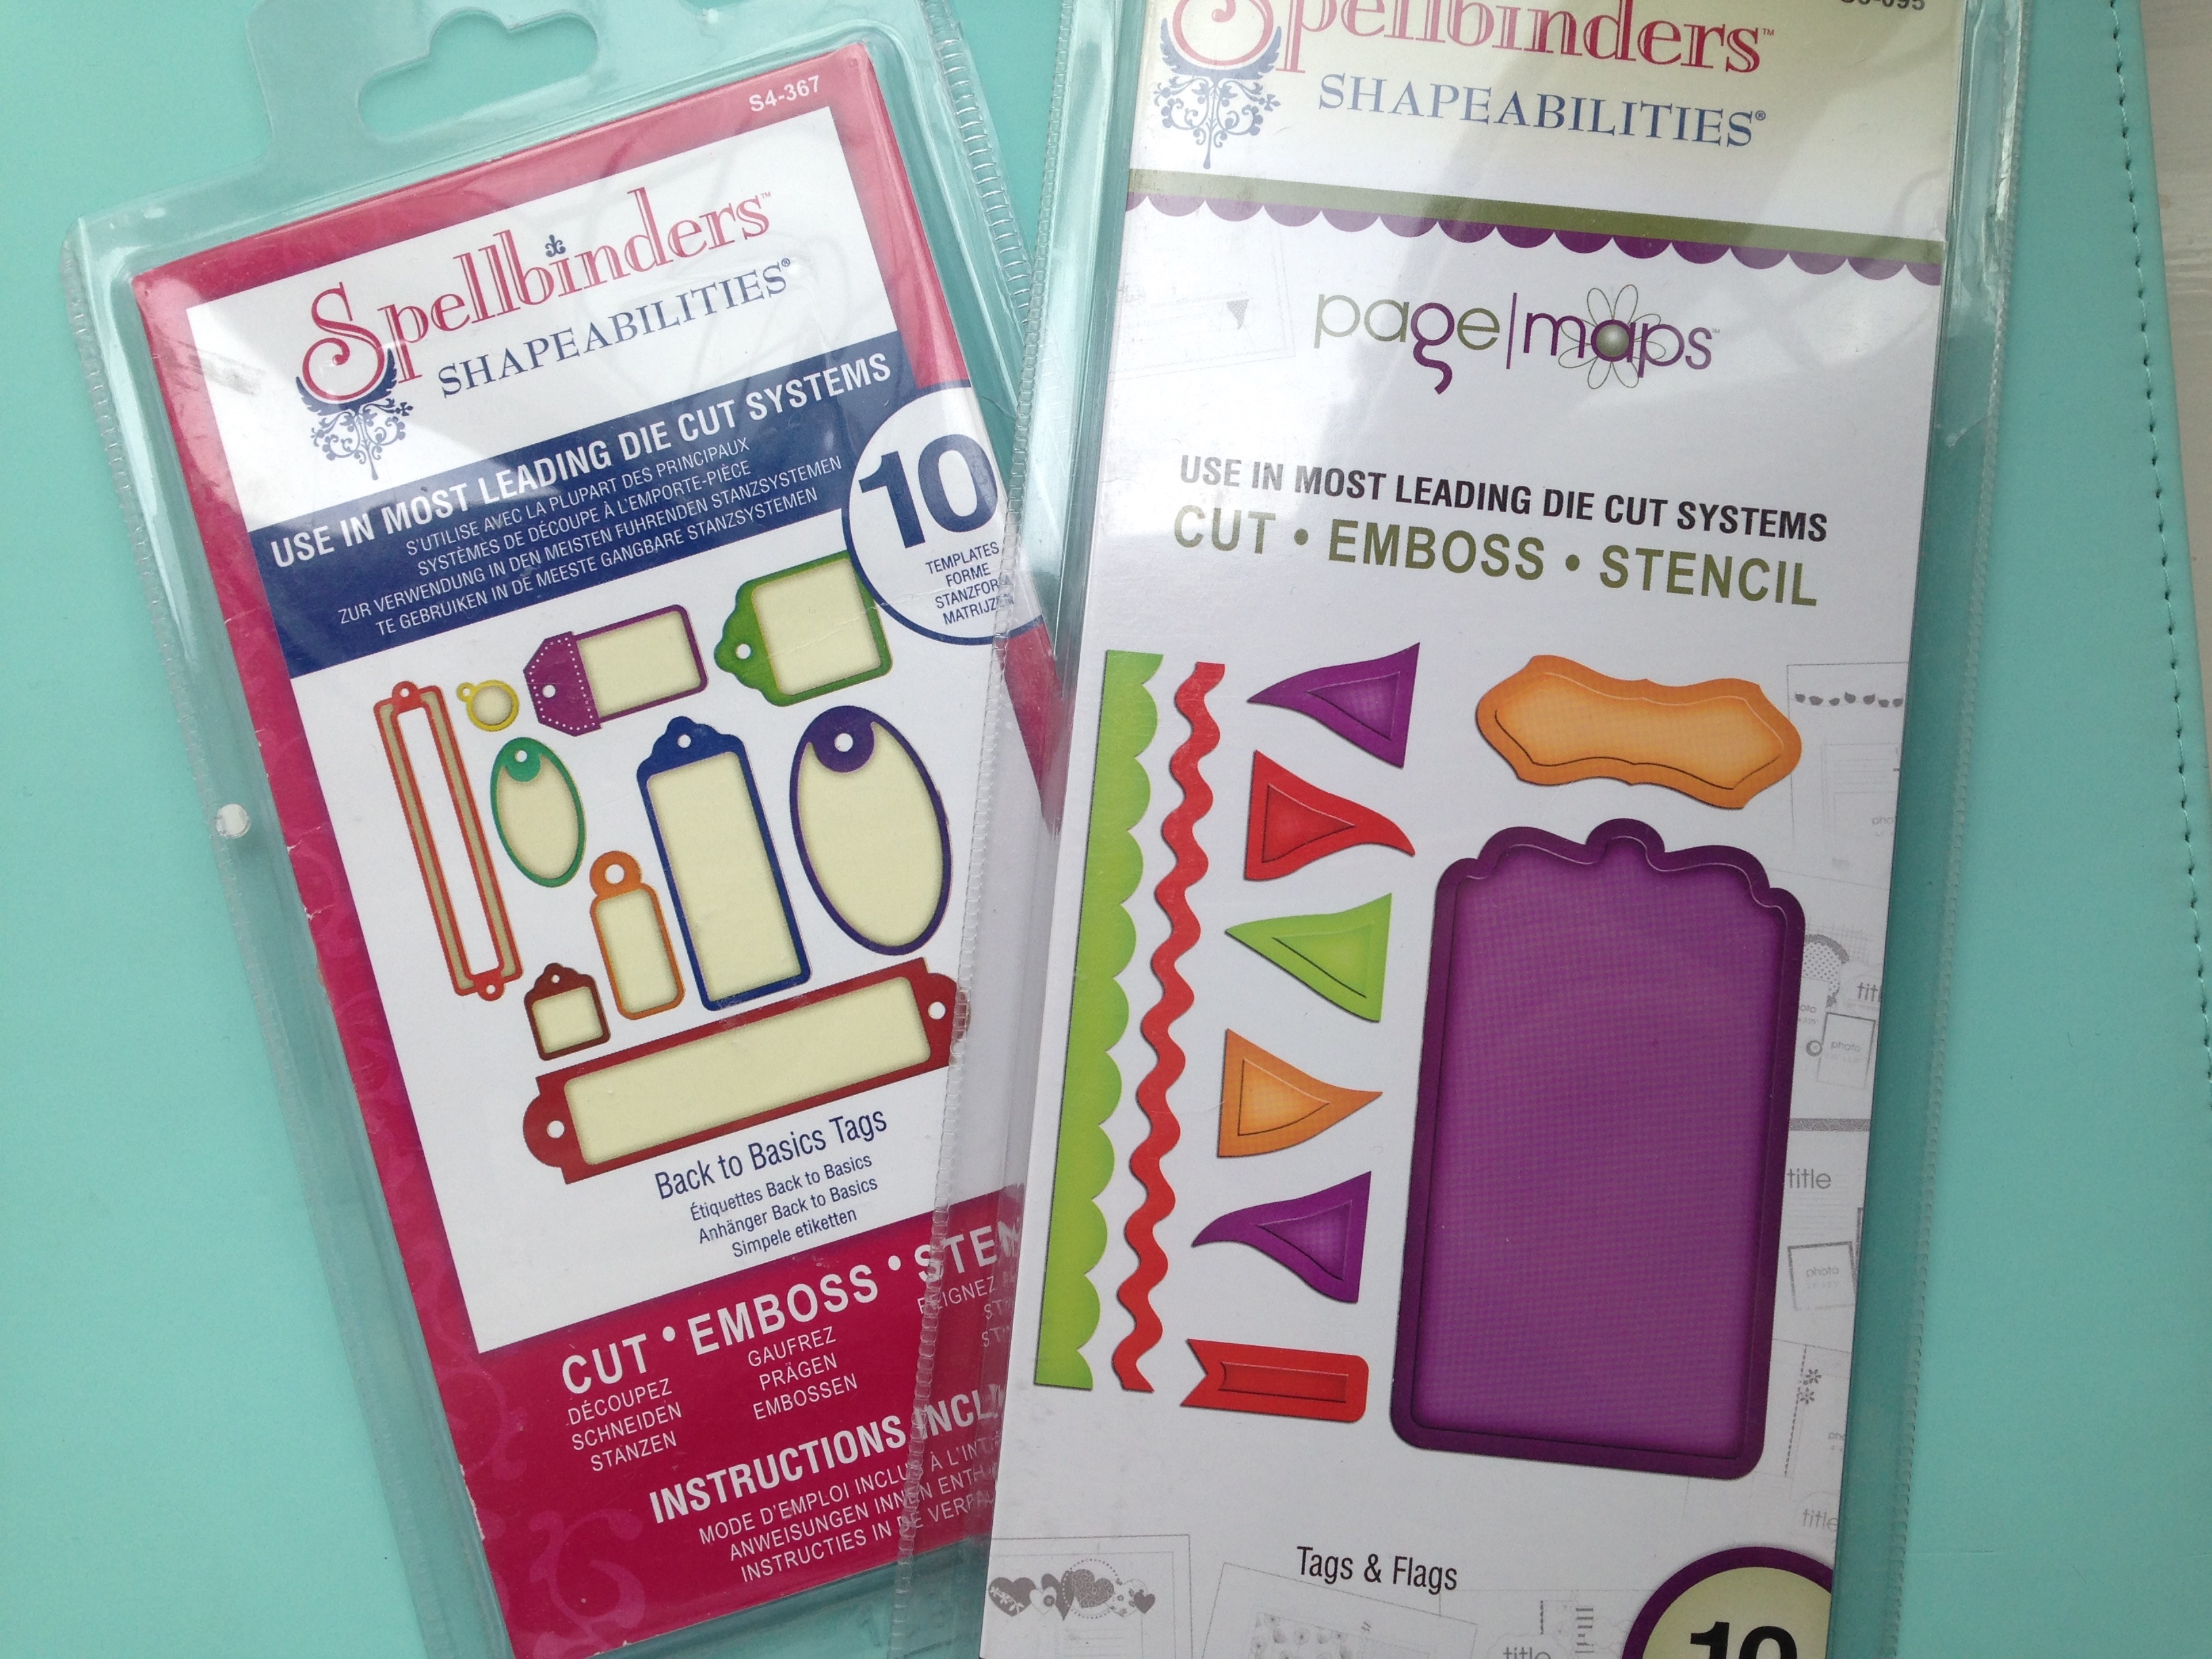
So I started this card by making one of my Easy Peasy Card Bases using the Hunkydory Glitter Card. This glitter card is really amazing because the glitter is completely encapsulated within the glaze on the surface of the card which stops the glitter shedding in any way at all, it even feels really smooth. Anyway I picked a pink and a lavender sheet of the glitter card to make the card base and put the glitter on the inside. This meant the outside of my card was just plain white but since I intended to cover this with a different coloured card that didn’t matter and it did make the inside look really pretty. As a final touch on the inside I die cut a label and it’s mat from the Spellbinders Ornate Label Die Set.
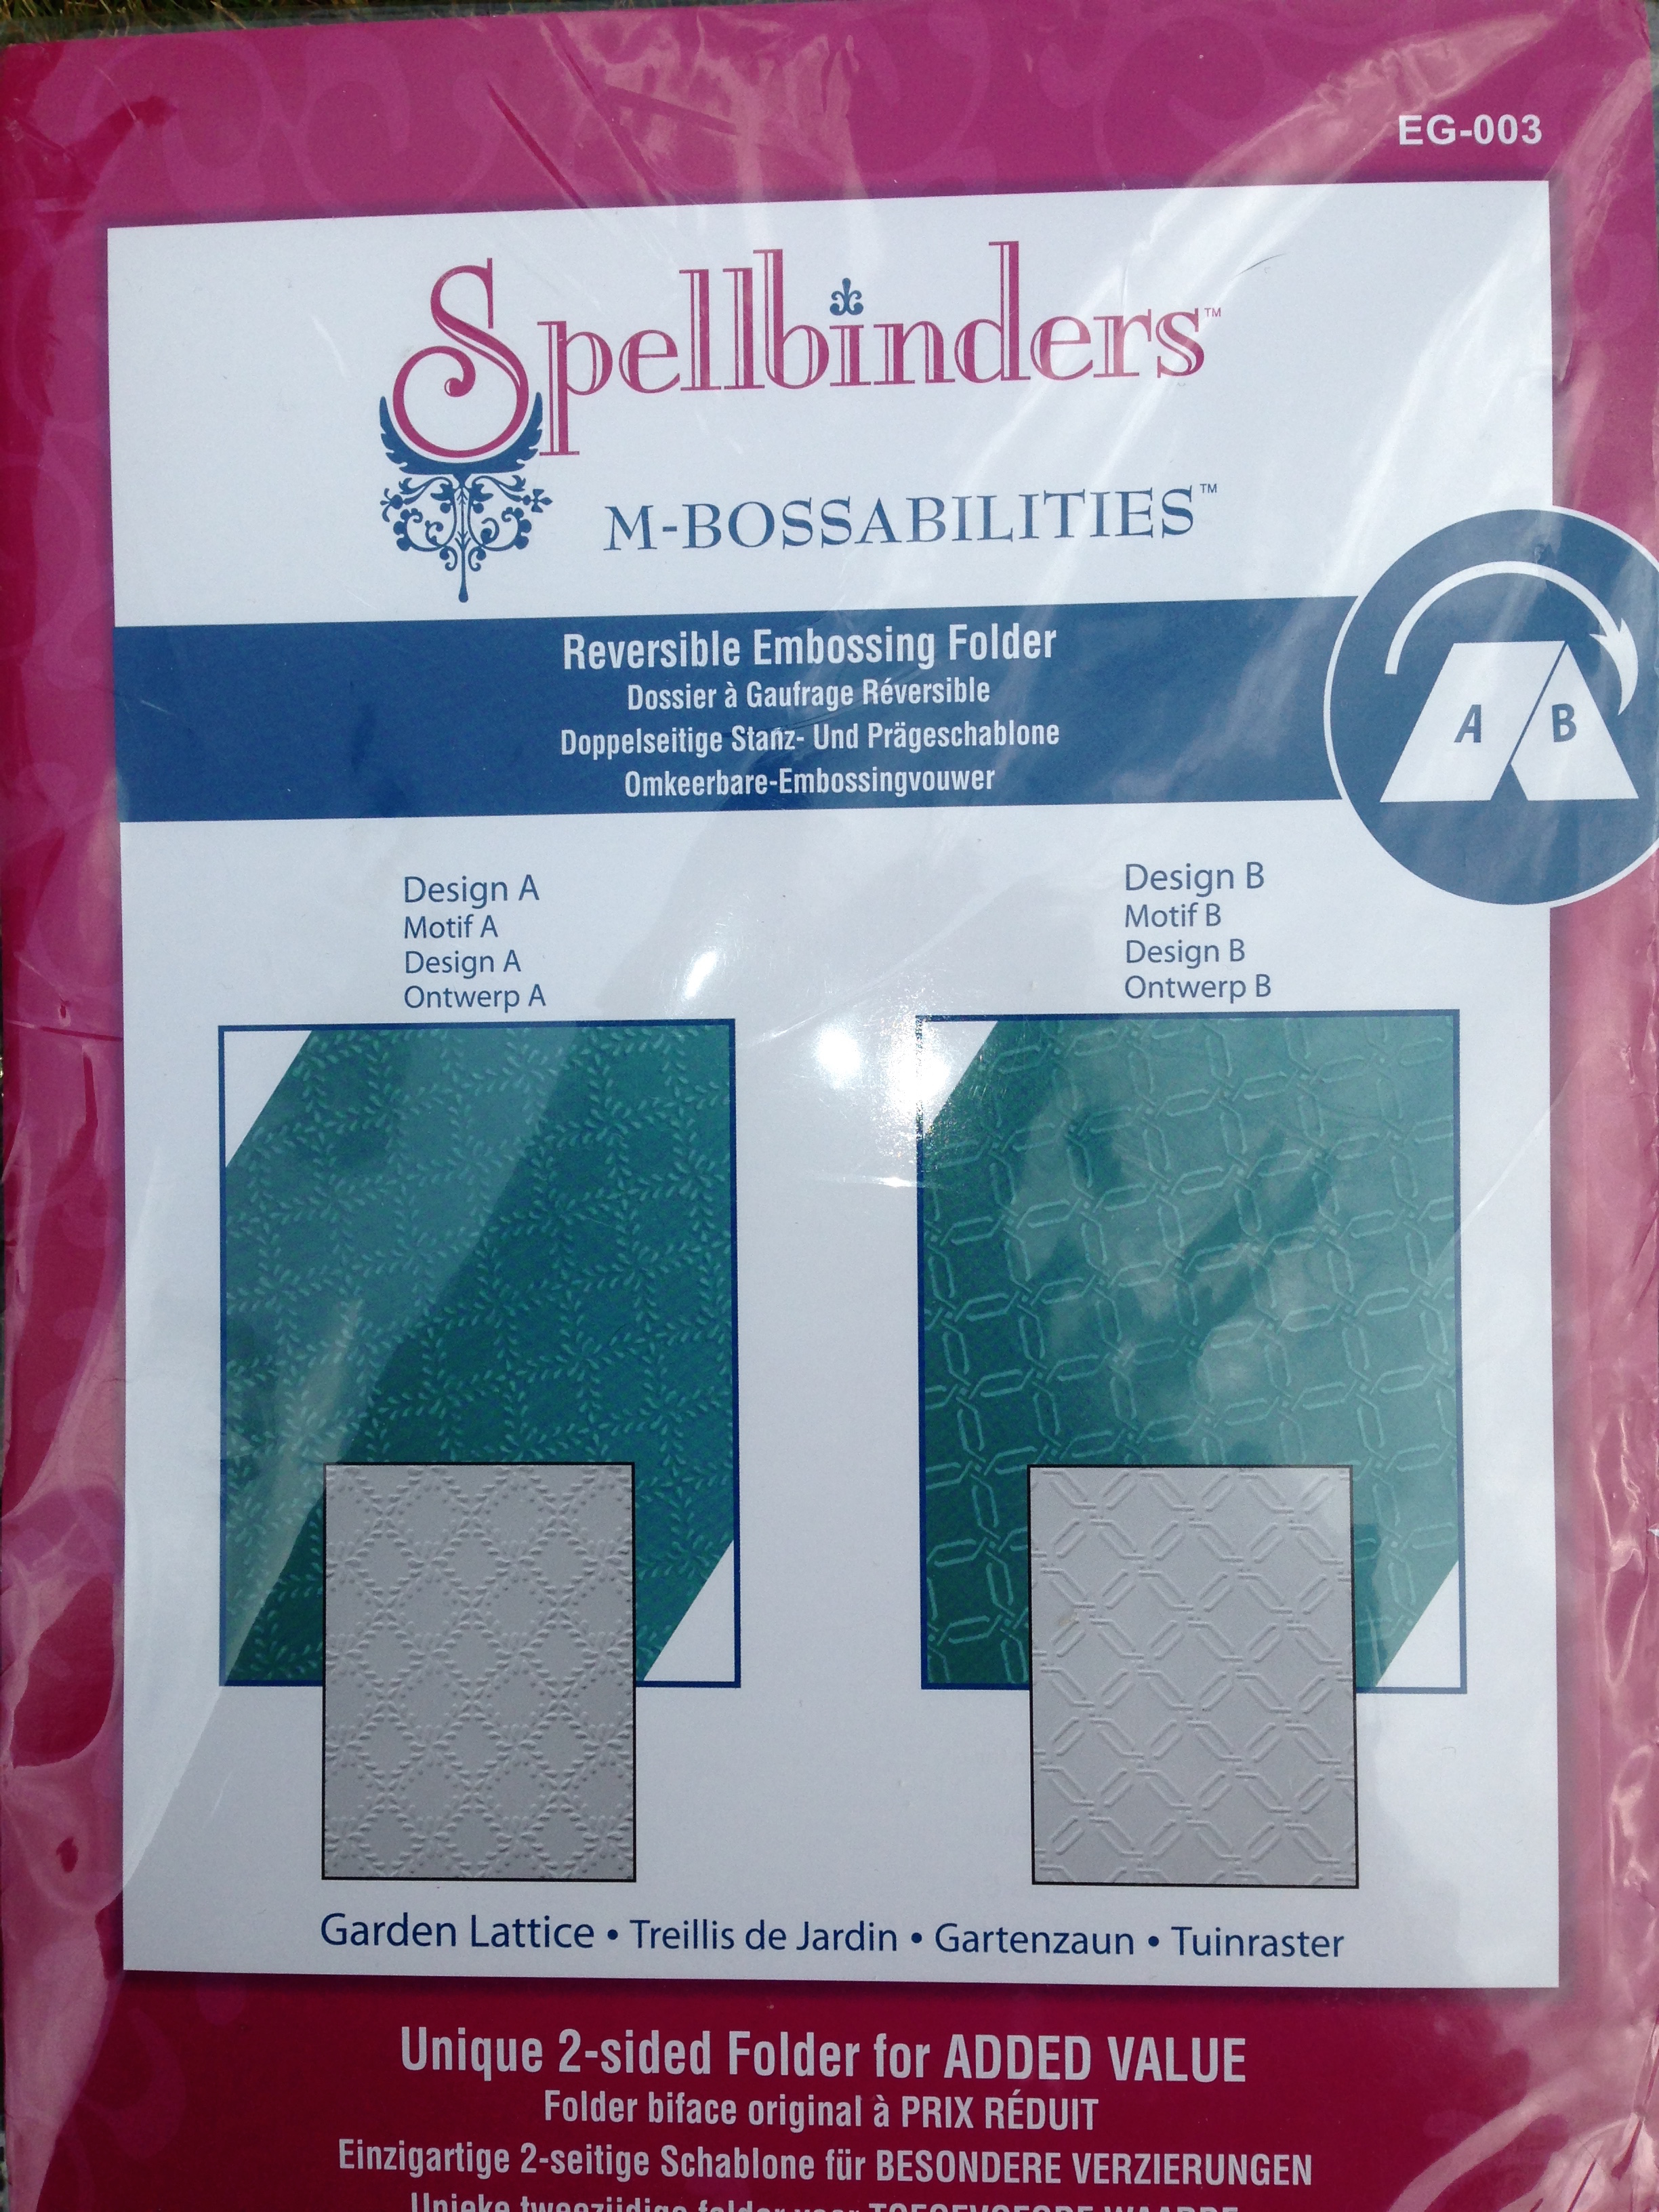
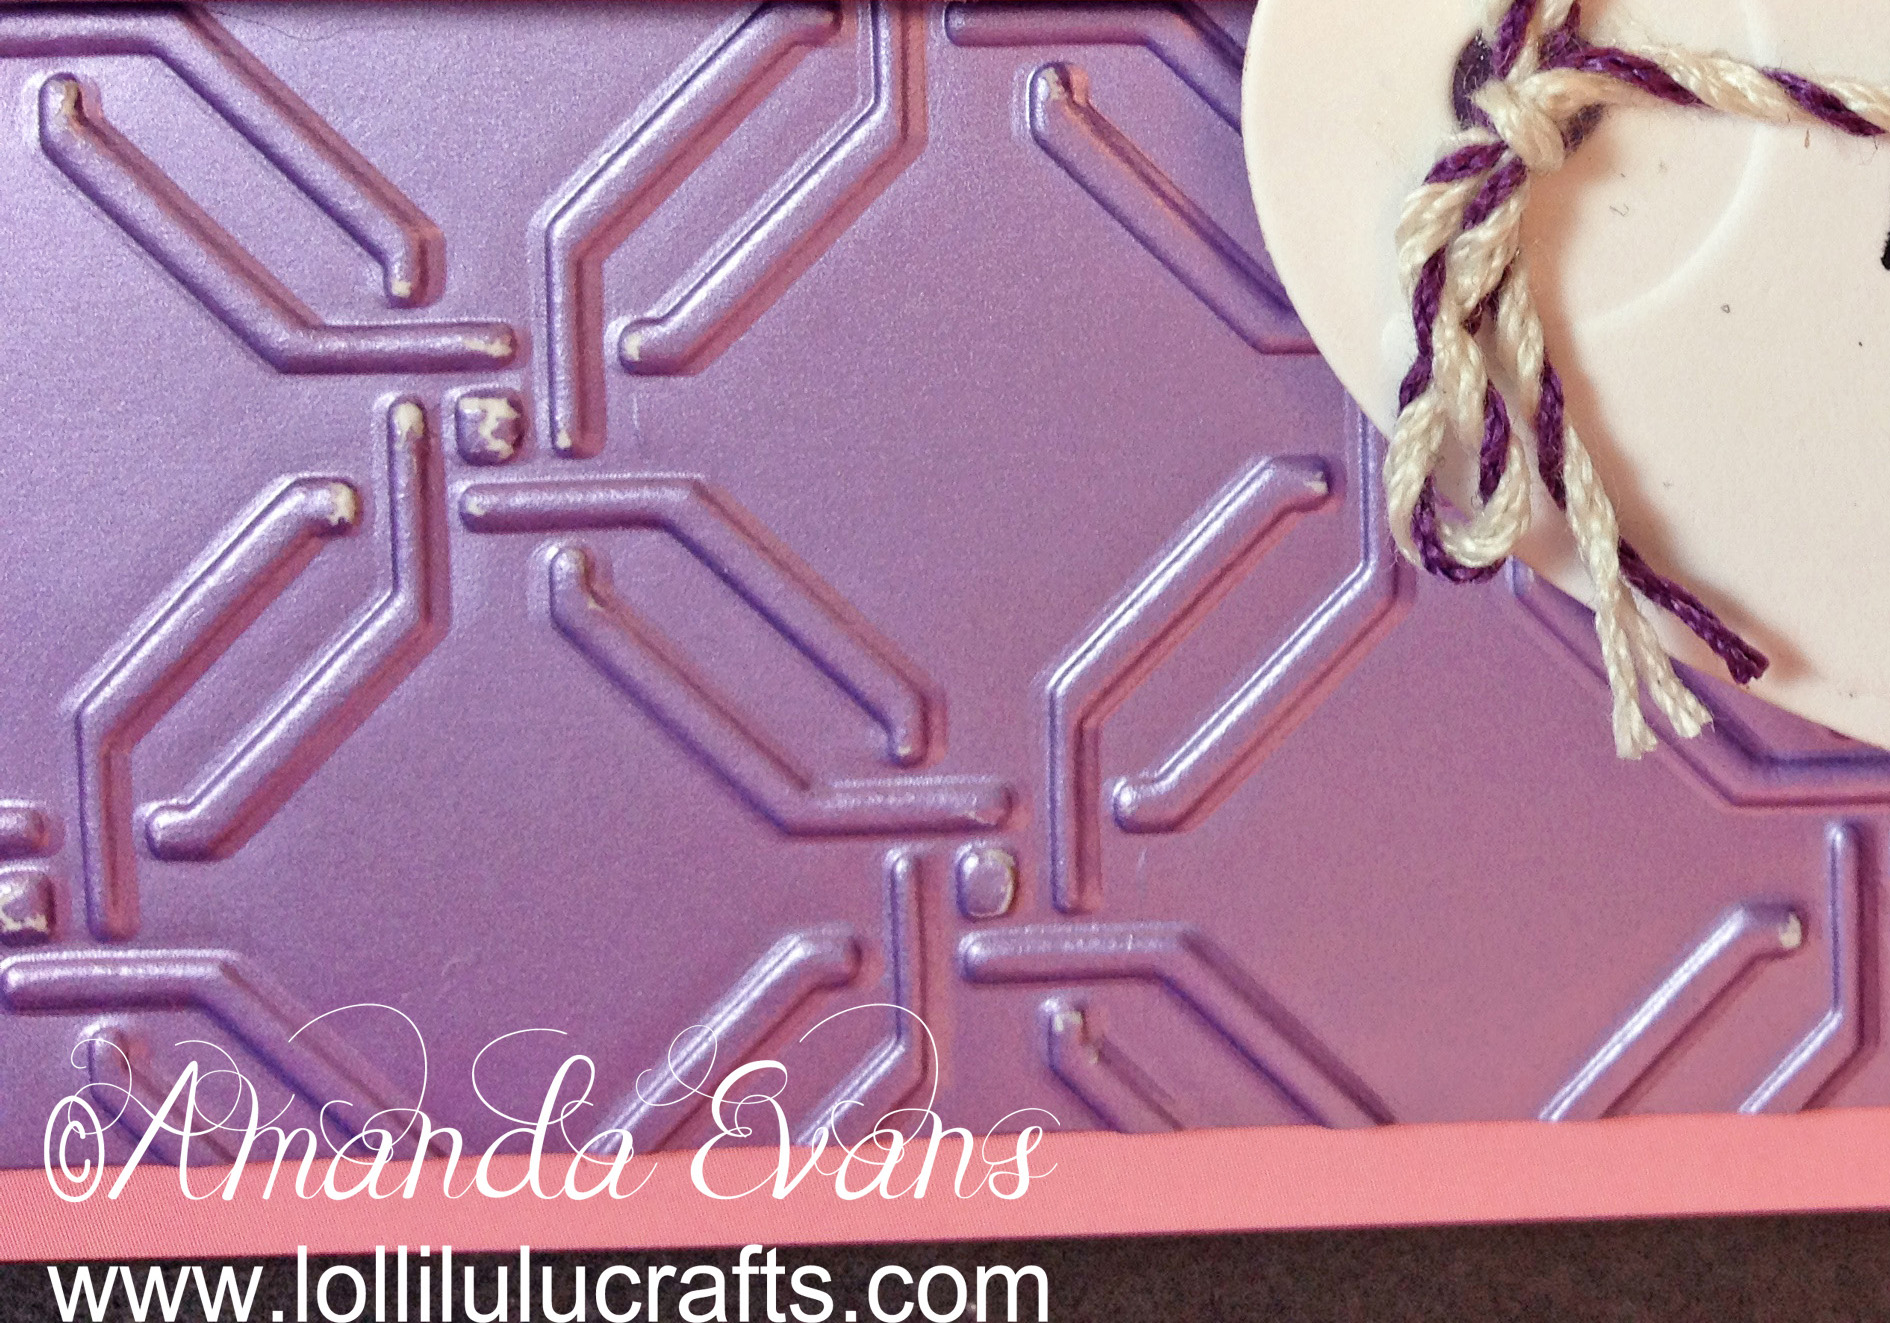
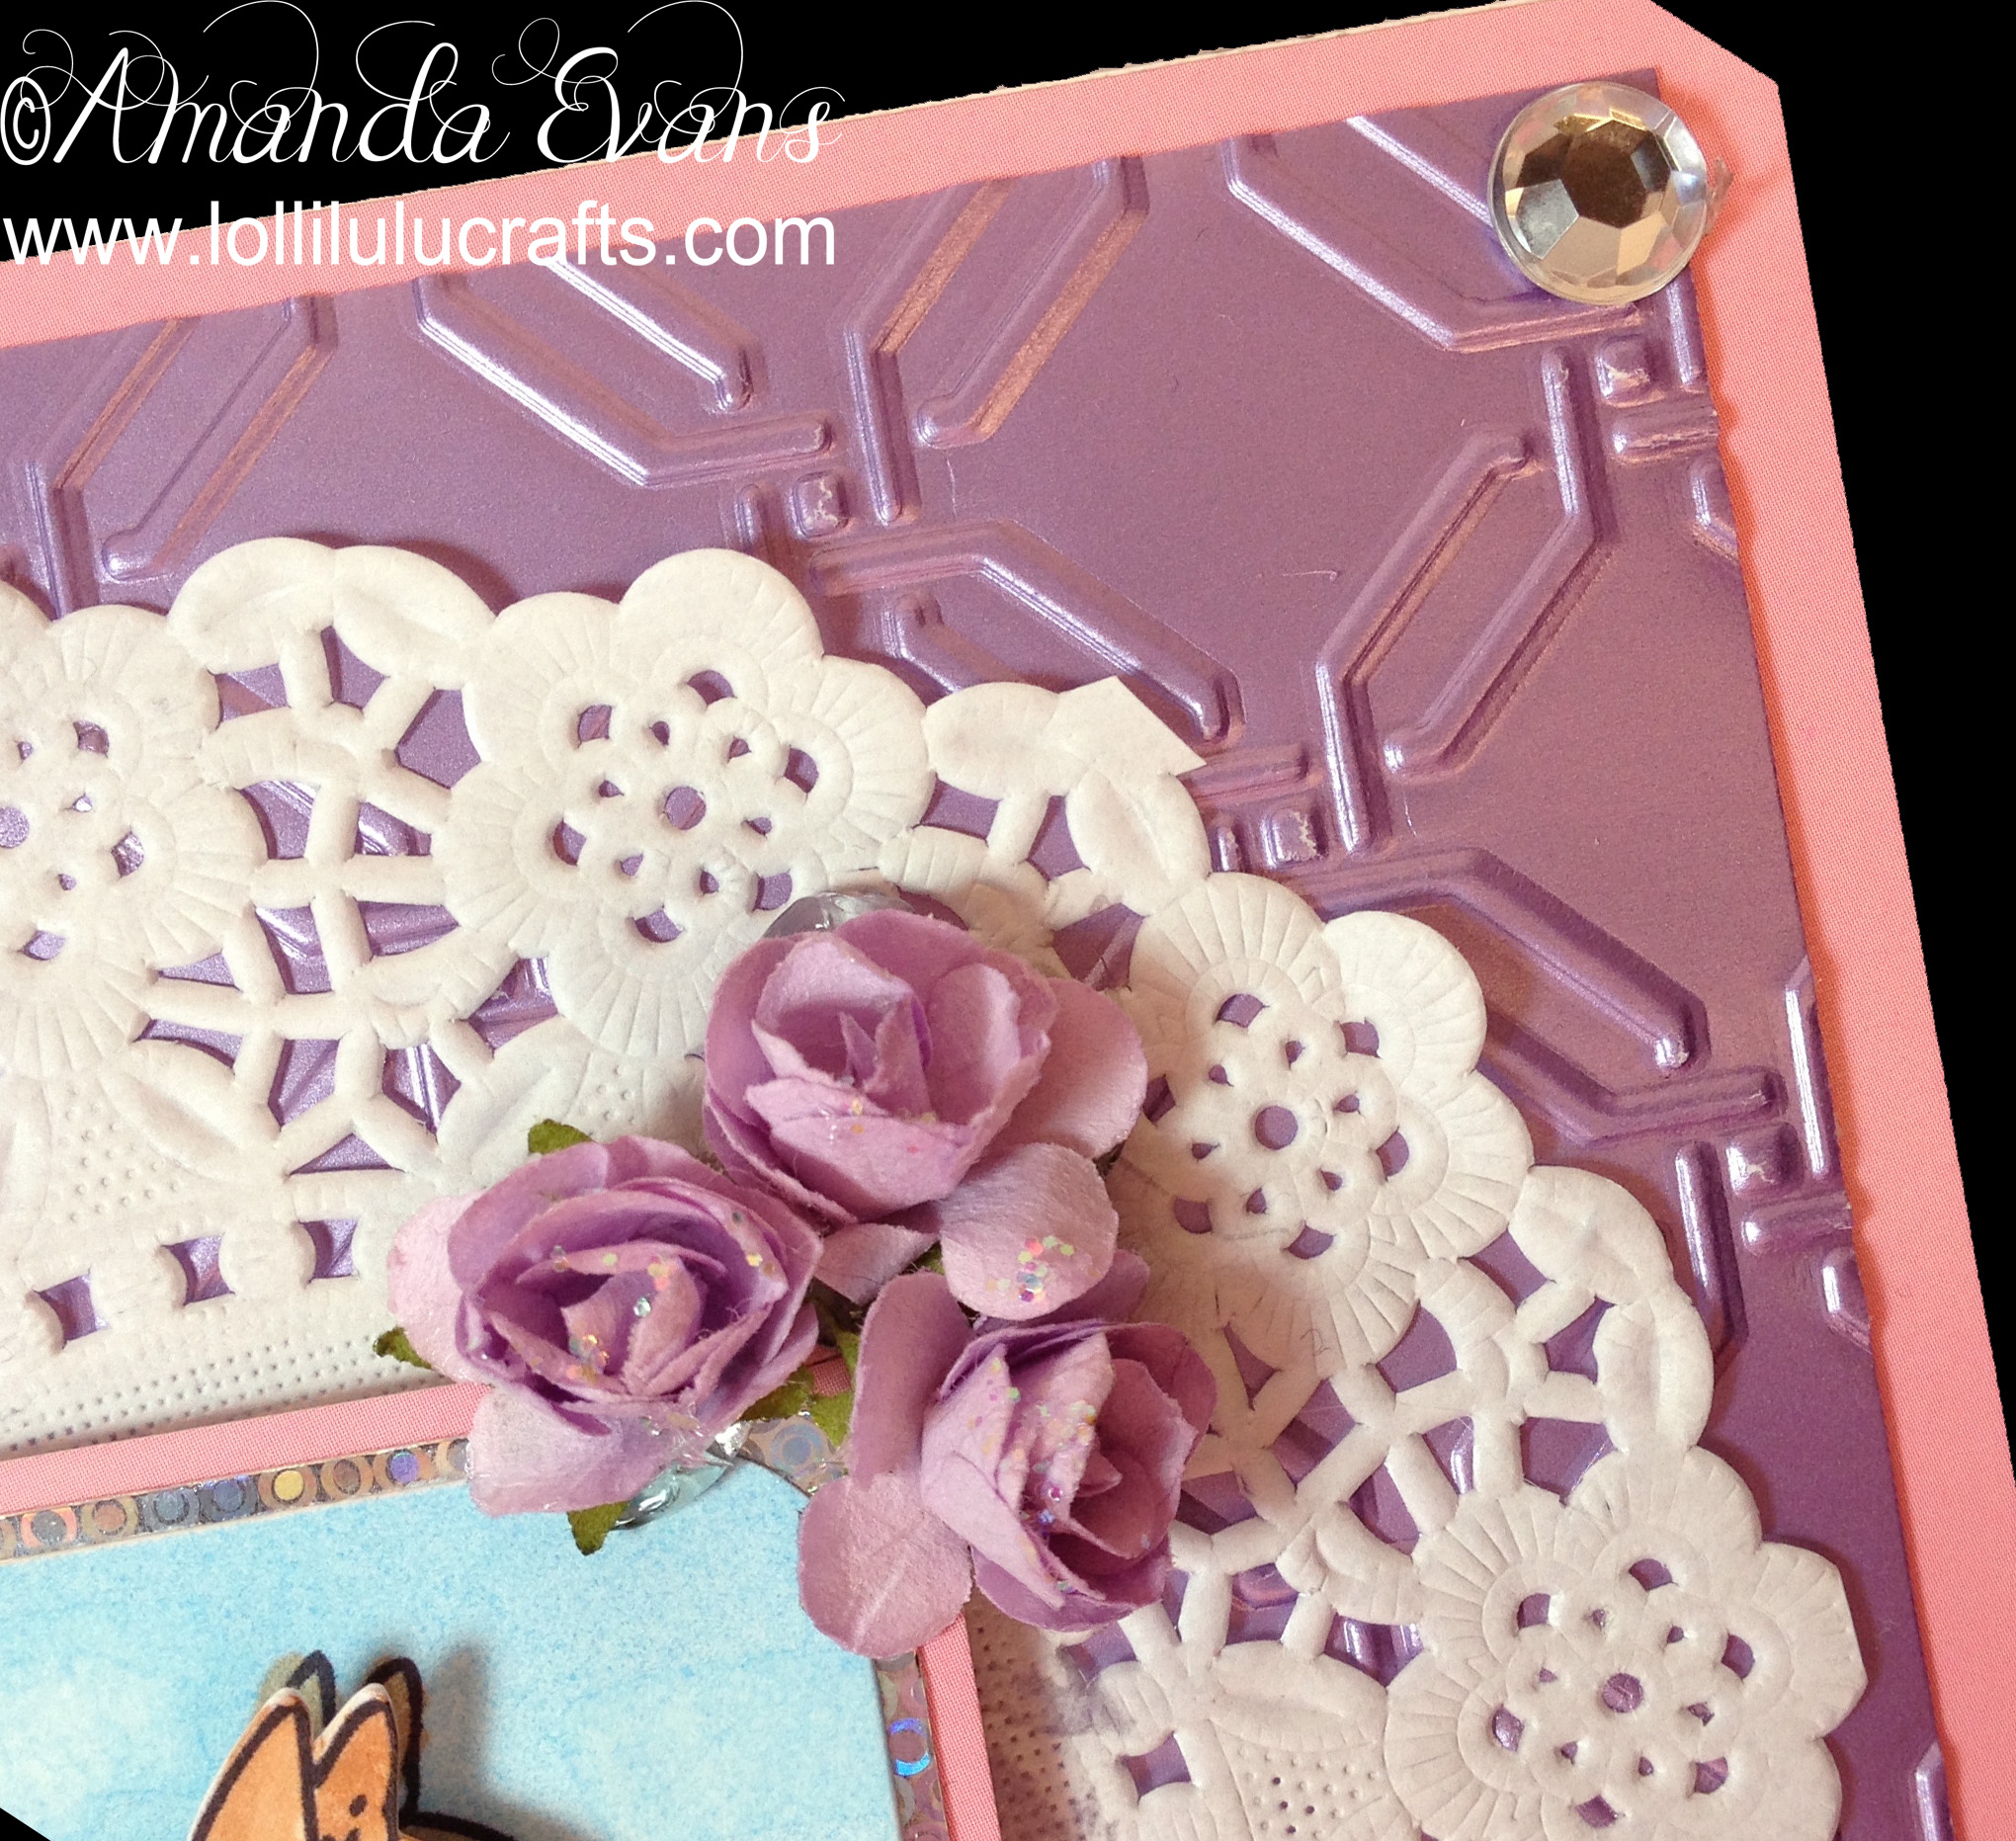
Then I moved to the outside of my card and Mat & Layered it with a pink piece and a purple lavender piece of Hunkydory card. The lavender pearl card stock I first embossed using the Spellbinders Garden Lattice M-bossibilities embossing folder.
Now I put the card to one side and I get to making my picture. So the first thing I do is open my Silhouette Studio as I wish to do a print and cut. So I clicked to import my Just Inklined Digi Stamp into my Silhouette Software, then sizing it and tracing around it to create my cutline.
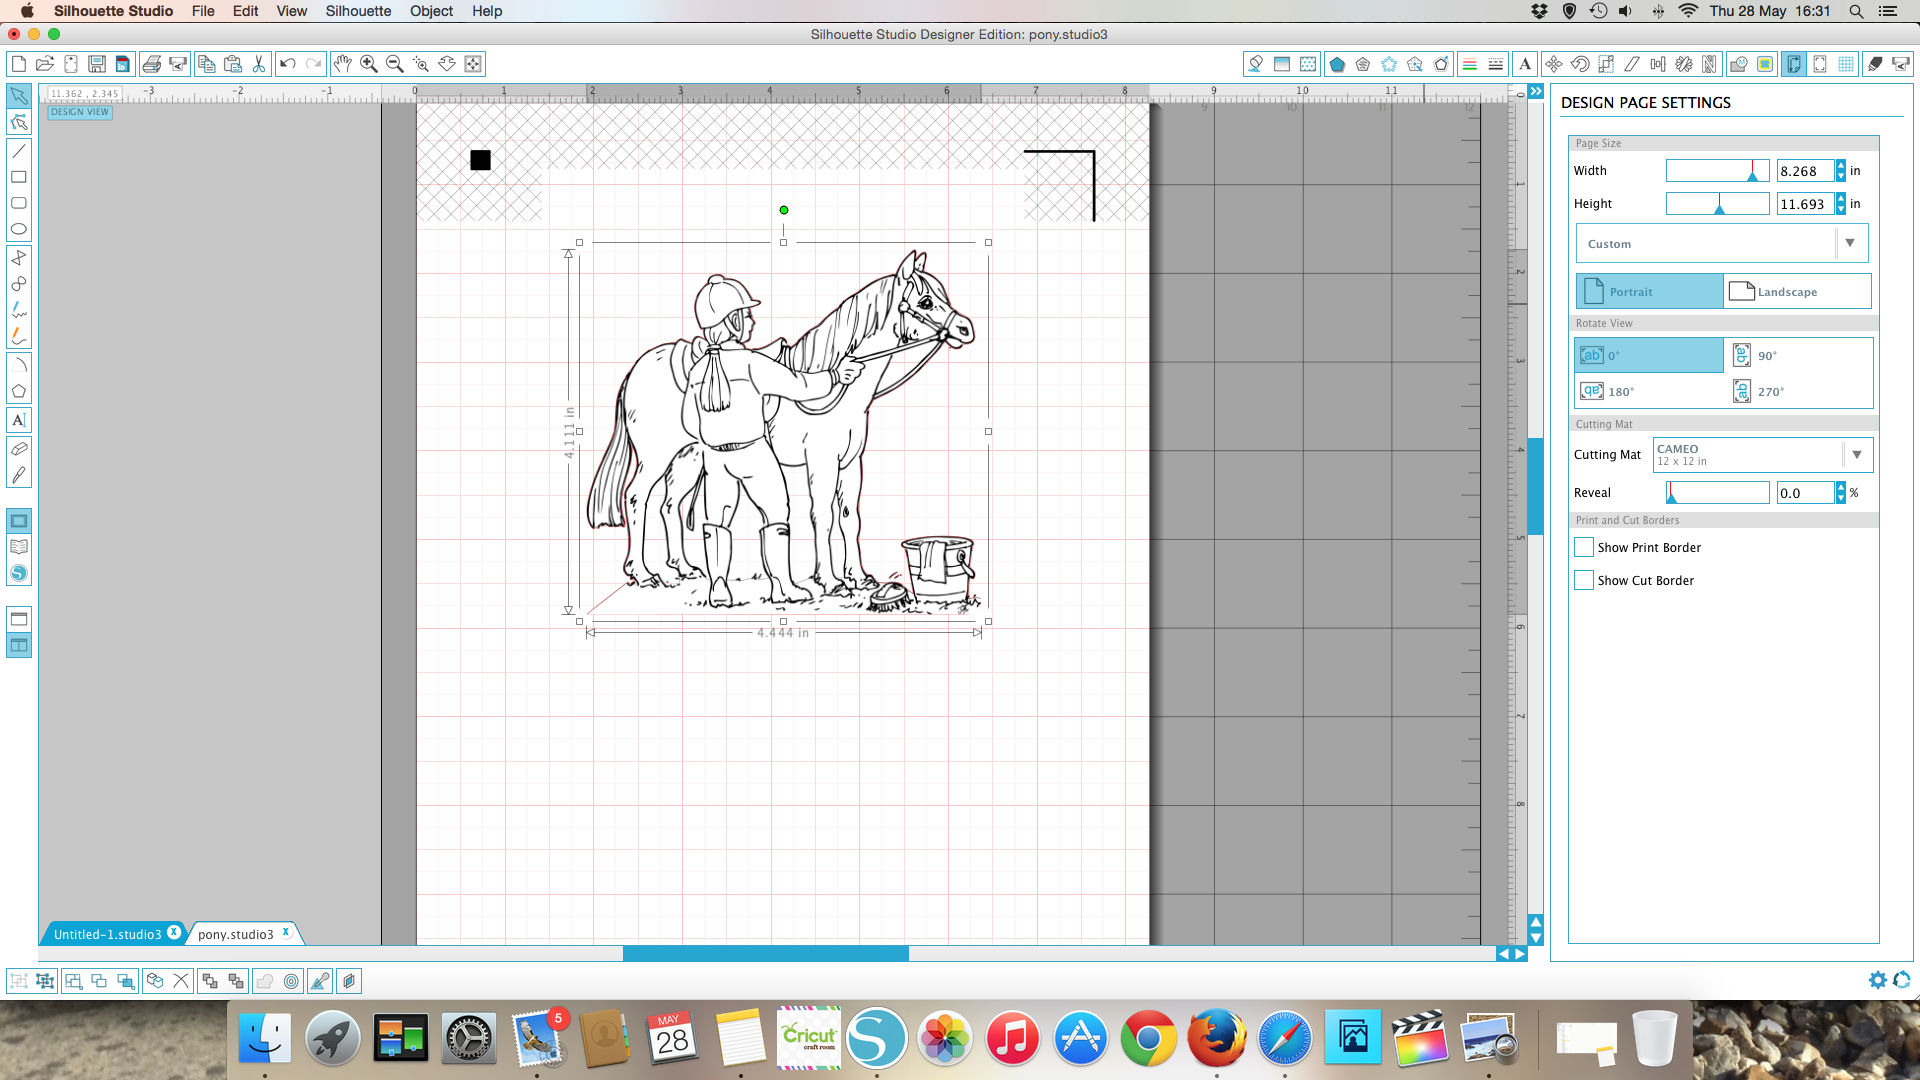
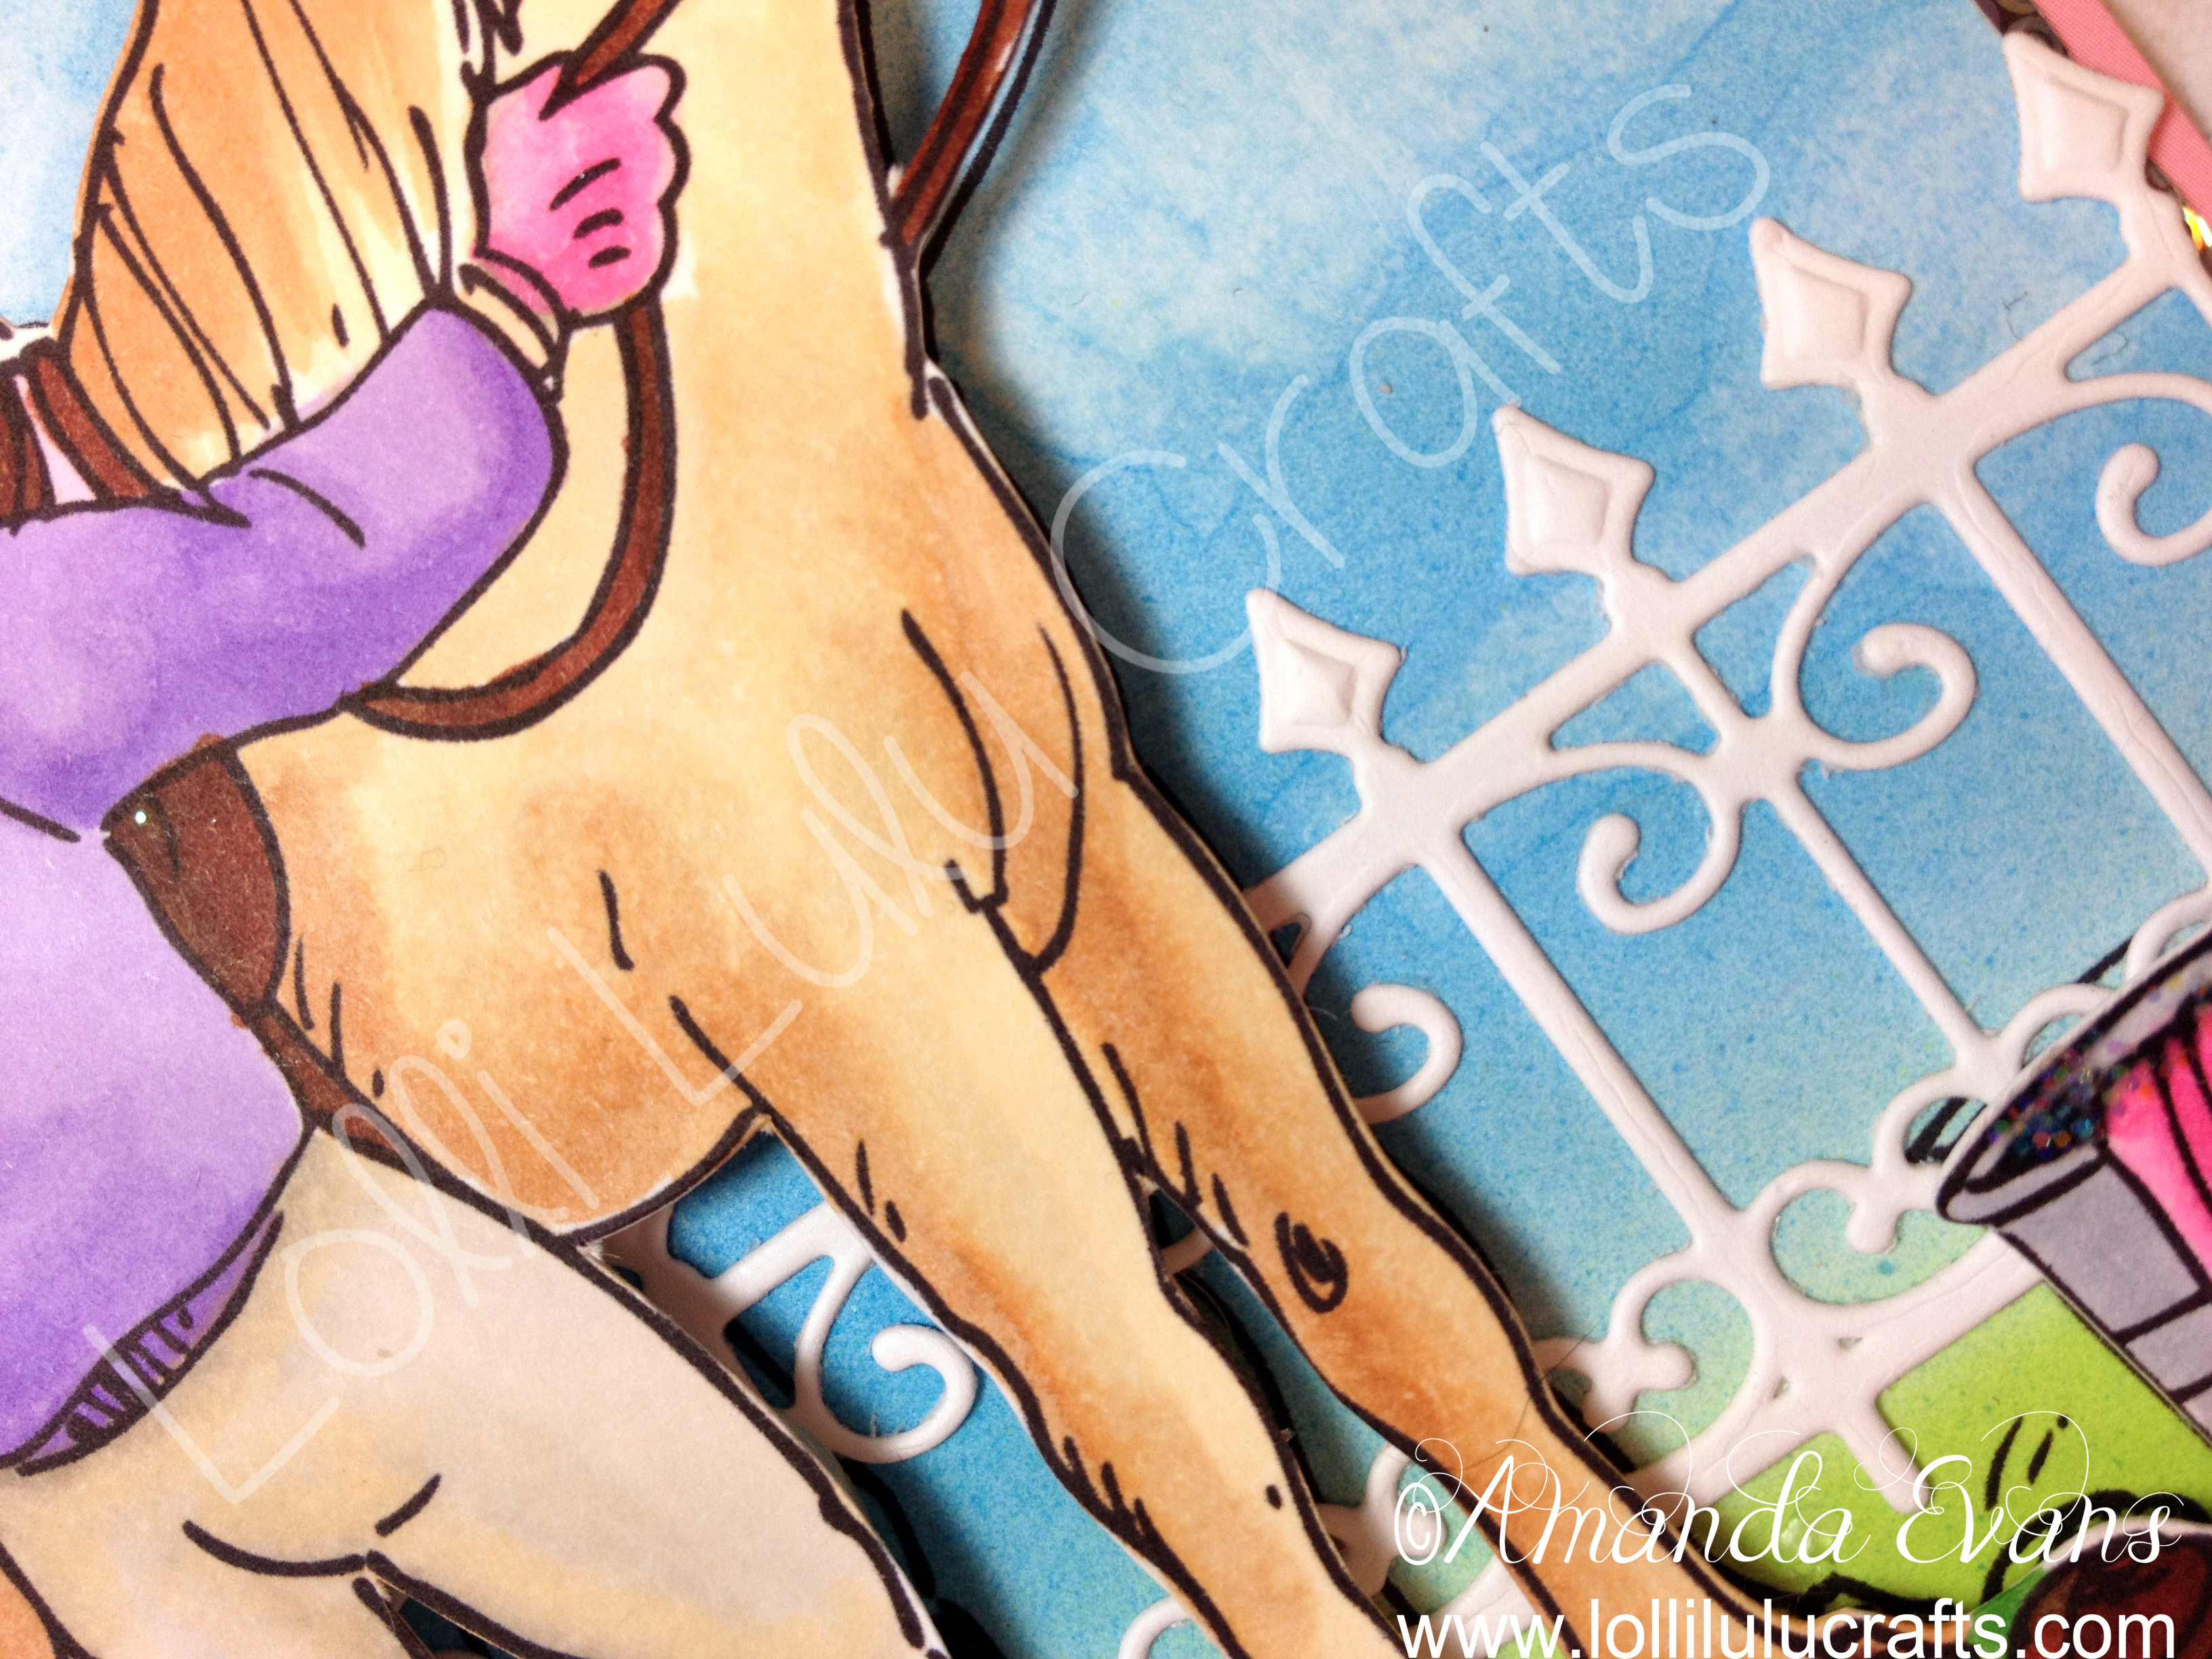
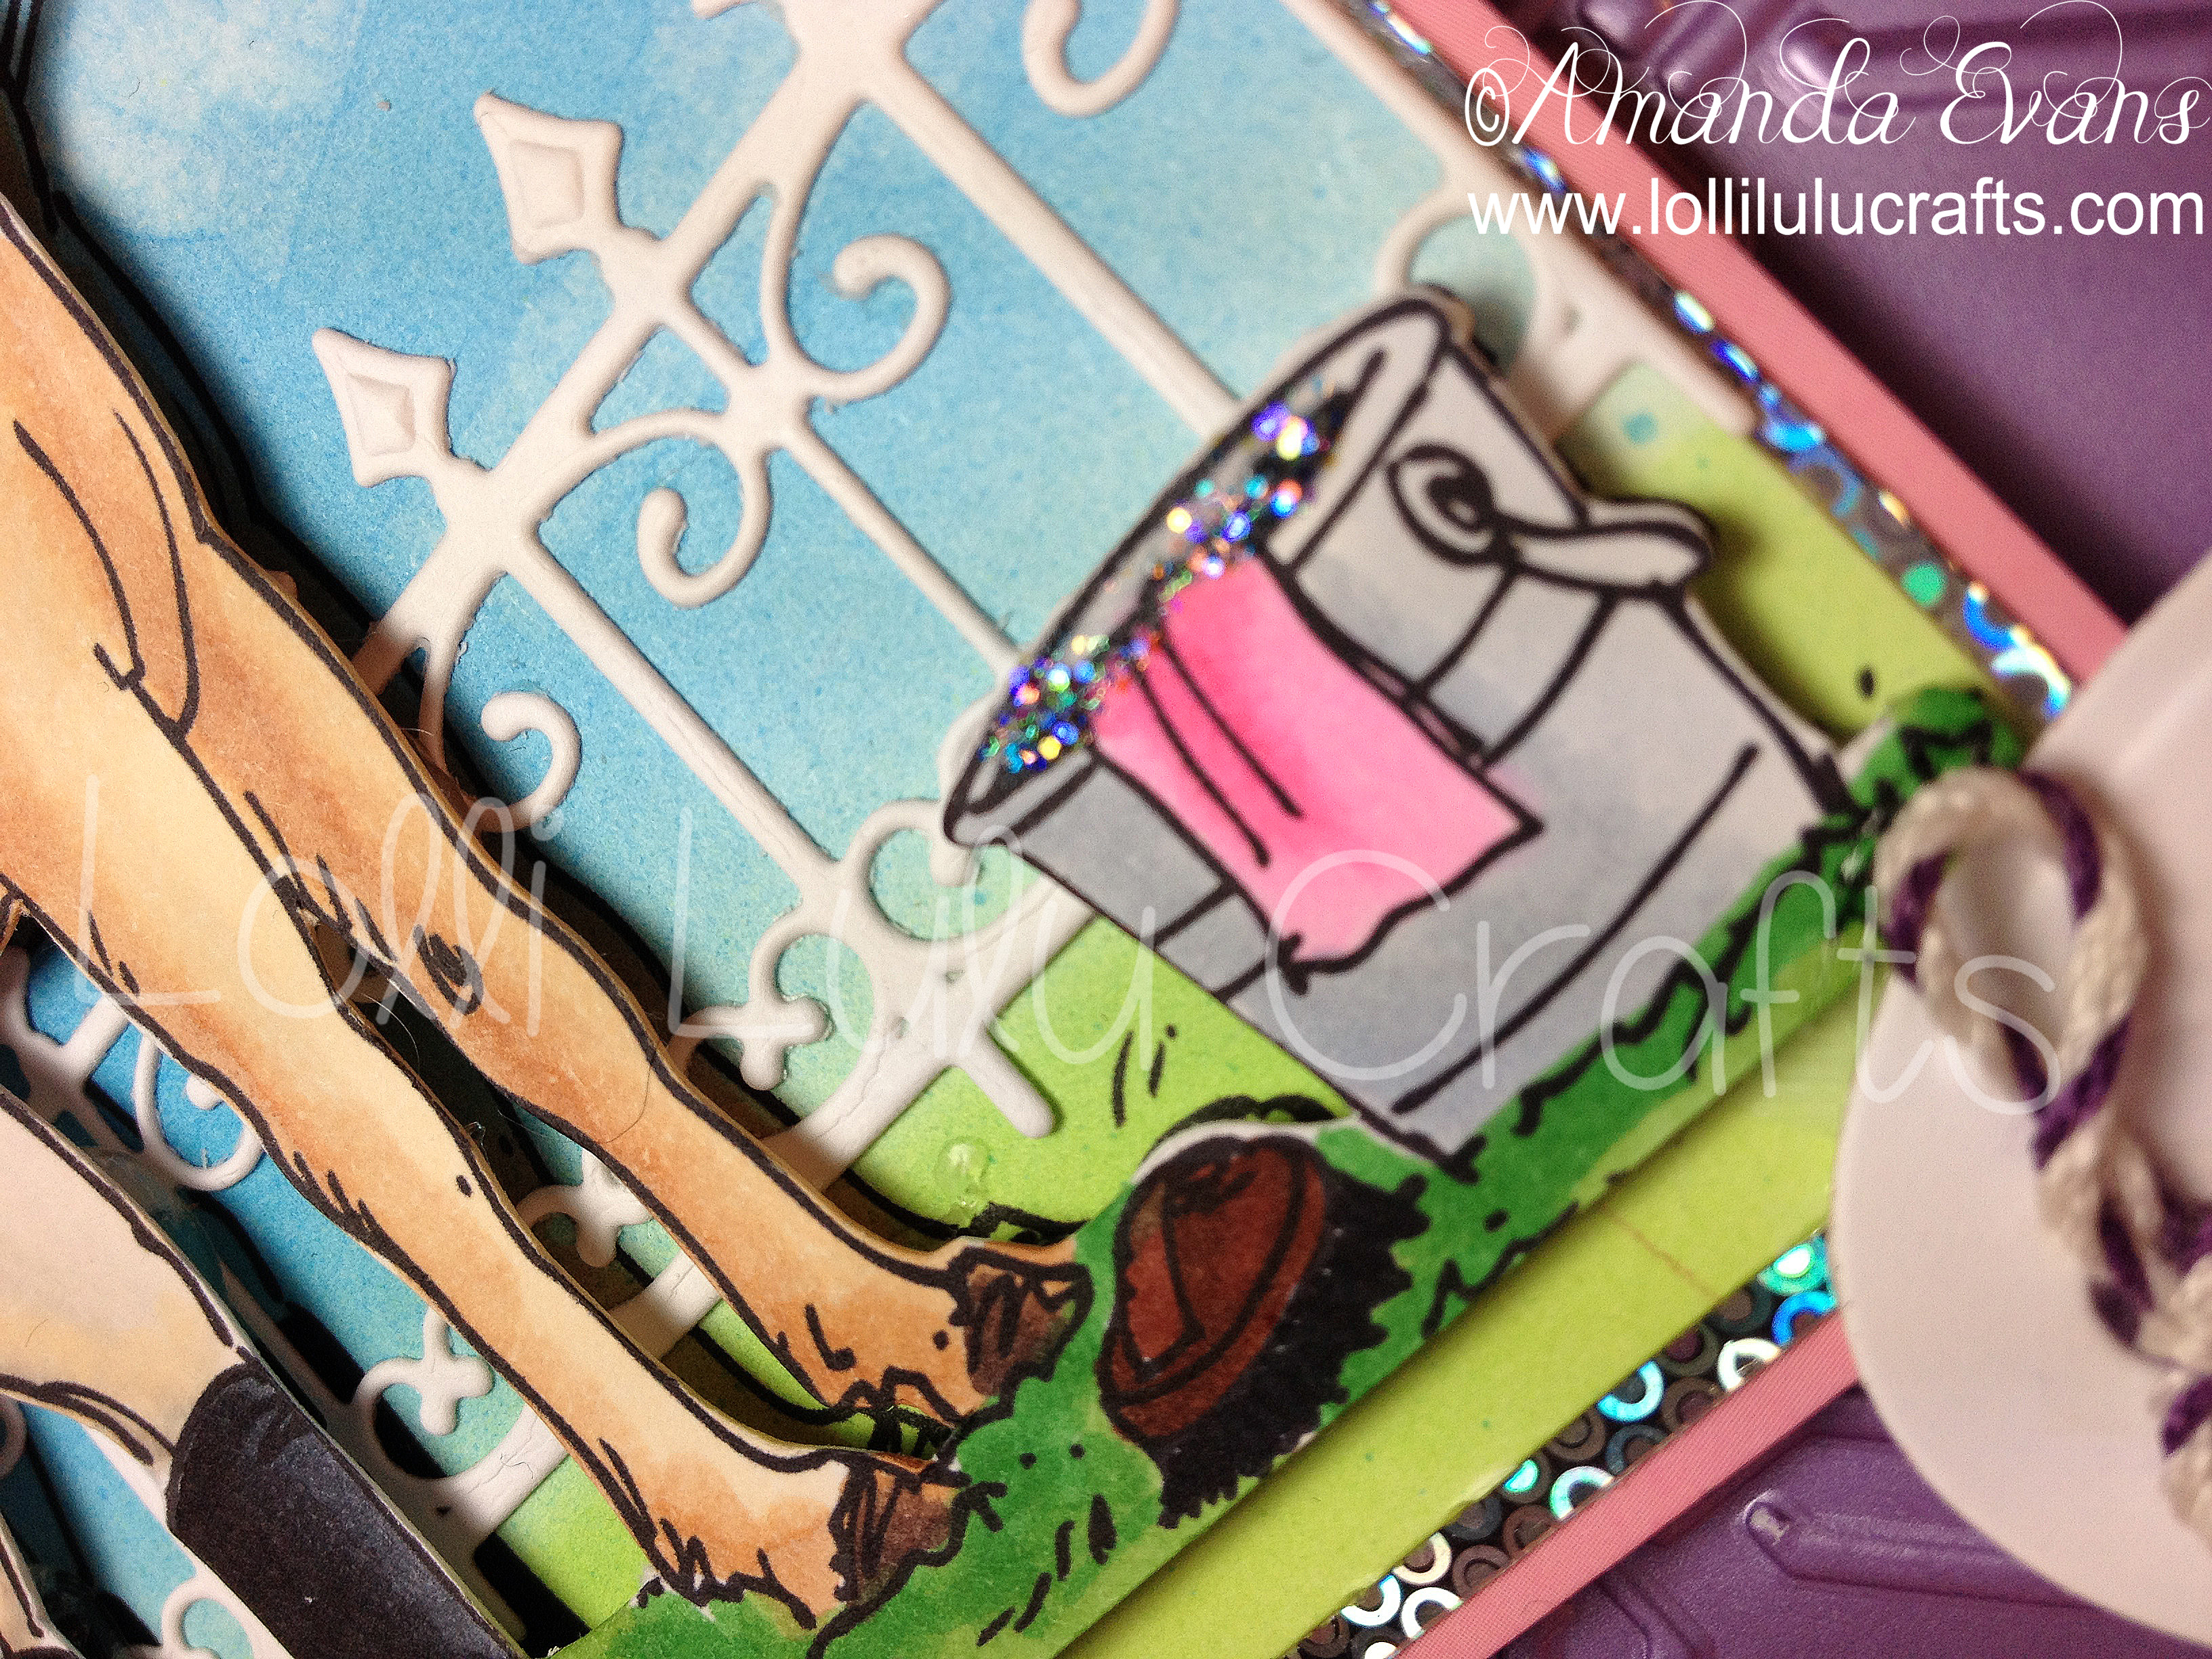
Once I had set up the trace I printed my image out twice. Once as the base & background, and secondly to be used as my cut image – the pieces of which would be my decoupage layer. However before cutting my image on my Silhouette I did all of my colouring. On the background piece I did a rough colour on the horse & girl since those were not really going to show as these were going to have the decoupage cut pieces over them. However just so you can’t see any white from the sides it’s always better just to do a quick wash of colour. I then used my Copic Airbrush System to make my sky and grass. Next I coloured the second image but this time I didn’t colour the background only the actual image itself and the grass that was drawn as part of the image. I then placed that Image onto my silhouette cutting mat and cut it out. The background image I cut into a rough square of approx. 5 inches.
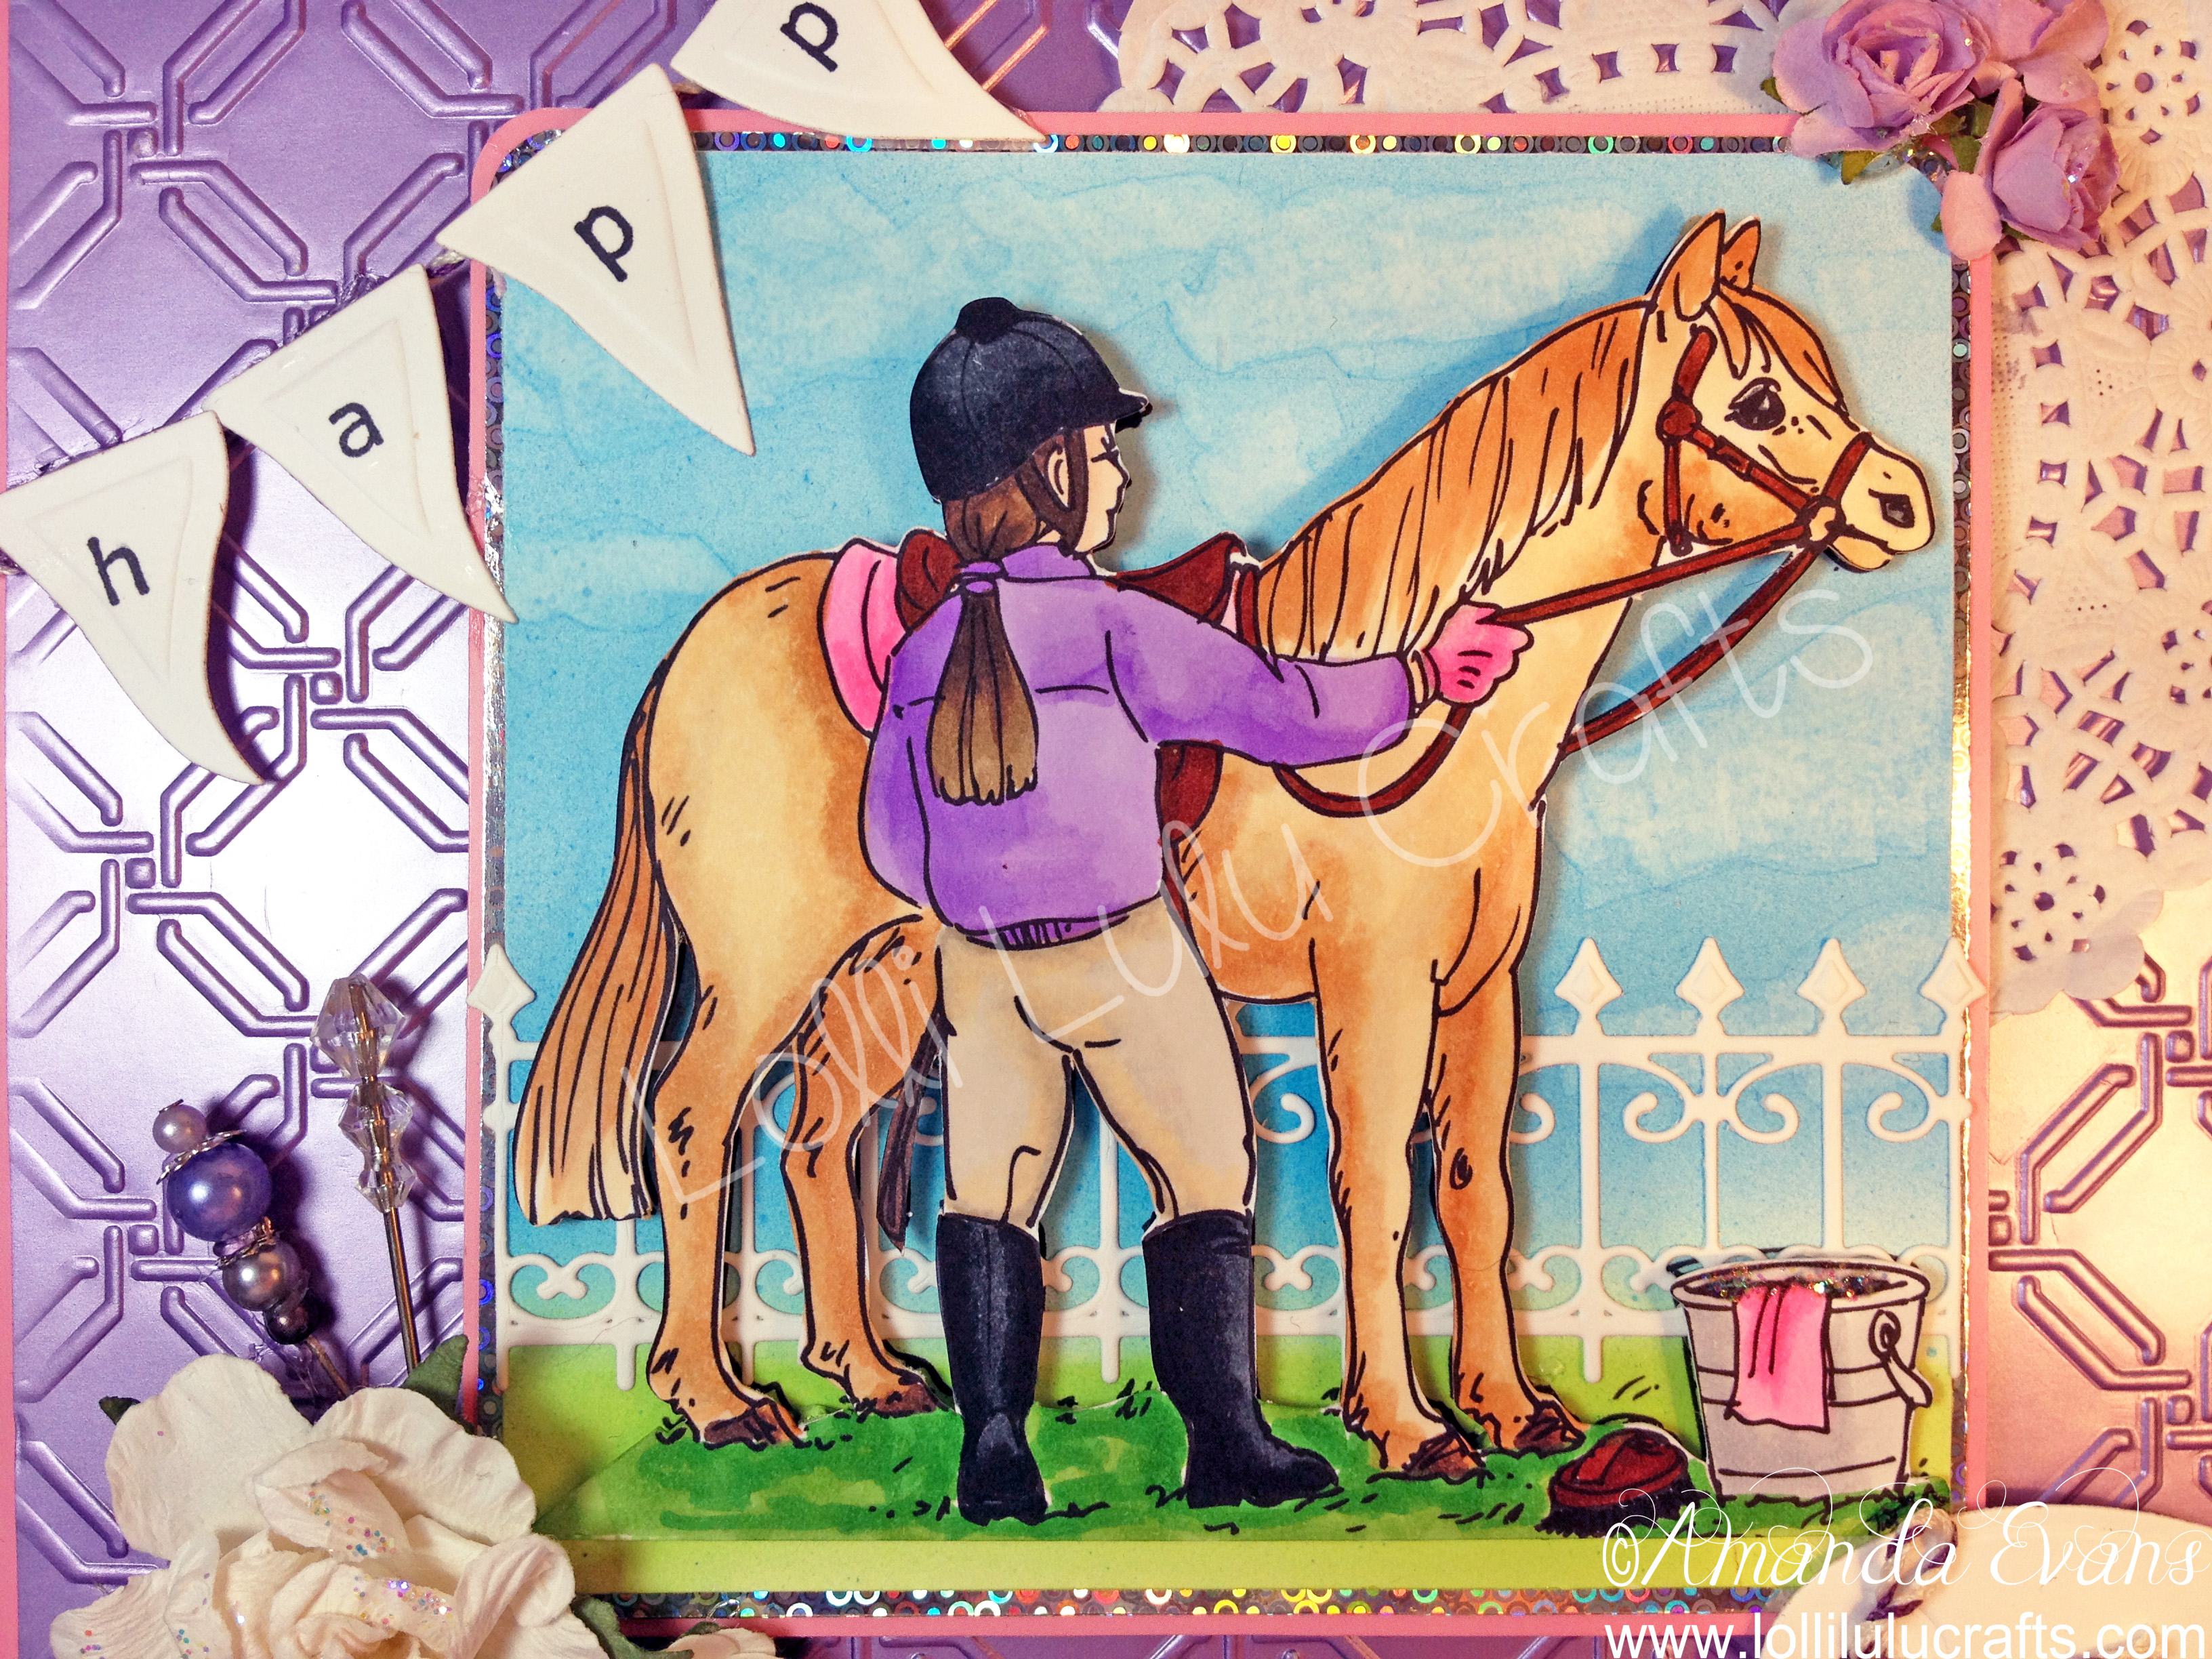
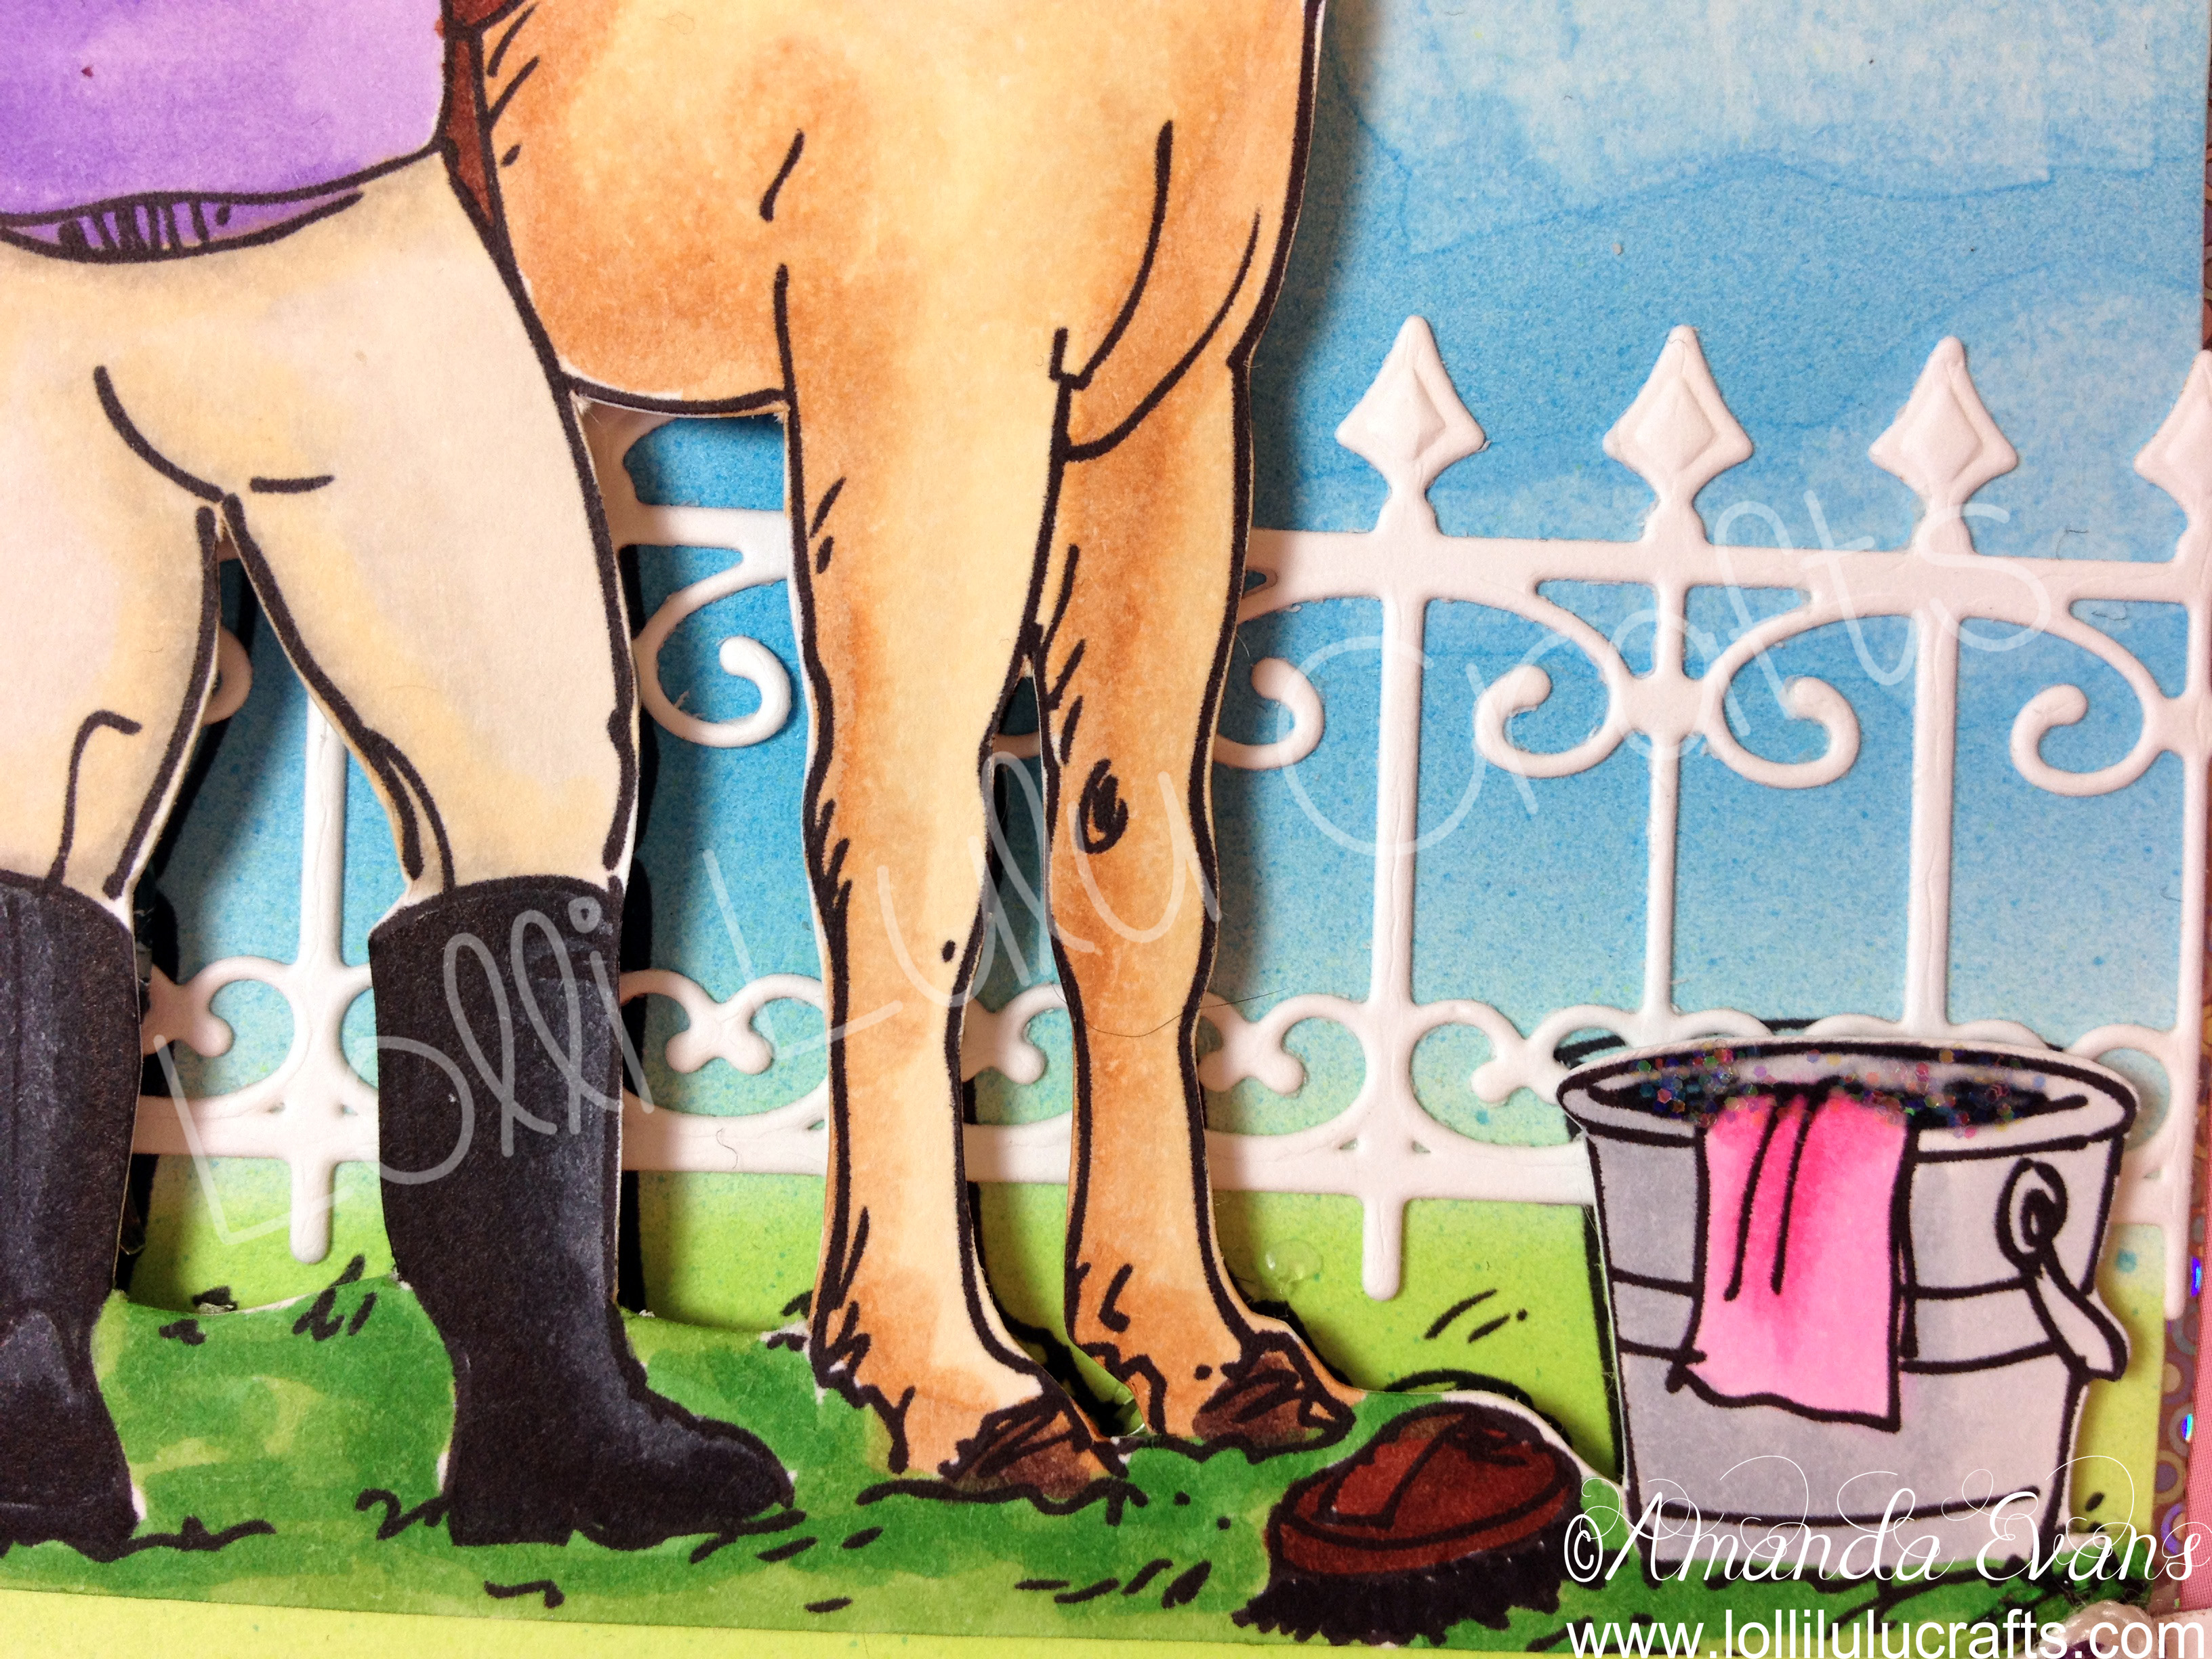
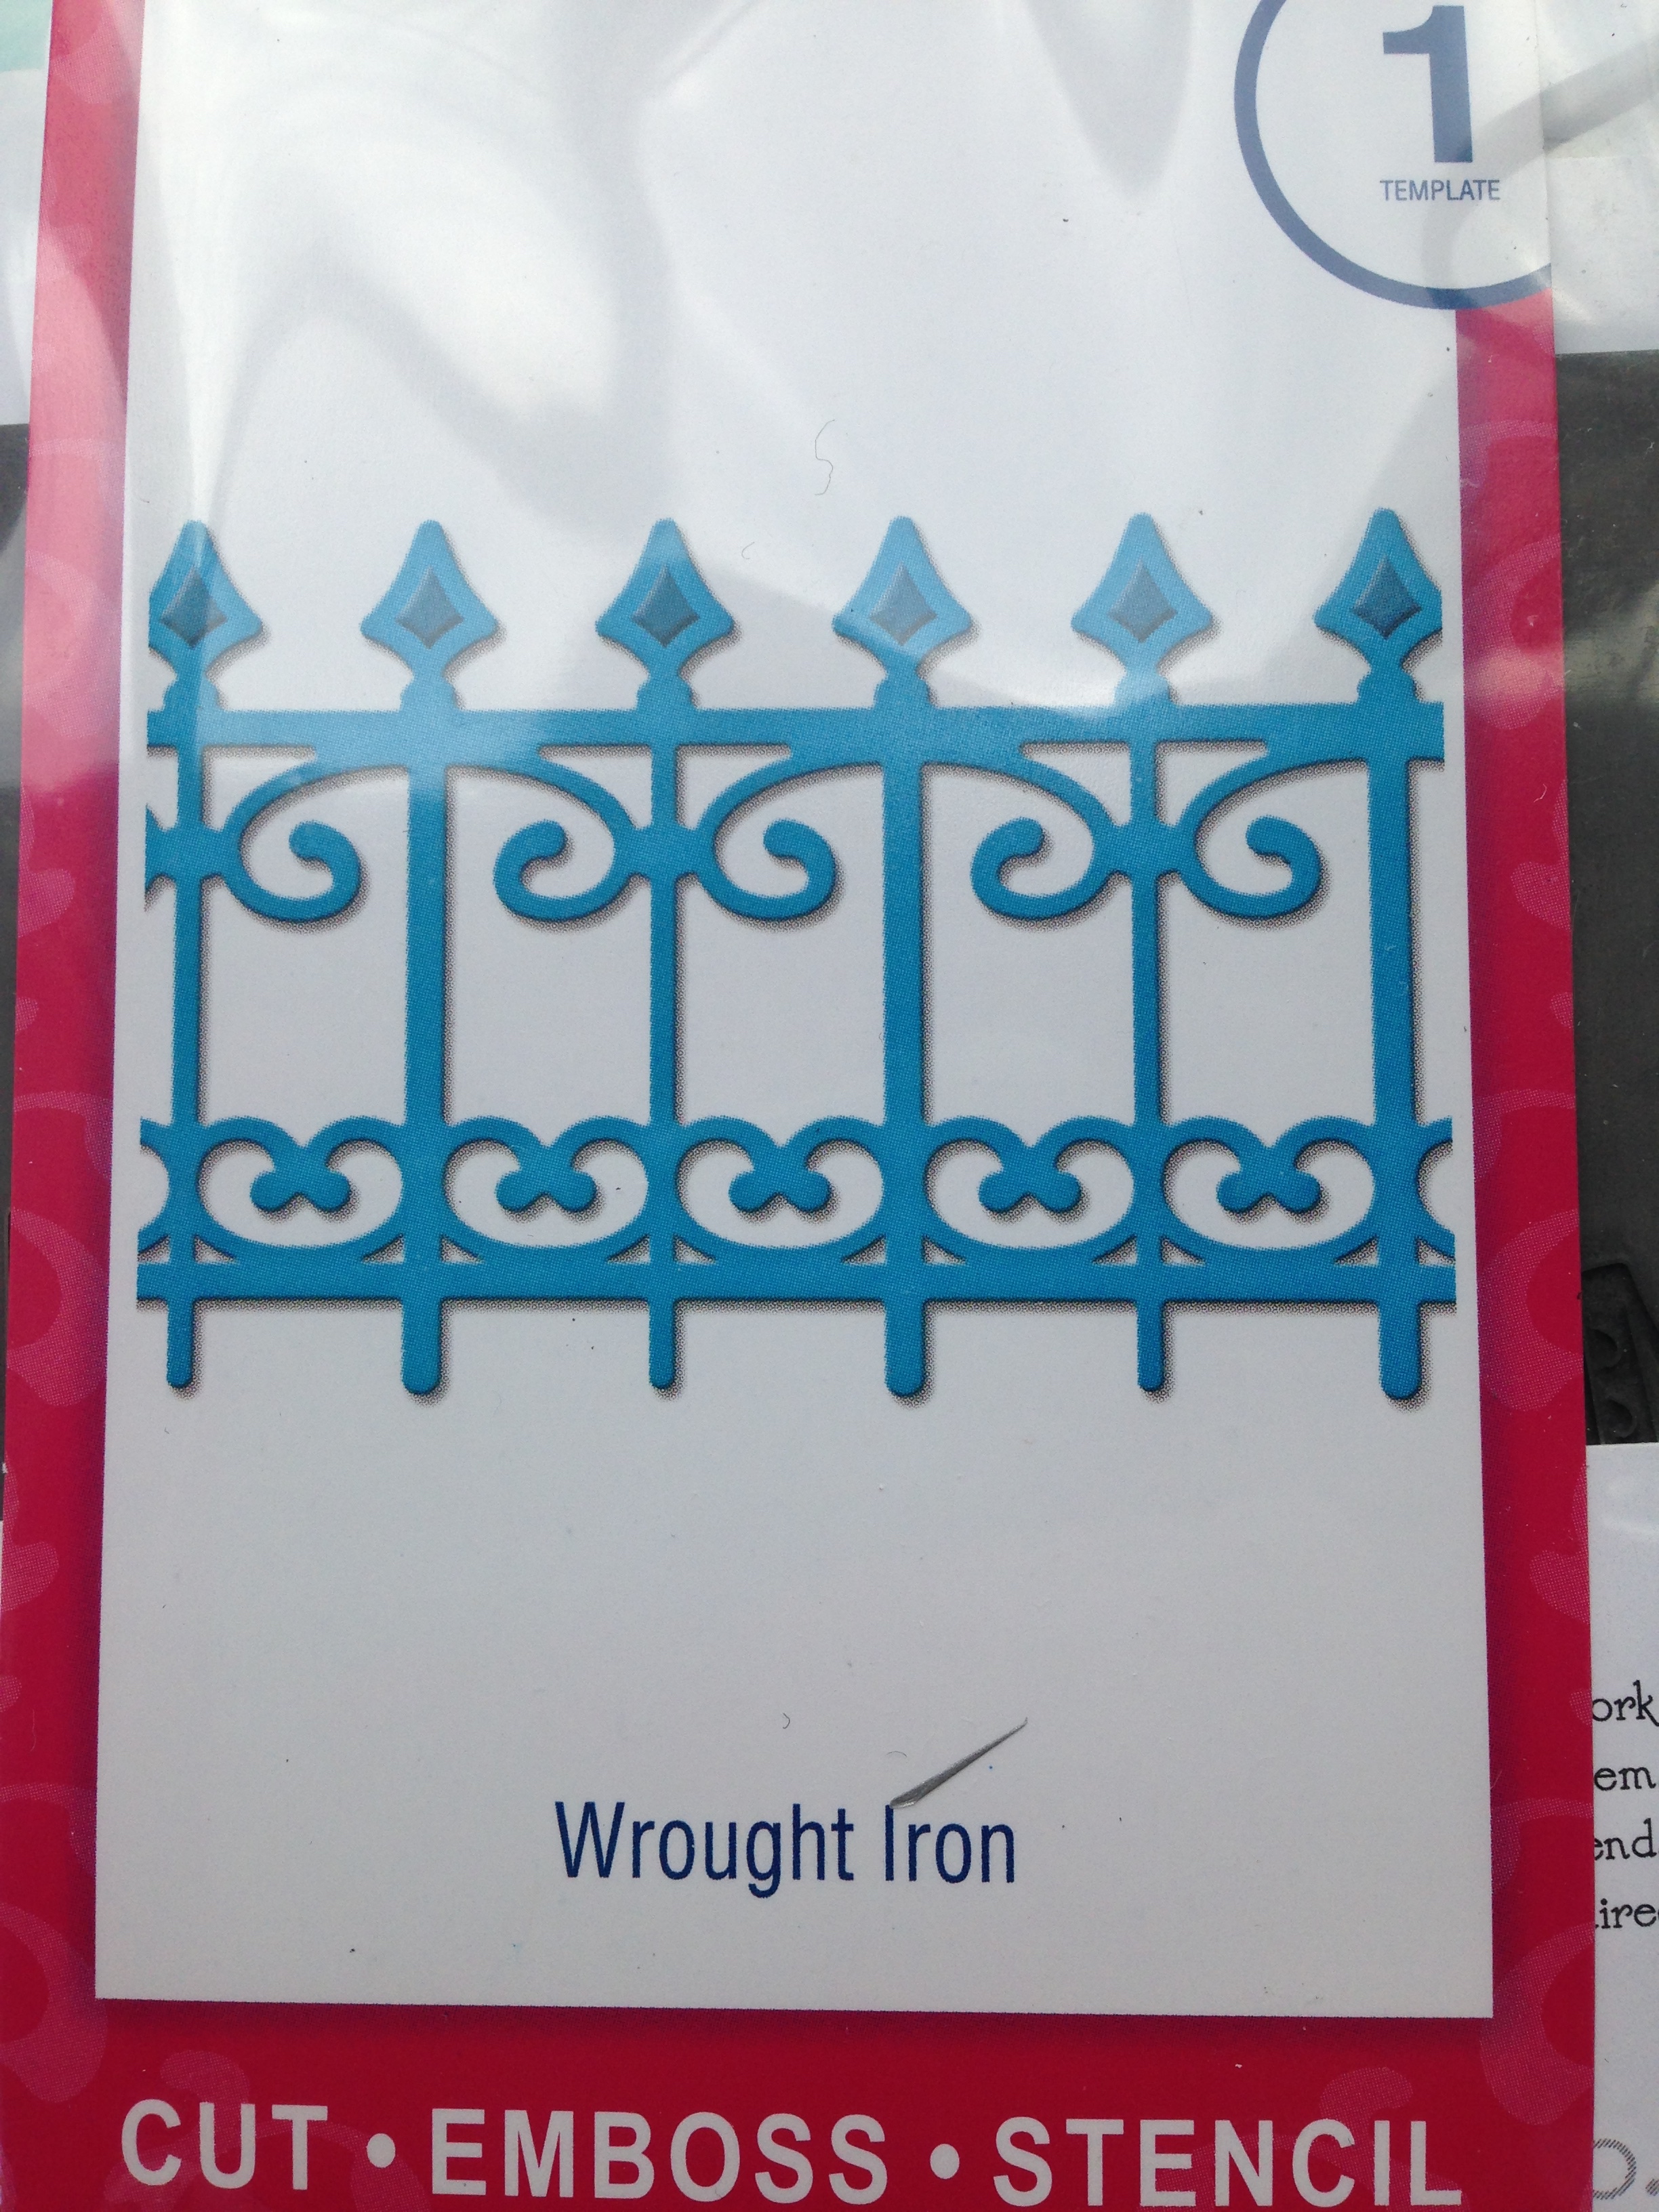
Before decoupaging my pony onto my background image I die cut a spellbinders wrought iron die in white card to create a gorgeous fence for my image. I stuck it down onto my background before adding my layers so that it looked as if the pony was standing in front of my fence.
Once the image was all put together I matted and laid it on to some pink and some holographic card and then popped my image to one side while we did a little more prep. Next I die cut the little flags stamping on each one A letter to make the word “happy”. I then stamped the other half of that sentiment, “birthday”, onto a piece of white card which I then die cut into a little tag.
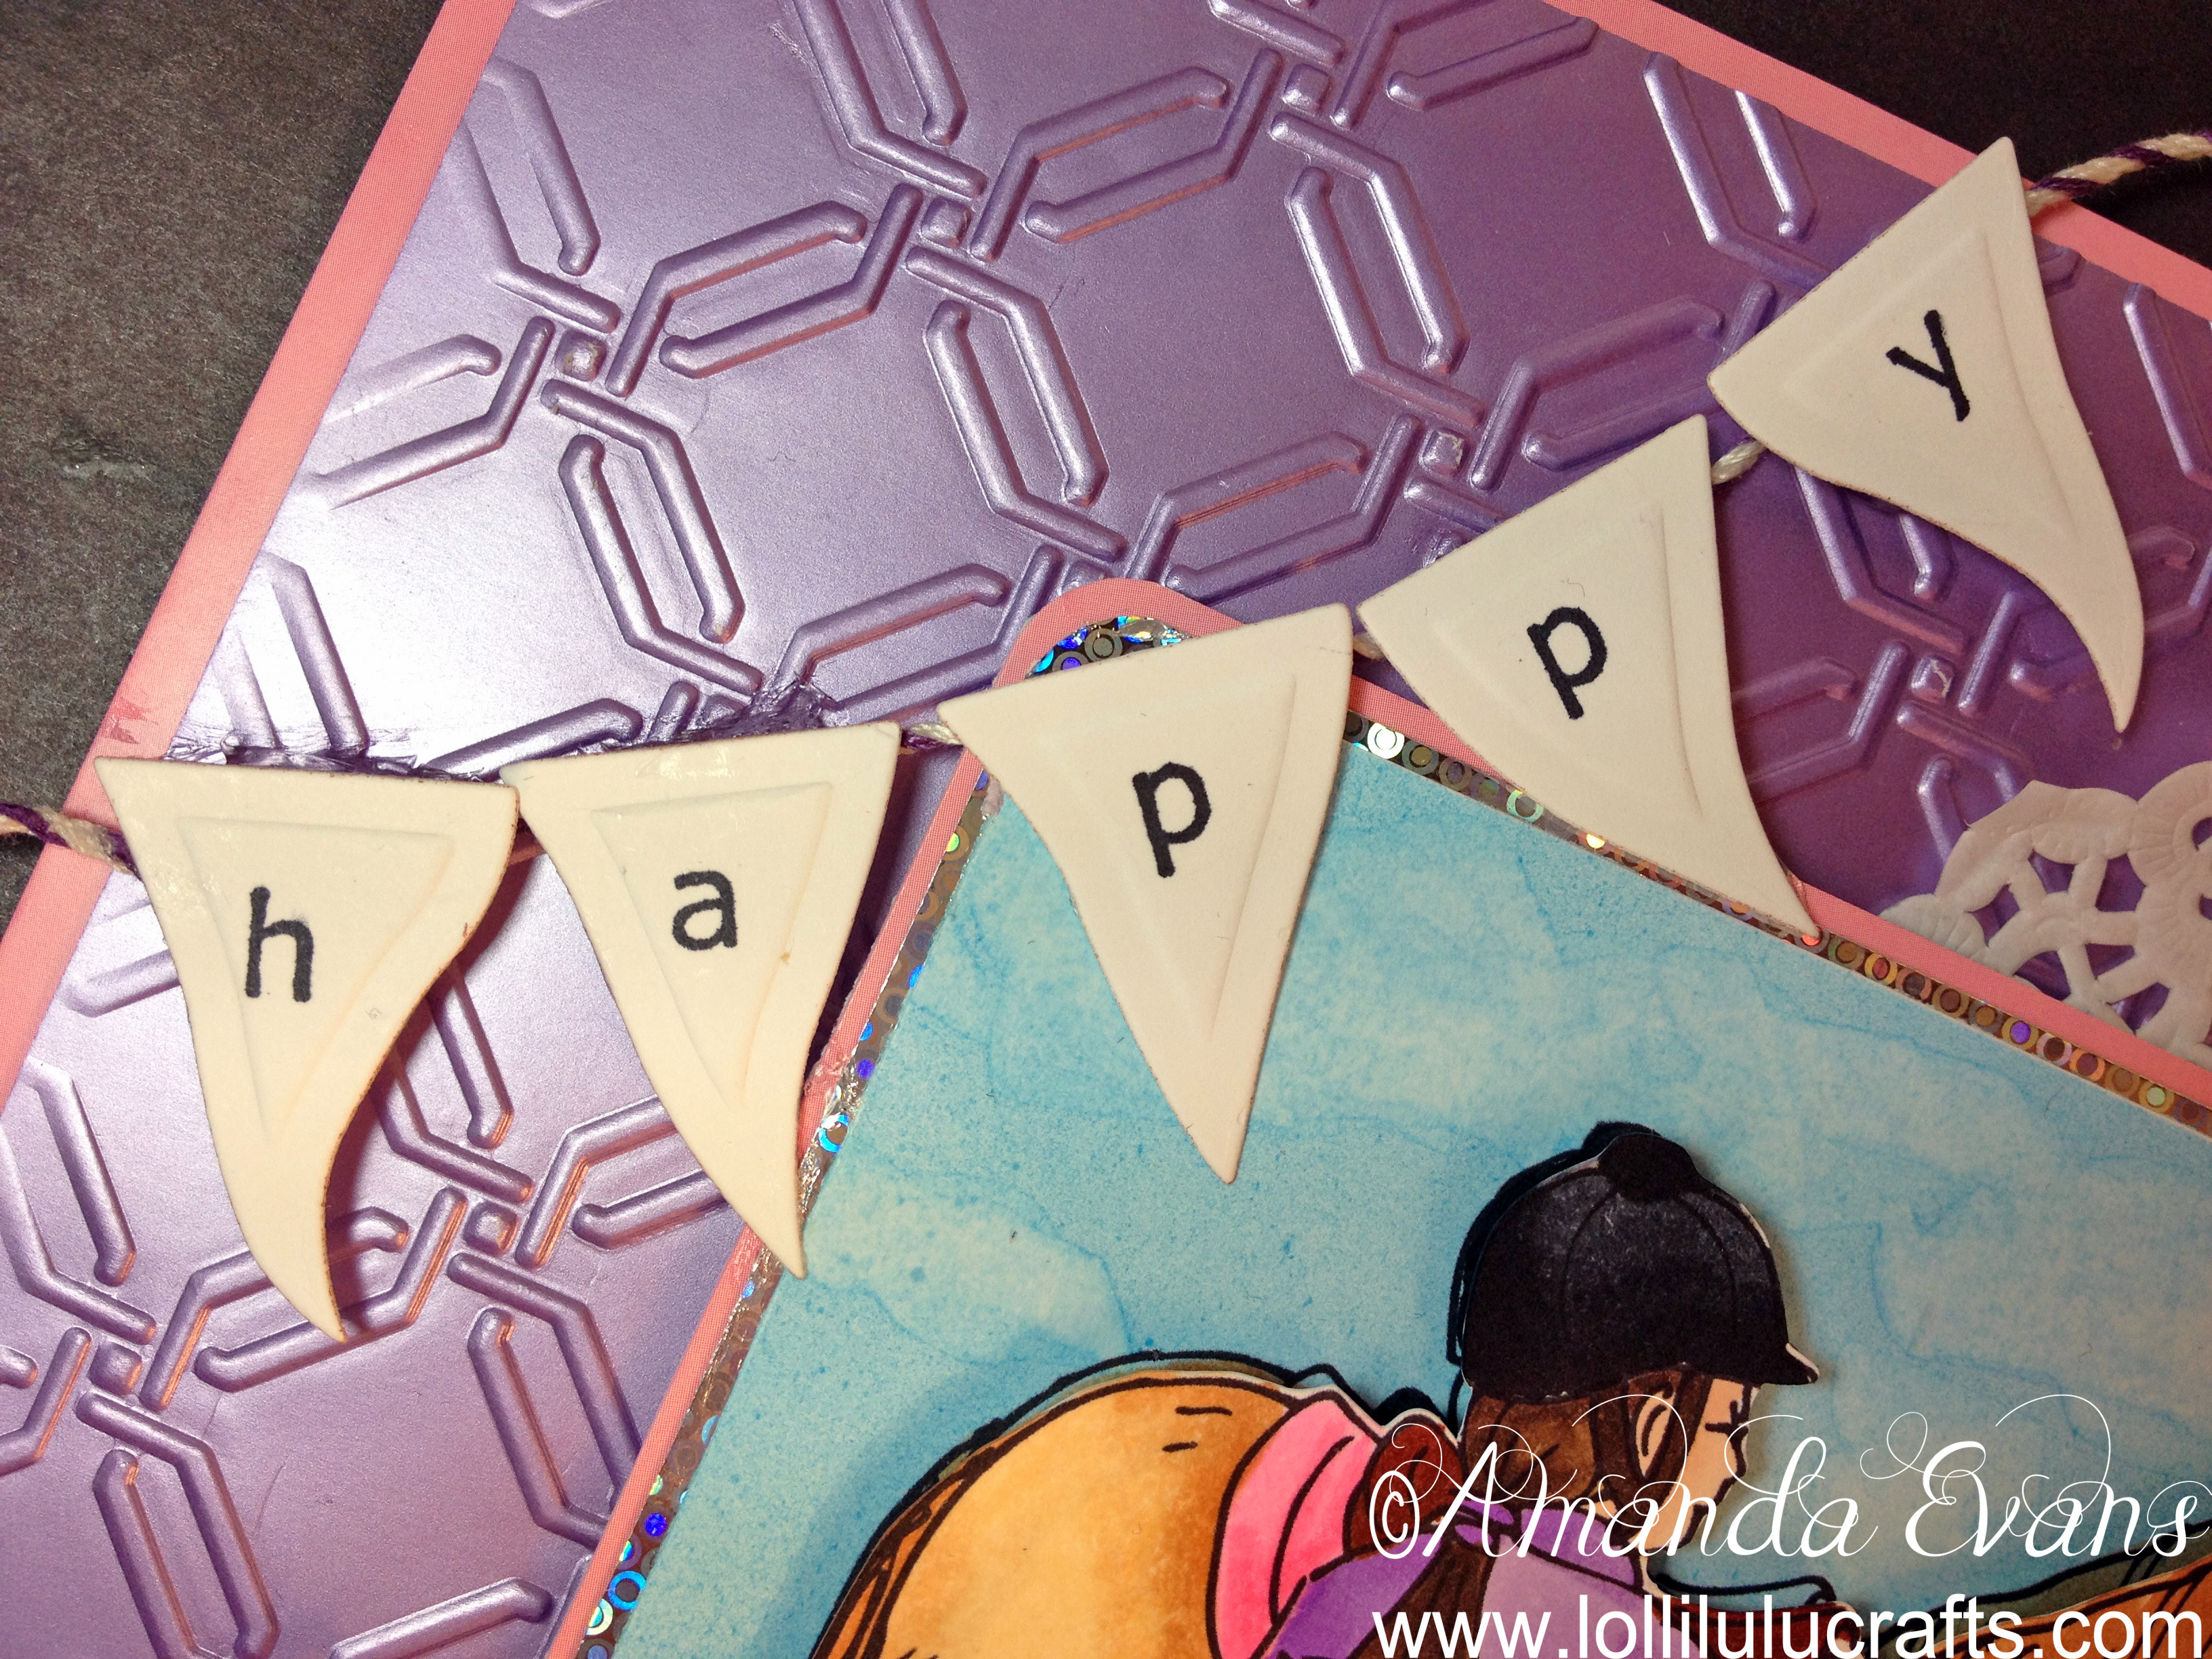
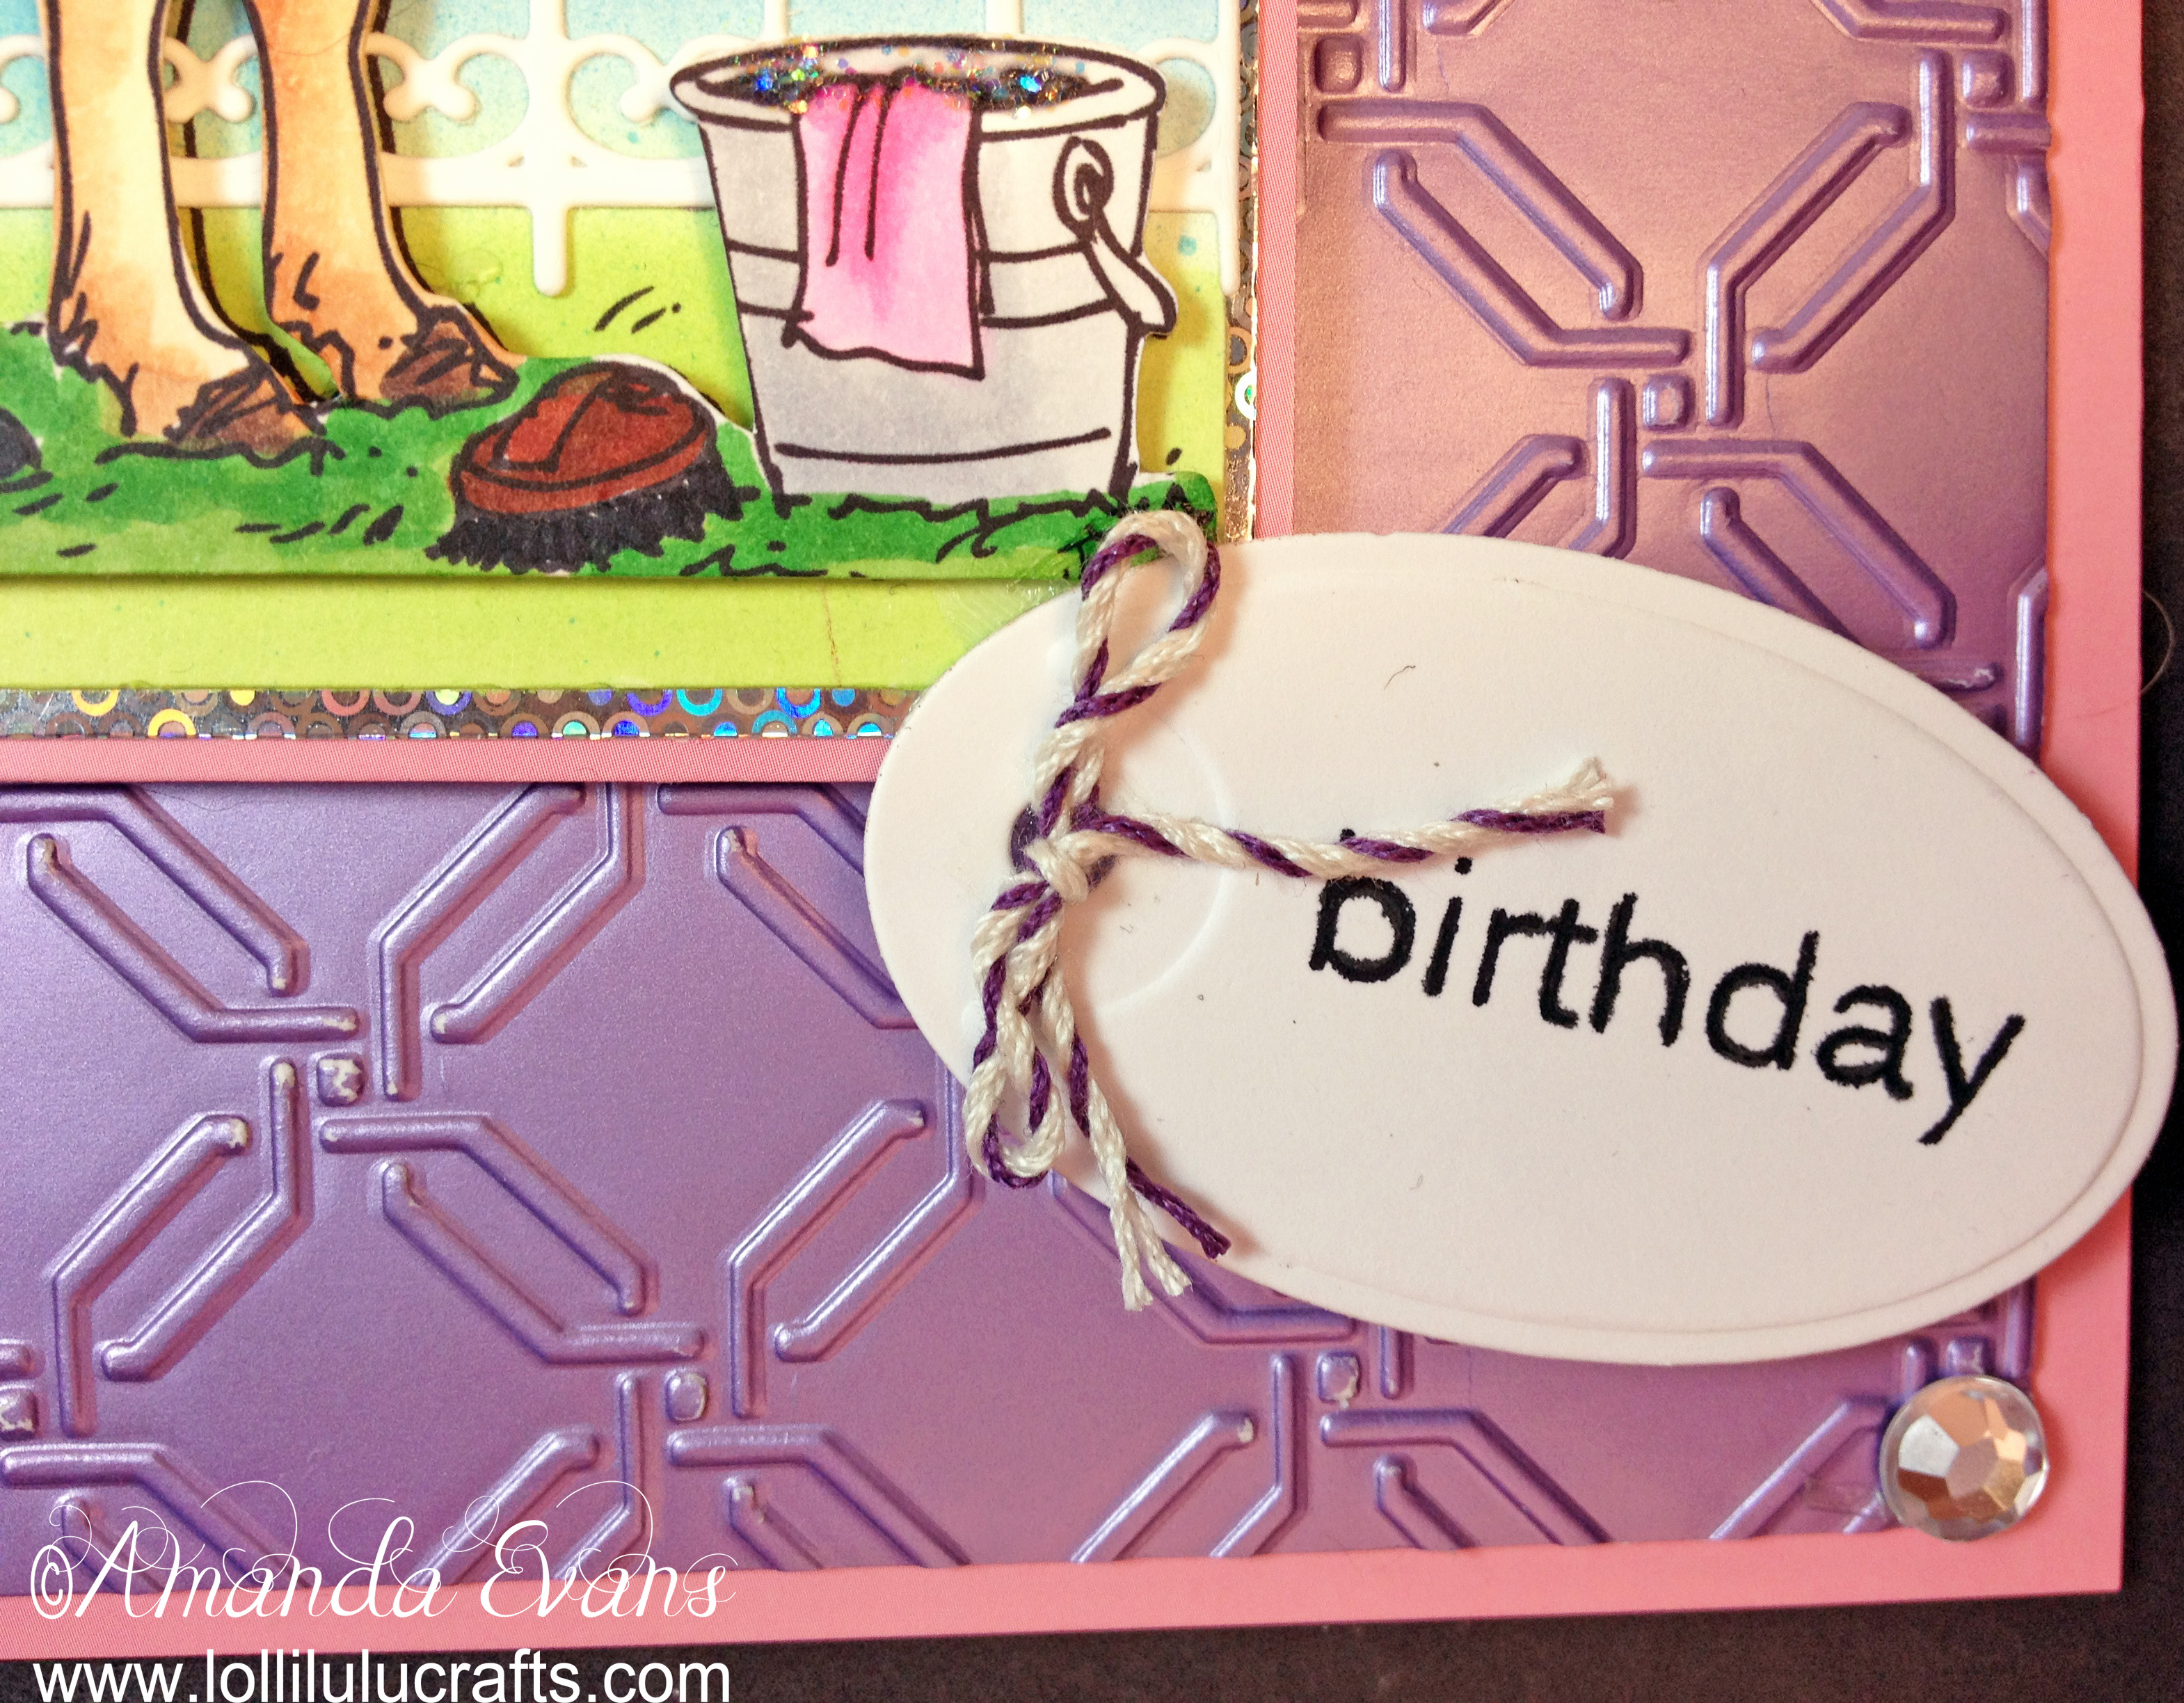
Then it was just a case of putting all these different elements together. I put back my main card to which I added a doily on top of which I stuck my image. Next I added my flags and tag using some lavender and white twine to hang the flags off off and as a little bow on the tag.
Then I added some paper flowers and a couple of stickpins to add a little softness around a central image. Then I added some crystal stickles to those flowers and to the water in the bucket on my image, just to add a little sparkle and shimmer to our card. And the final touch was for little crystals one in each of the corner of the card.

So that is it are completed My Little Pony Stamped Card and hopefully you can understand why, although I no longer have the film, that I still wanted to share this with you? I think it’s a fabulous card, and I’m really pleased with how it turned out. I’m just sorry that I no longer had the film as I would’ve loved to have shared all those techniques with you. Still I hope that you still enjoyed taking a look at our card today and, as always, I would love to hear your comments. But for now hugs and have a great craft day,


Love it! I have a lot of horse loving friends who would have loved to get this card :o)
Thank you hun, It is a cute image isn’t it 🙂